Nikon D7200 Setup Guide: The 5 Settings I Change First (Plus 2 Bonus Tips)
These are the first settings I change on a Nikon D7200. I shoot NEF (RAW) + JPEG basic, use AF-C through the viewfinder and AF-S with a small movable focus point in live view, and turn off Active D-Lighting and the beep. For video, I set 1920x1080 at 60p for action or 24p for a cinematic look, High quality, manual microphone sensitivity, and the Flat Picture Control. I also use the focus point display in playback when I'm short on time, and I set up back button focus.
Video
These are the top five settings I changed when I first got the Nikon D7200, plus a couple of bonus tips. I shoot weddings and other events, and I shoot a lot of video, so you’ll see both photo and video settings here. If you just want the settings, they’re all in the table below.
Nikon D7200 Settings Quick Reference
| Setting | Where to Find It | What I Use |
|---|---|---|
| Image quality | Photo Shooting Menu > Image quality | NEF (RAW) + JPEG basic |
| Focus mode (viewfinder) | Hold the AF-mode button, turn the main command dial | AF-C |
| Focus mode (live view) | Hold the AF-mode button, turn the main command dial | AF-S |
| AF-area mode (live view) | Hold the AF-mode button, turn the sub-command dial | Normal-area |
| Active D-Lighting | i button, or Photo Shooting Menu > Active D-Lighting | Off |
| Beep | Custom Setting Menu > d1 Beep > Volume | Off |
| Frame size/frame rate | Movie Shooting Menu | 1920×1080 60p for action, 24p for a cinematic look |
| Movie quality | Movie Shooting Menu | High quality |
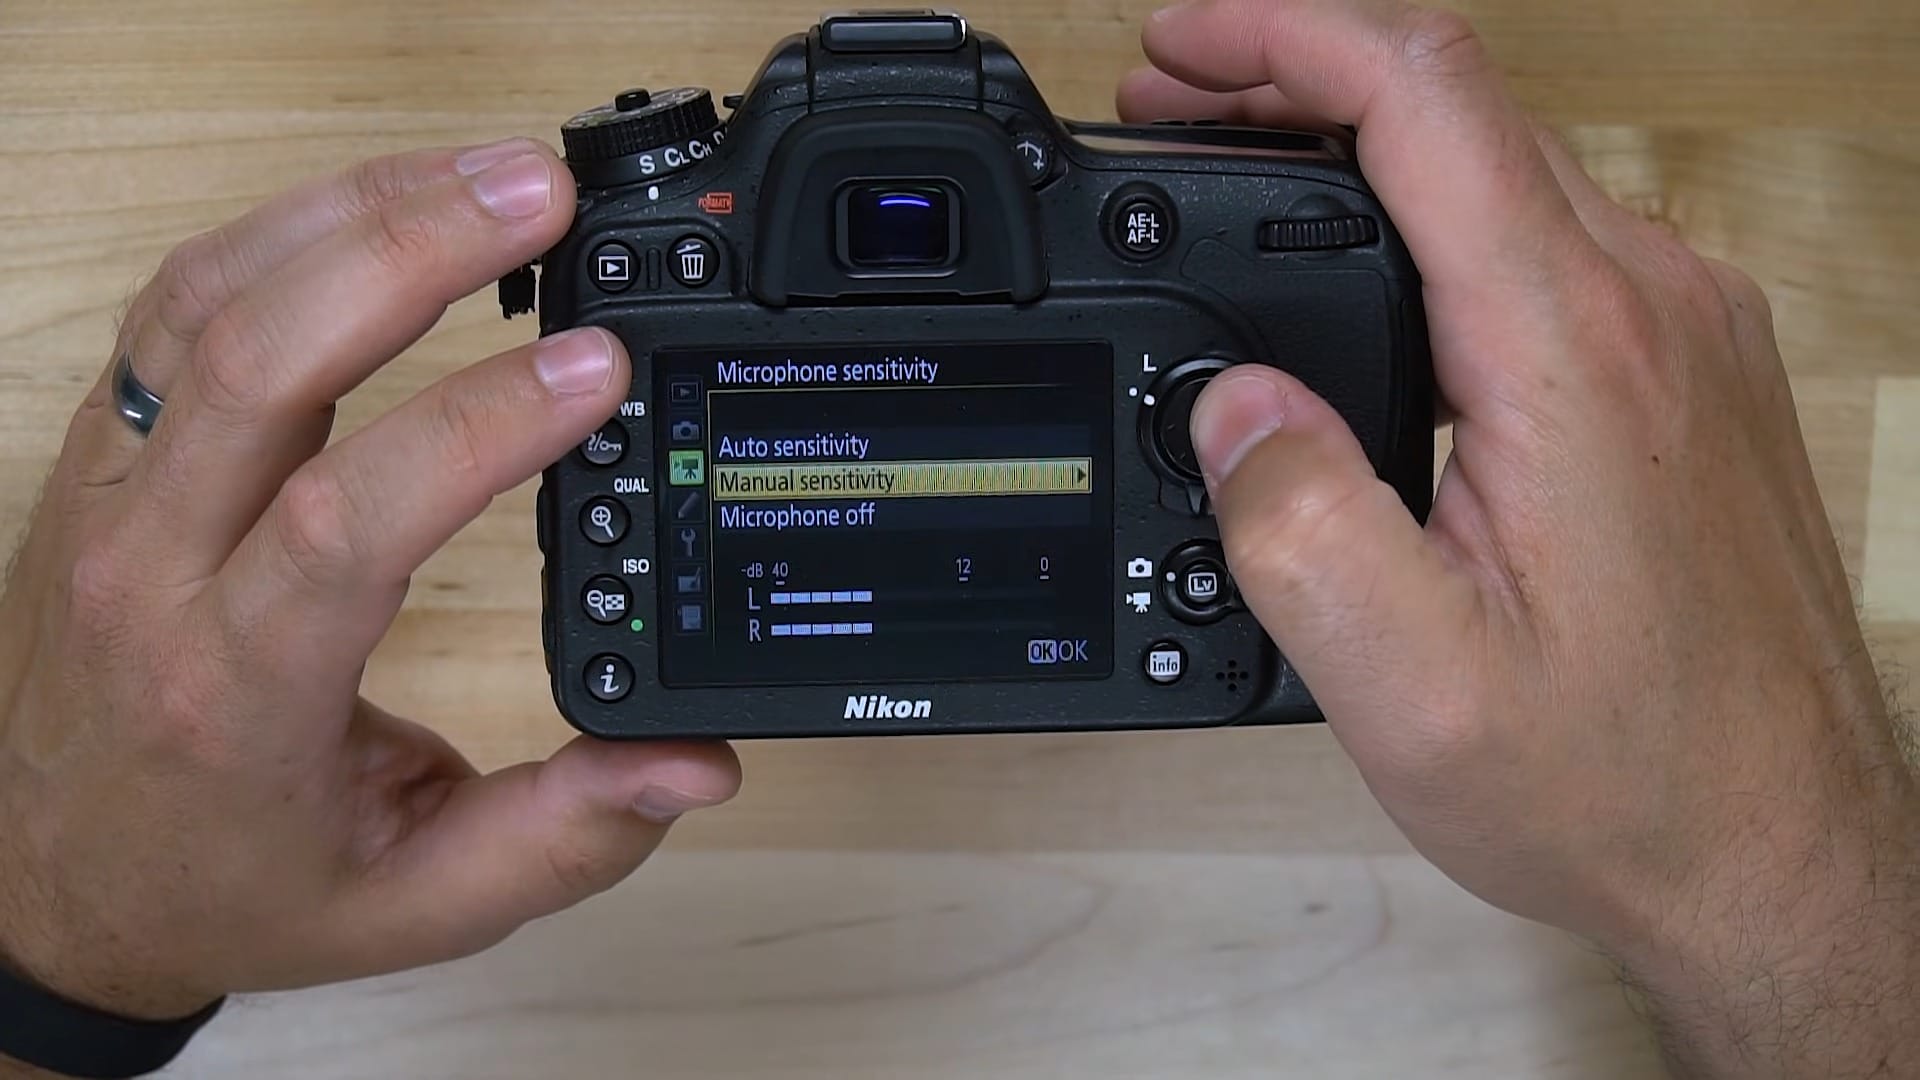
| Microphone sensitivity | Movie Shooting Menu | Manual sensitivity |
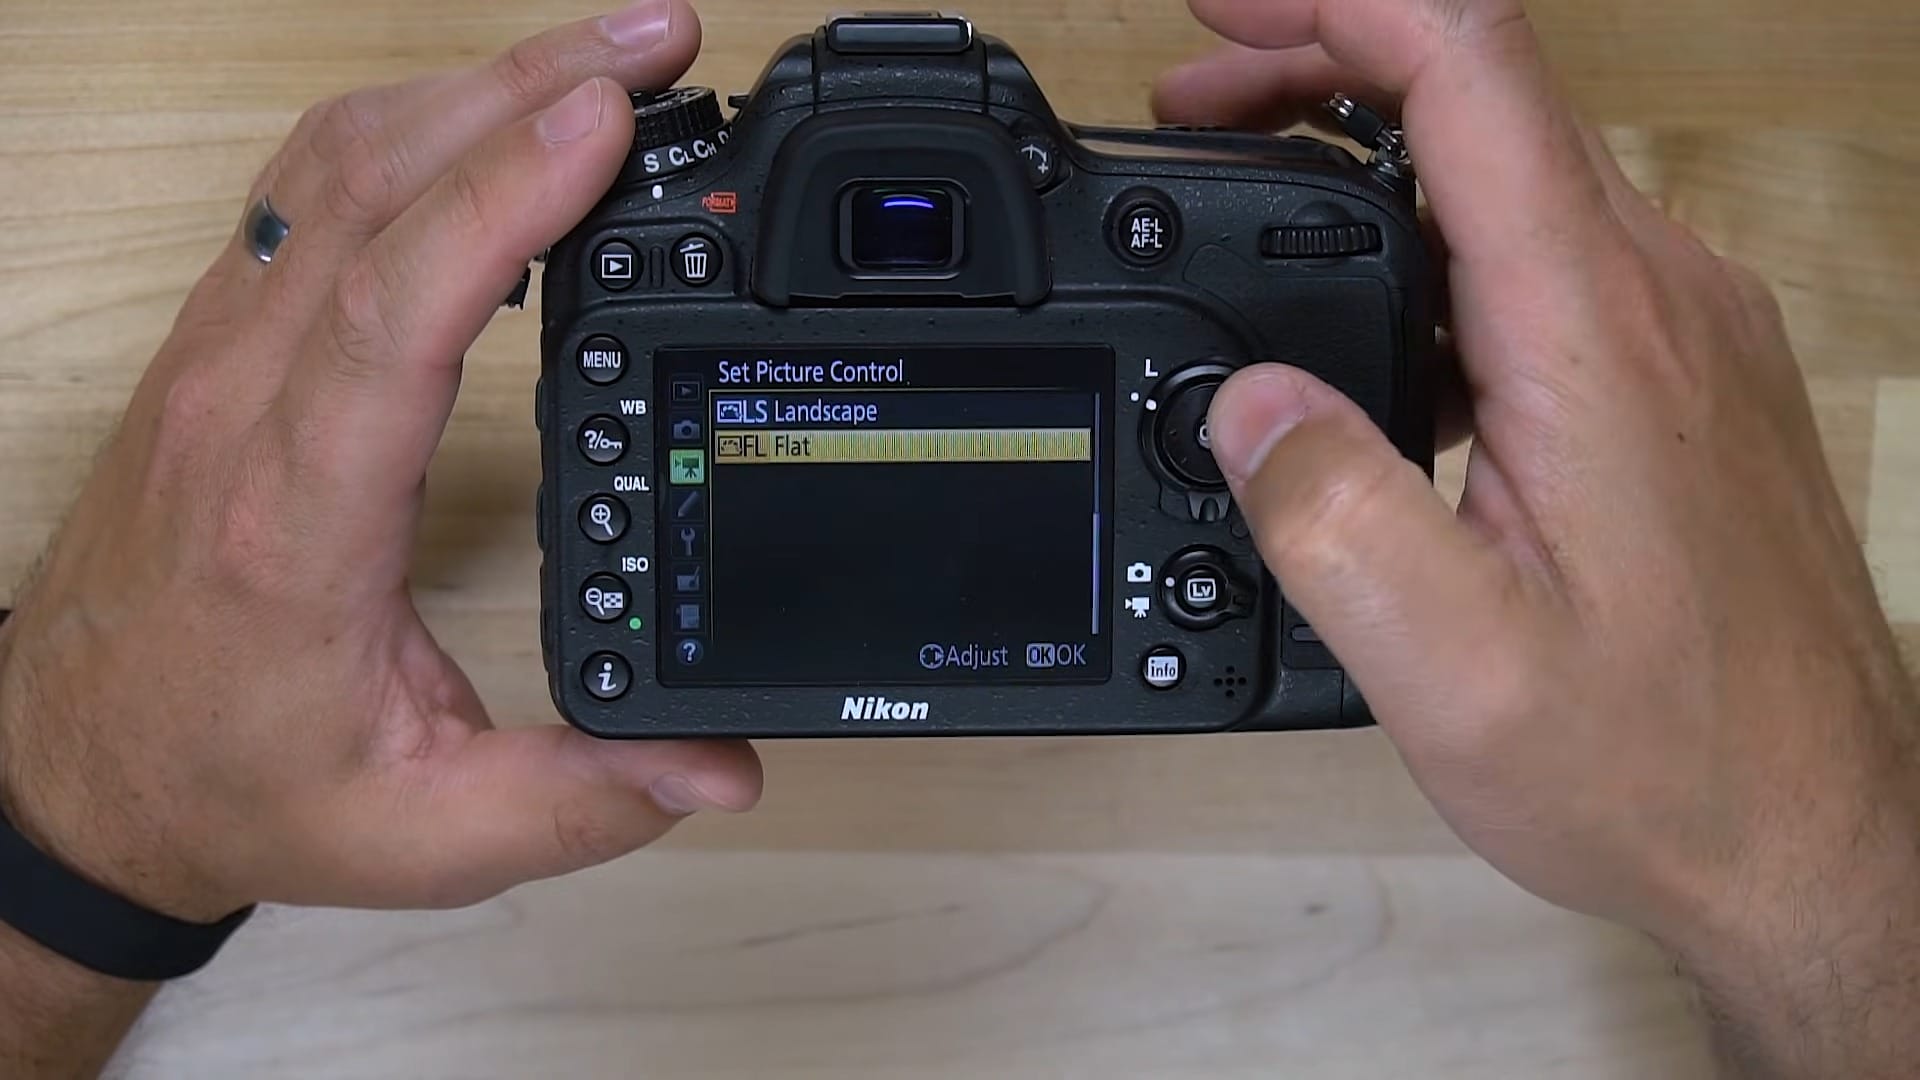
| Set Picture Control (movies) | Movie Shooting Menu | Flat |
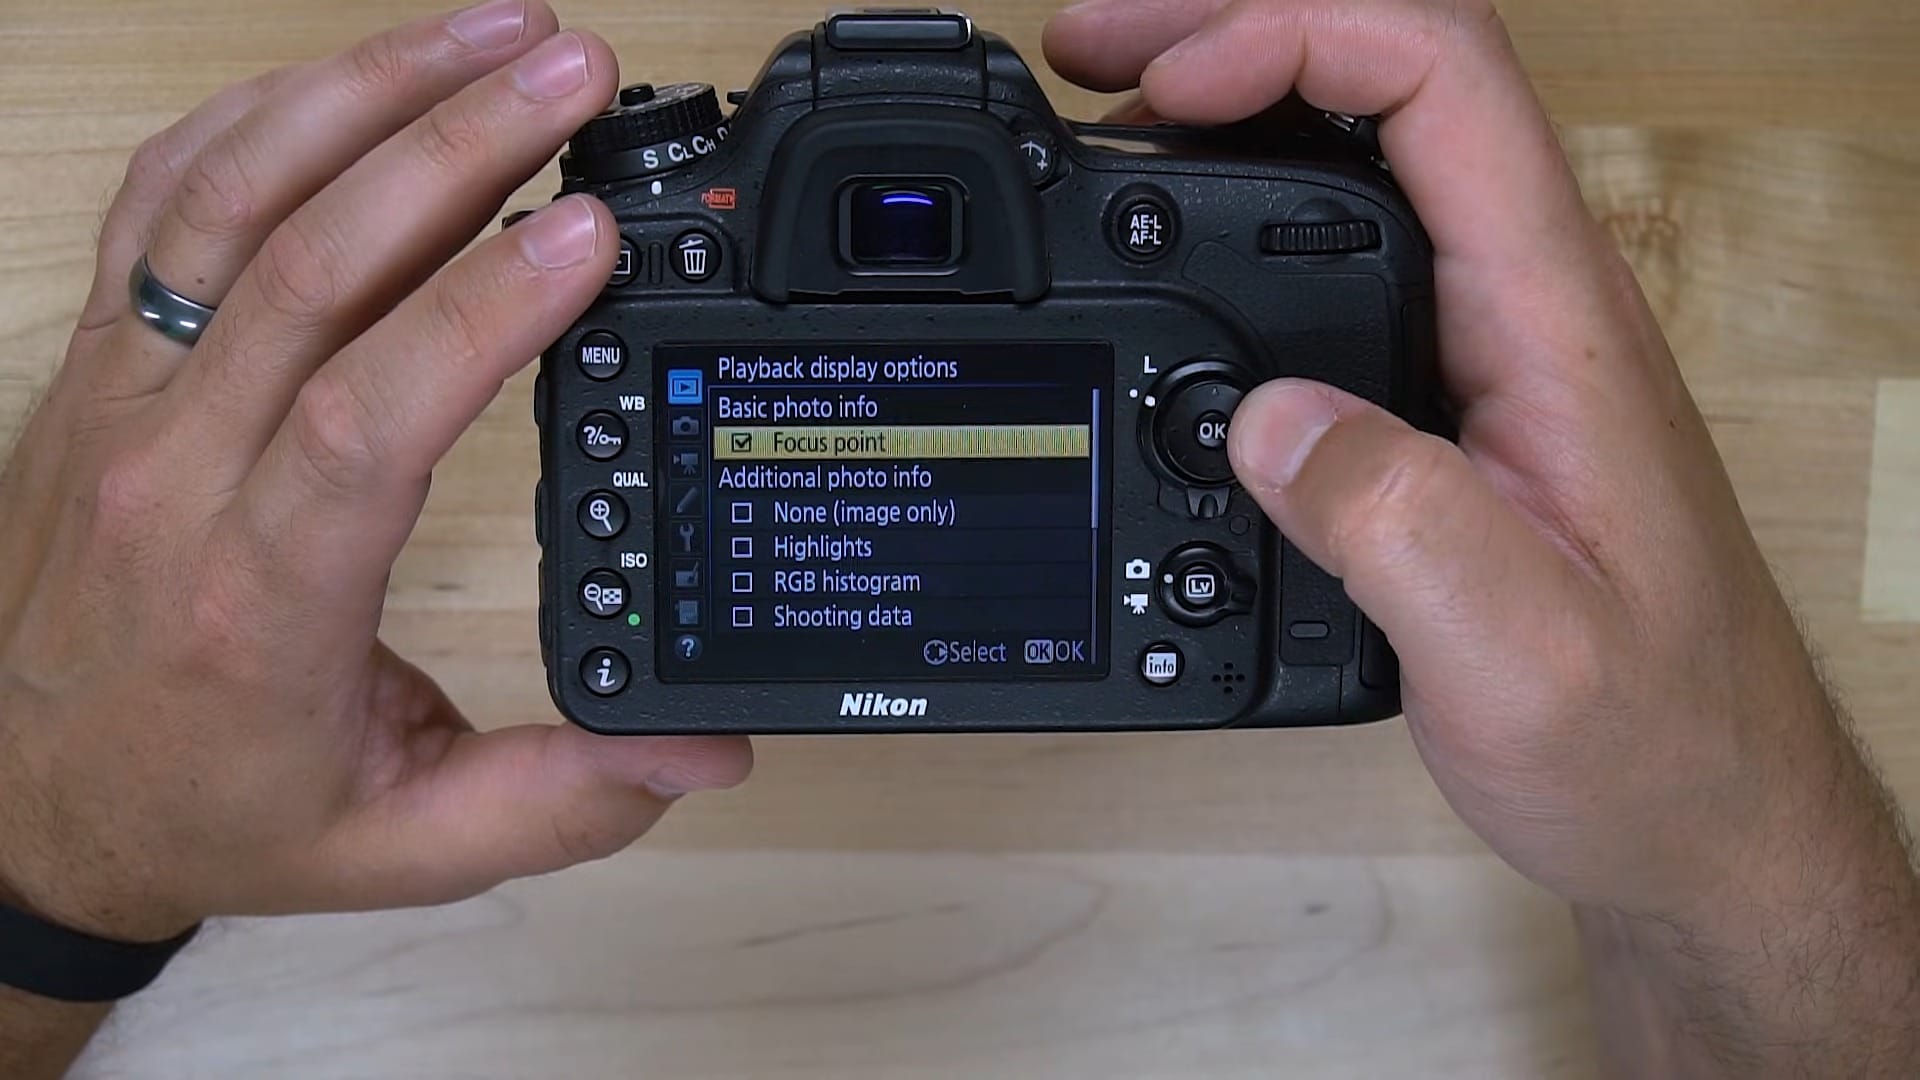
| Focus point in playback | Playback Menu > Playback display options | On when I’m short on time |
| Back button focus | Custom Setting Menu > f4 and a4 | AF-ON / AF-ON only |
1. Shoot RAW + JPEG
The first thing I did was go in and turn on RAW capture. By default, the D7200 is set to JPEG. You want to shoot RAW because you get a higher quality image that gives you a lot more room when you edit later. RAW gives you way more flexibility when you’re adjusting white balance, exposure, and all that good stuff.
I shoot RAW + JPEG. If you want to send photos from your camera to your phone, so you can edit them right away or post them to social media, you need to be shooting some form of JPEG. The RAW file is the one I edit on my computer, and the JPEG lets me share a photo quickly.
It’s really hard to go back and get a photo you wanted to share quickly once the moment’s gone, so it’s better to just shoot RAW plus a small JPEG from the start. SD cards are so big these days that you can capture both and still have plenty of room left over.
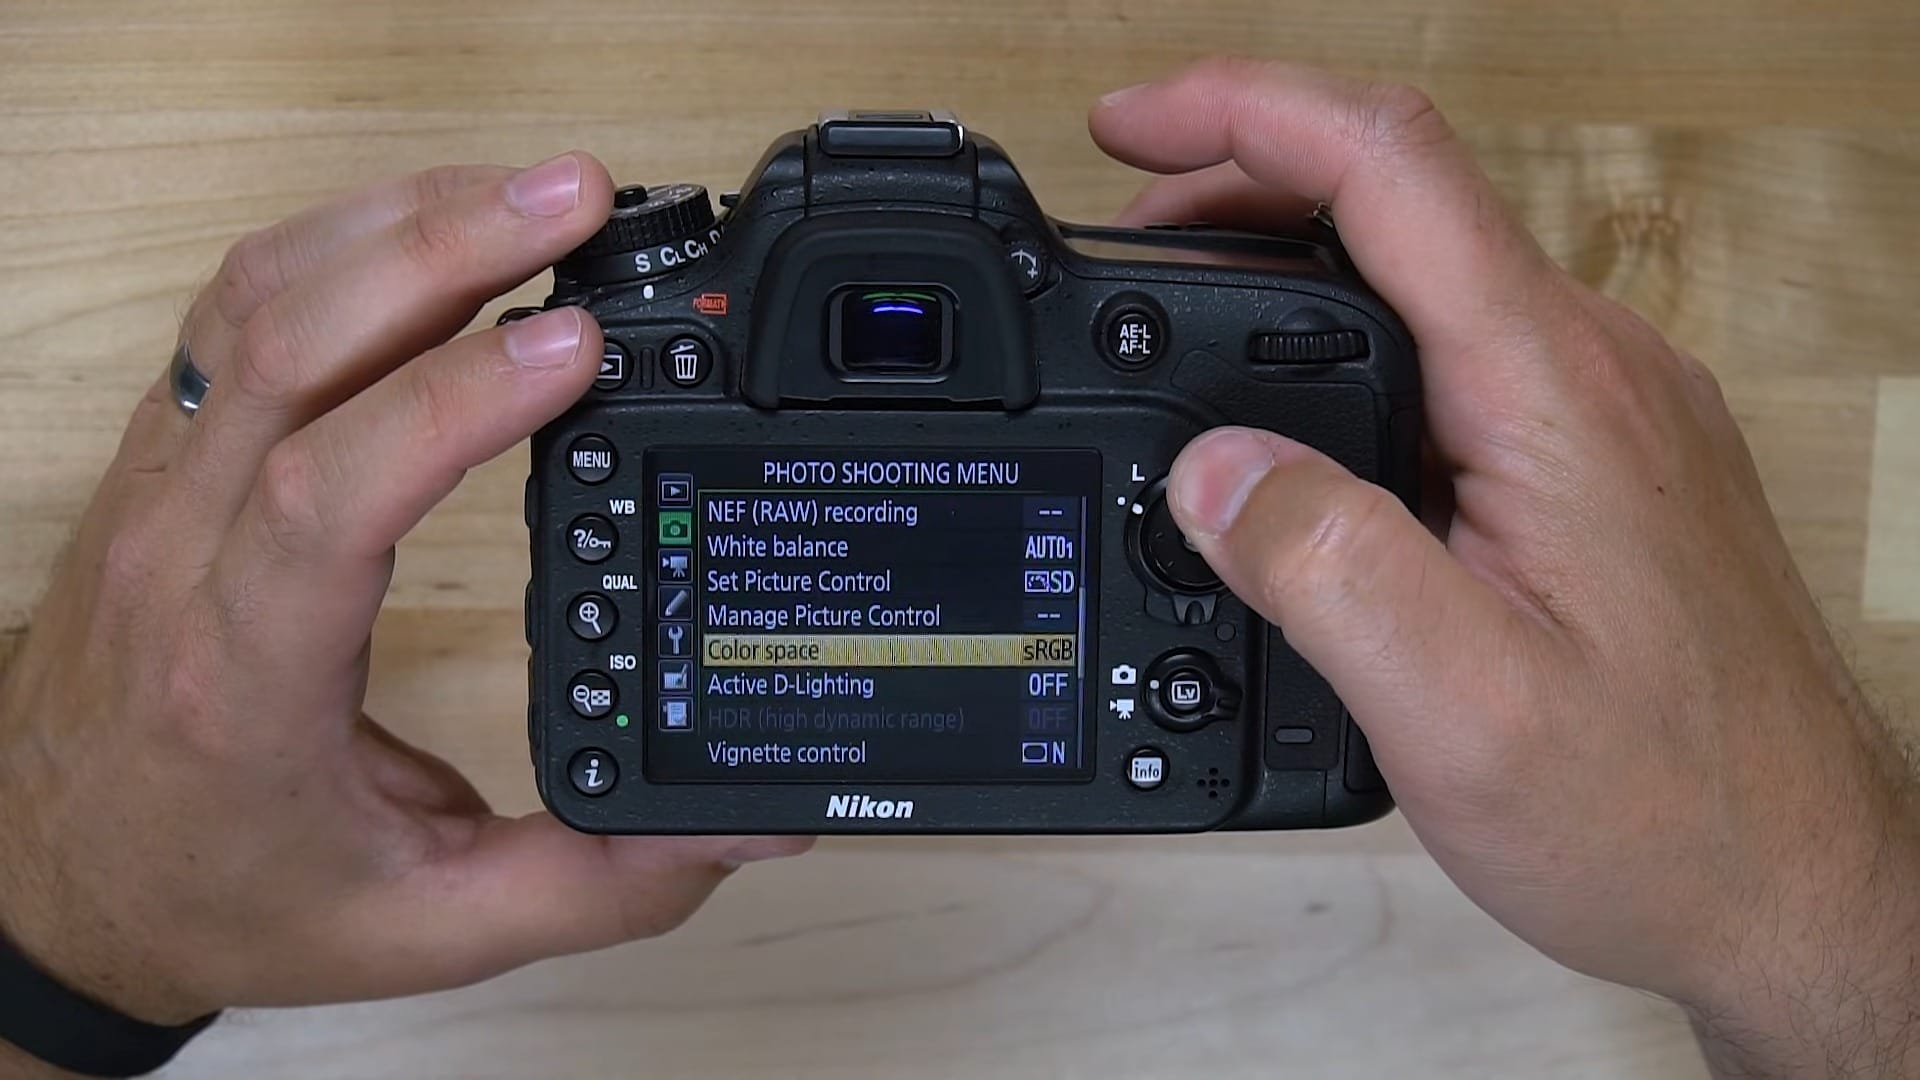
How to Set Image Quality
- Press MENU and go to the Photo Shooting Menu.
- Scroll to Image quality.
- Choose one of the NEF (RAW) + JPEG options (fine, normal, or basic) and press OK.
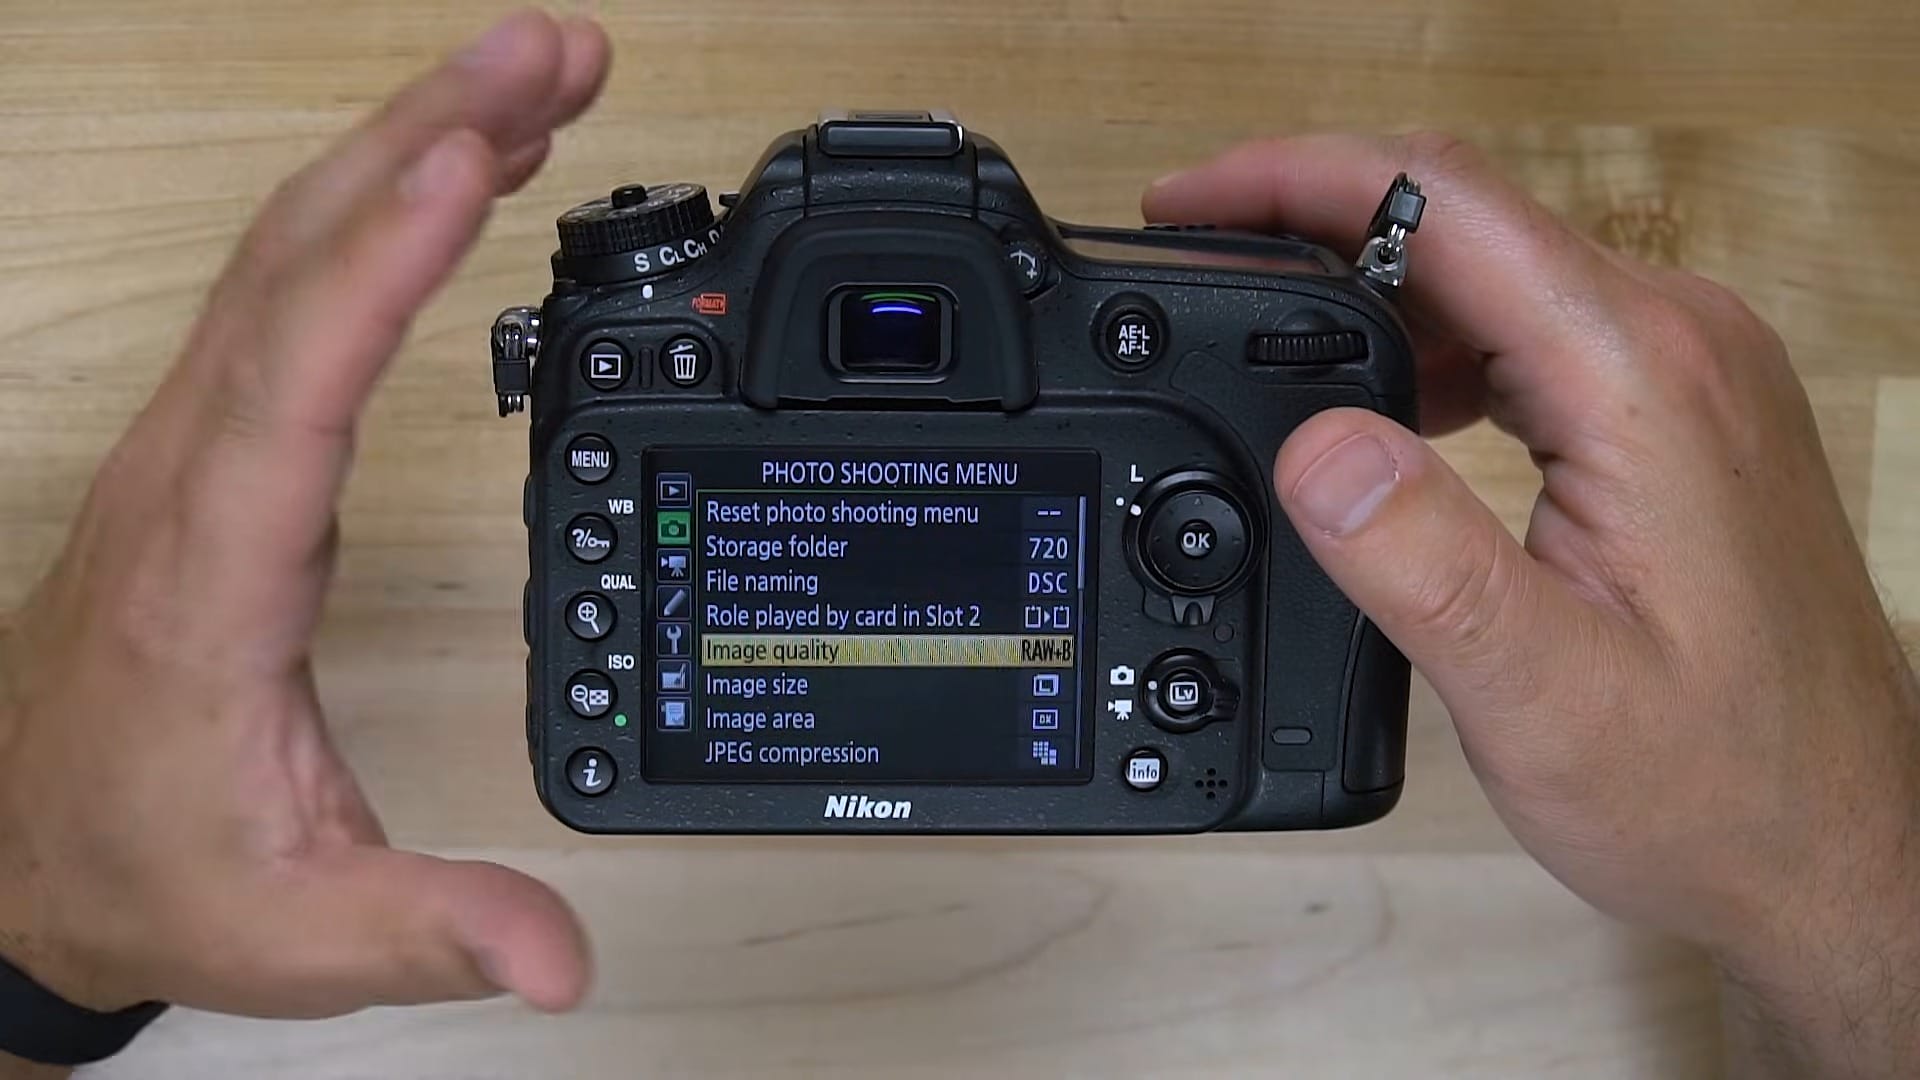
I use NEF (RAW) + JPEG basic. Basic is the most compressed JPEG option, so it’s a small file, and that’s all I need for sharing to my phone.
If you don’t need the JPEG, just choose NEF (RAW) and leave it at that. And if you don’t plan on editing your photos much, there’s really no reason to shoot RAW in the first place. You can shoot JPEG. But my opinion is to shoot RAW, and I keep that small JPEG so I can share it to my phone.
If you want to know how to get photos from the D7200 to your phone, I have a separate video on how to transfer images to a smartphone on the Nikon D7200.
2. Set Up Your Autofocus
The second thing I do is make sure my autofocus settings are set to where I want them to be. There’s a button on the side of the camera, right there with your AF/M focus switch. When you hold that button down, you can quickly change between the different autofocus settings.
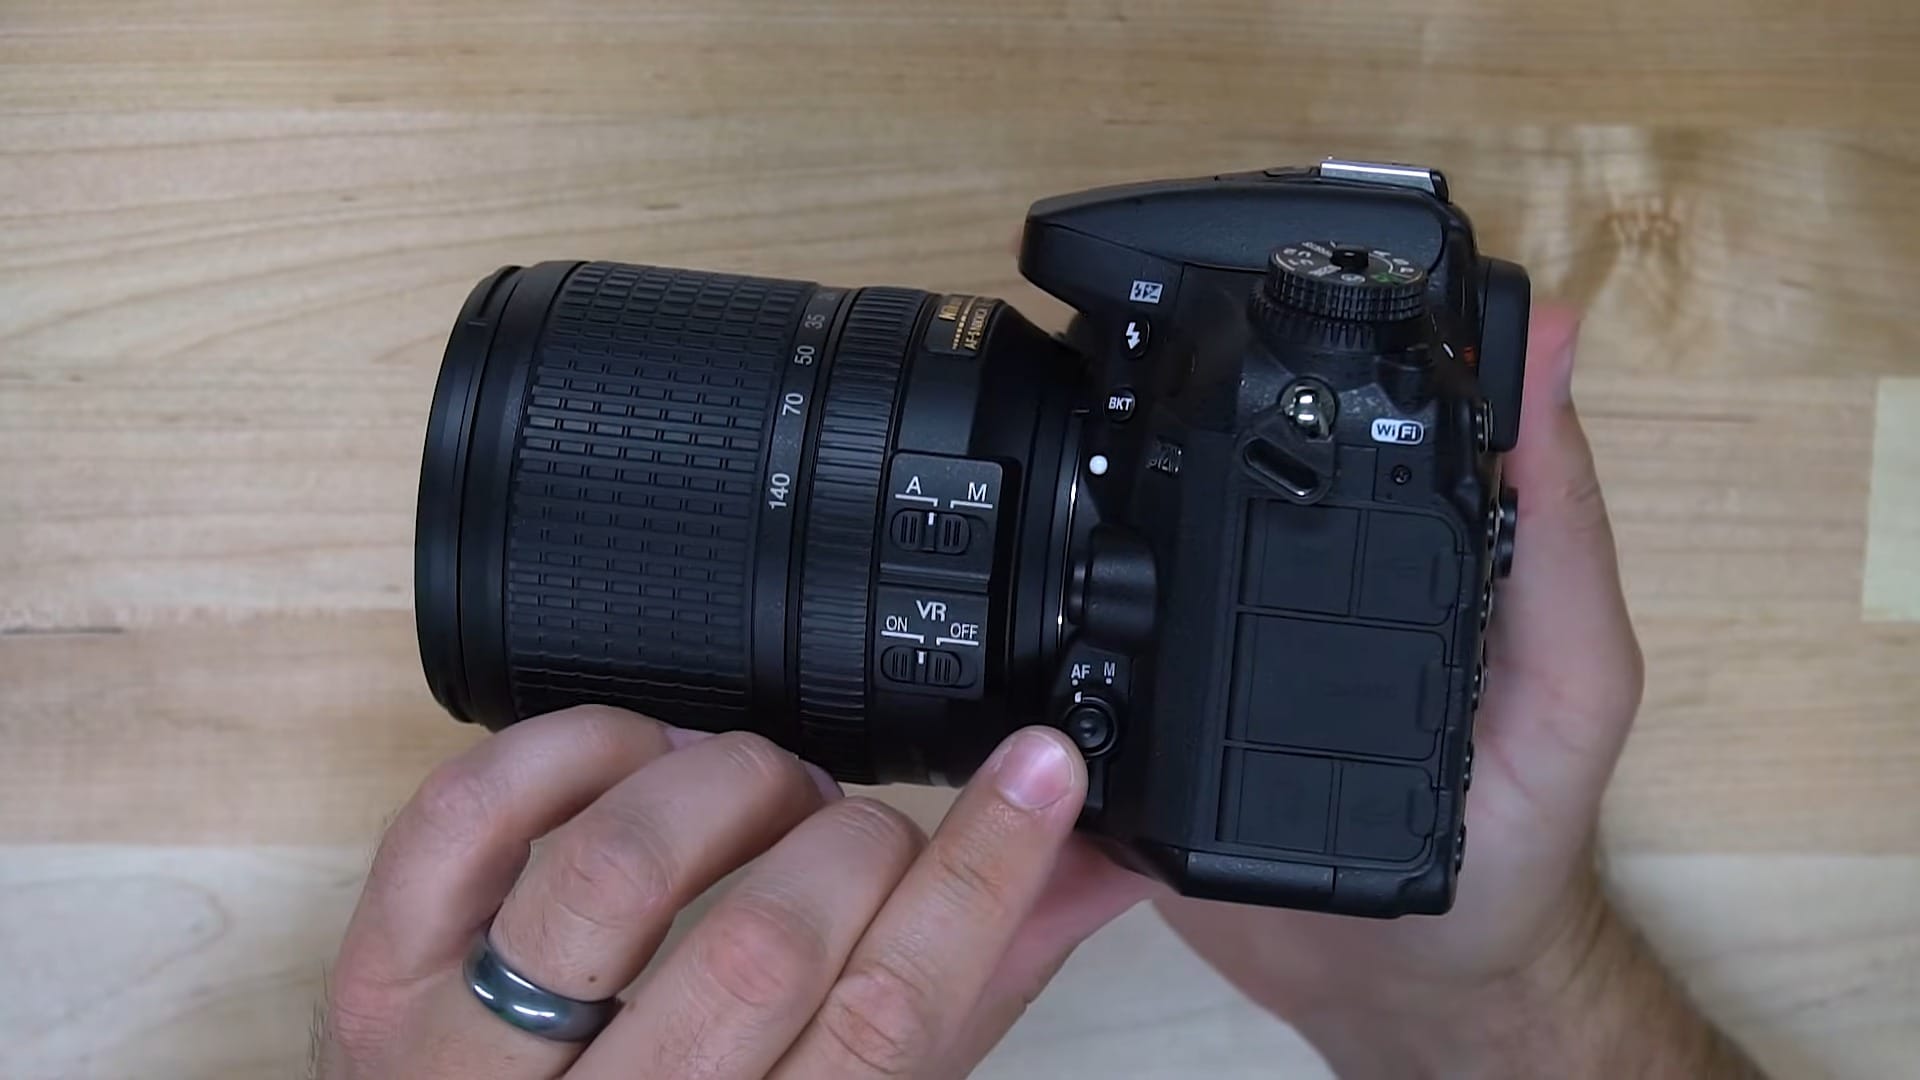
Focus Mode: AF-S, AF-C, AF-A, and AF-F
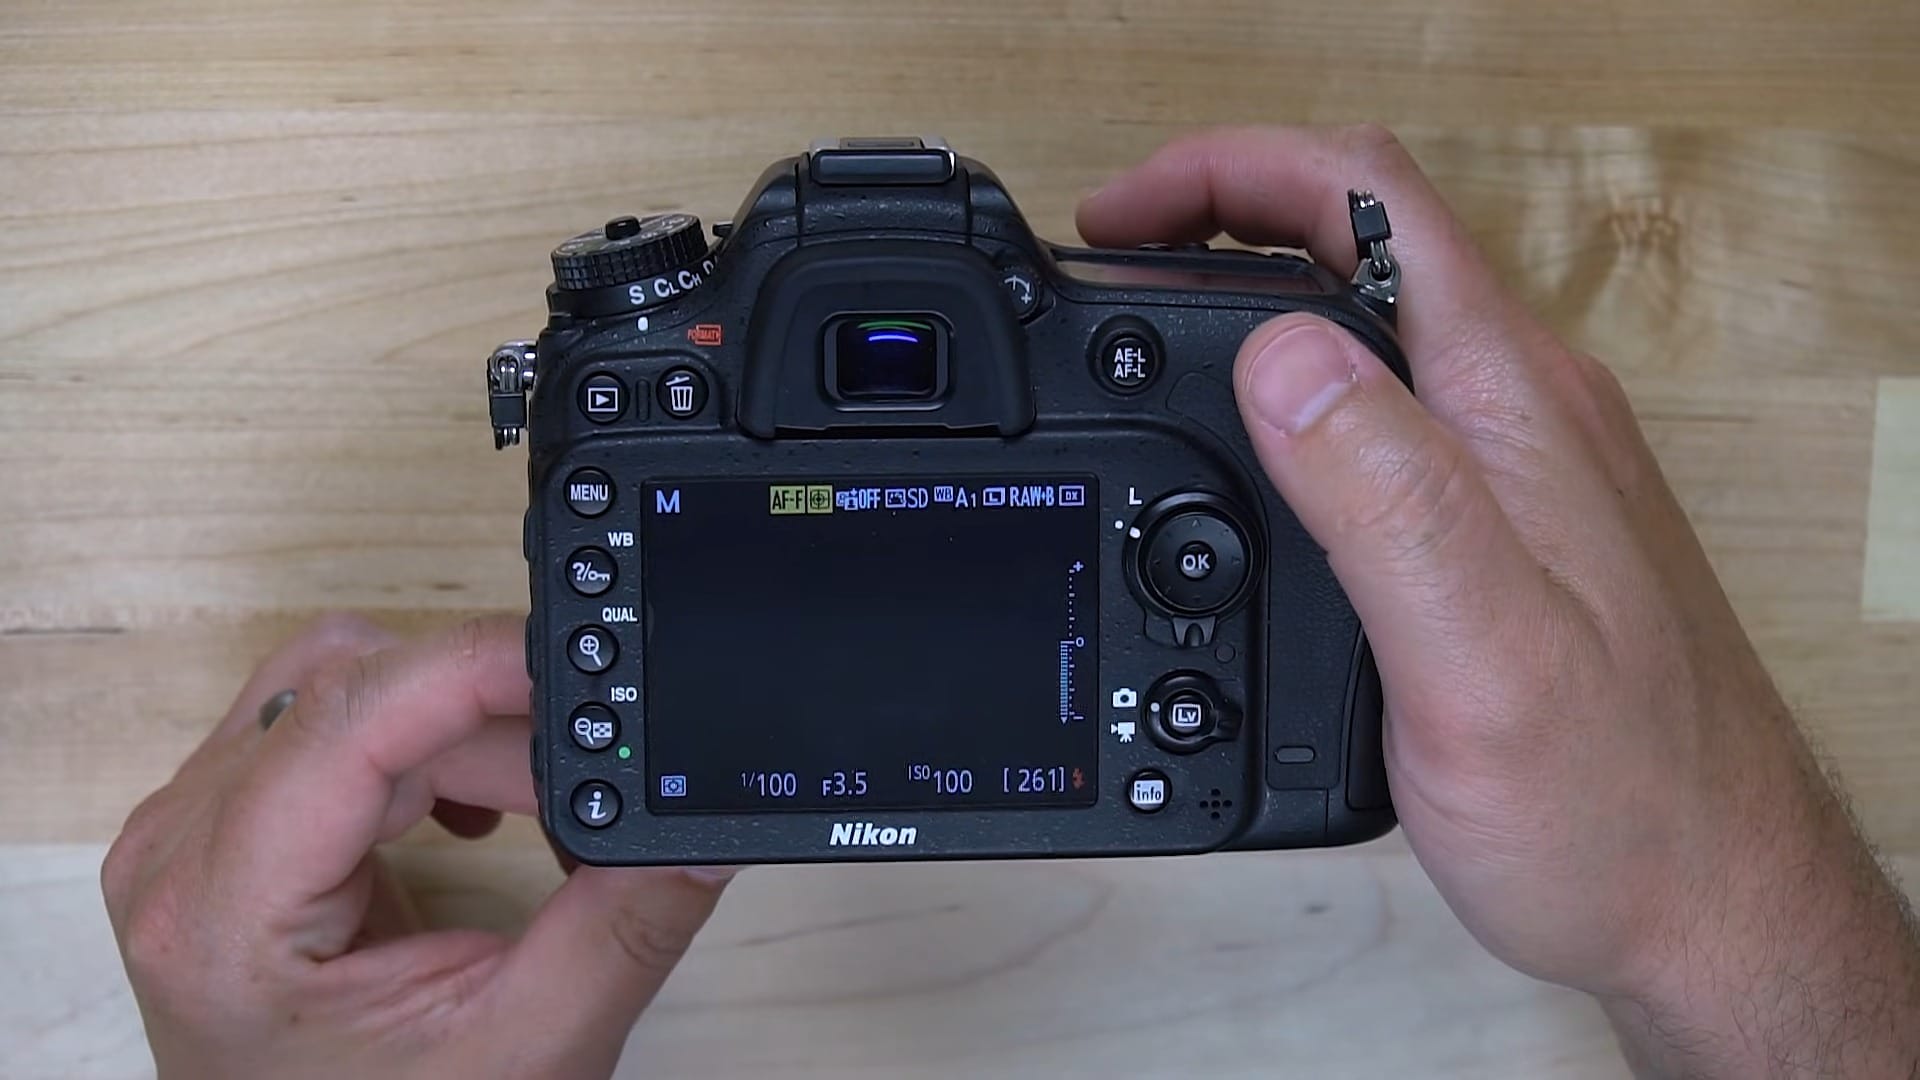
Hold that button and turn the main command dial on the back of the camera to change the focus mode. What you see depends on whether you’re in live view. In live view, all you get is AF-S and AF-F. Through the viewfinder, you get AF-S, AF-C, and AF-A.
| Mode | What It Does | Where You Can Use It |
|---|---|---|
| AF-S (single-servo) | Focuses once when you press the button and holds that focus until you let off and press again | Viewfinder and live view |
| AF-C (continuous-servo) | Keeps refocusing as long as you hold the button down, so it stays with a subject that’s moving | Viewfinder only |
| AF-A (auto-servo) | The camera decides between AF-S and AF-C for you | Viewfinder only |
| AF-F (full-time servo) | Keeps focusing on its own and locks focus when you press the shutter button halfway | Live view and video only |
I like servo mode. When I’m shooting through the viewfinder, I use AF-C, which lets the camera refocus every time I press down the shutter button, or in my case the back button, since I use back button focus. It makes focusing easier because the camera refocuses when it needs to, instead of focusing once and staying there. That matters most when you’re shooting continuous, where you hold down the shutter button and fire off a series of photos.
Now, the D7200 won’t let you choose AF-C in live view. You have to turn off live view, look through the viewfinder, hold down that button, and then turn the dial.
AF-Area Mode in Live View
One more thing here. In live view, while you’re holding down that same button, turn the sub-command dial on the front of the camera, the one right underneath your shutter button. That changes the AF-area mode, which is where in the frame the camera looks for focus. You’ve got face-priority (the little portrait icon), wide-area, normal-area, and subject-tracking.
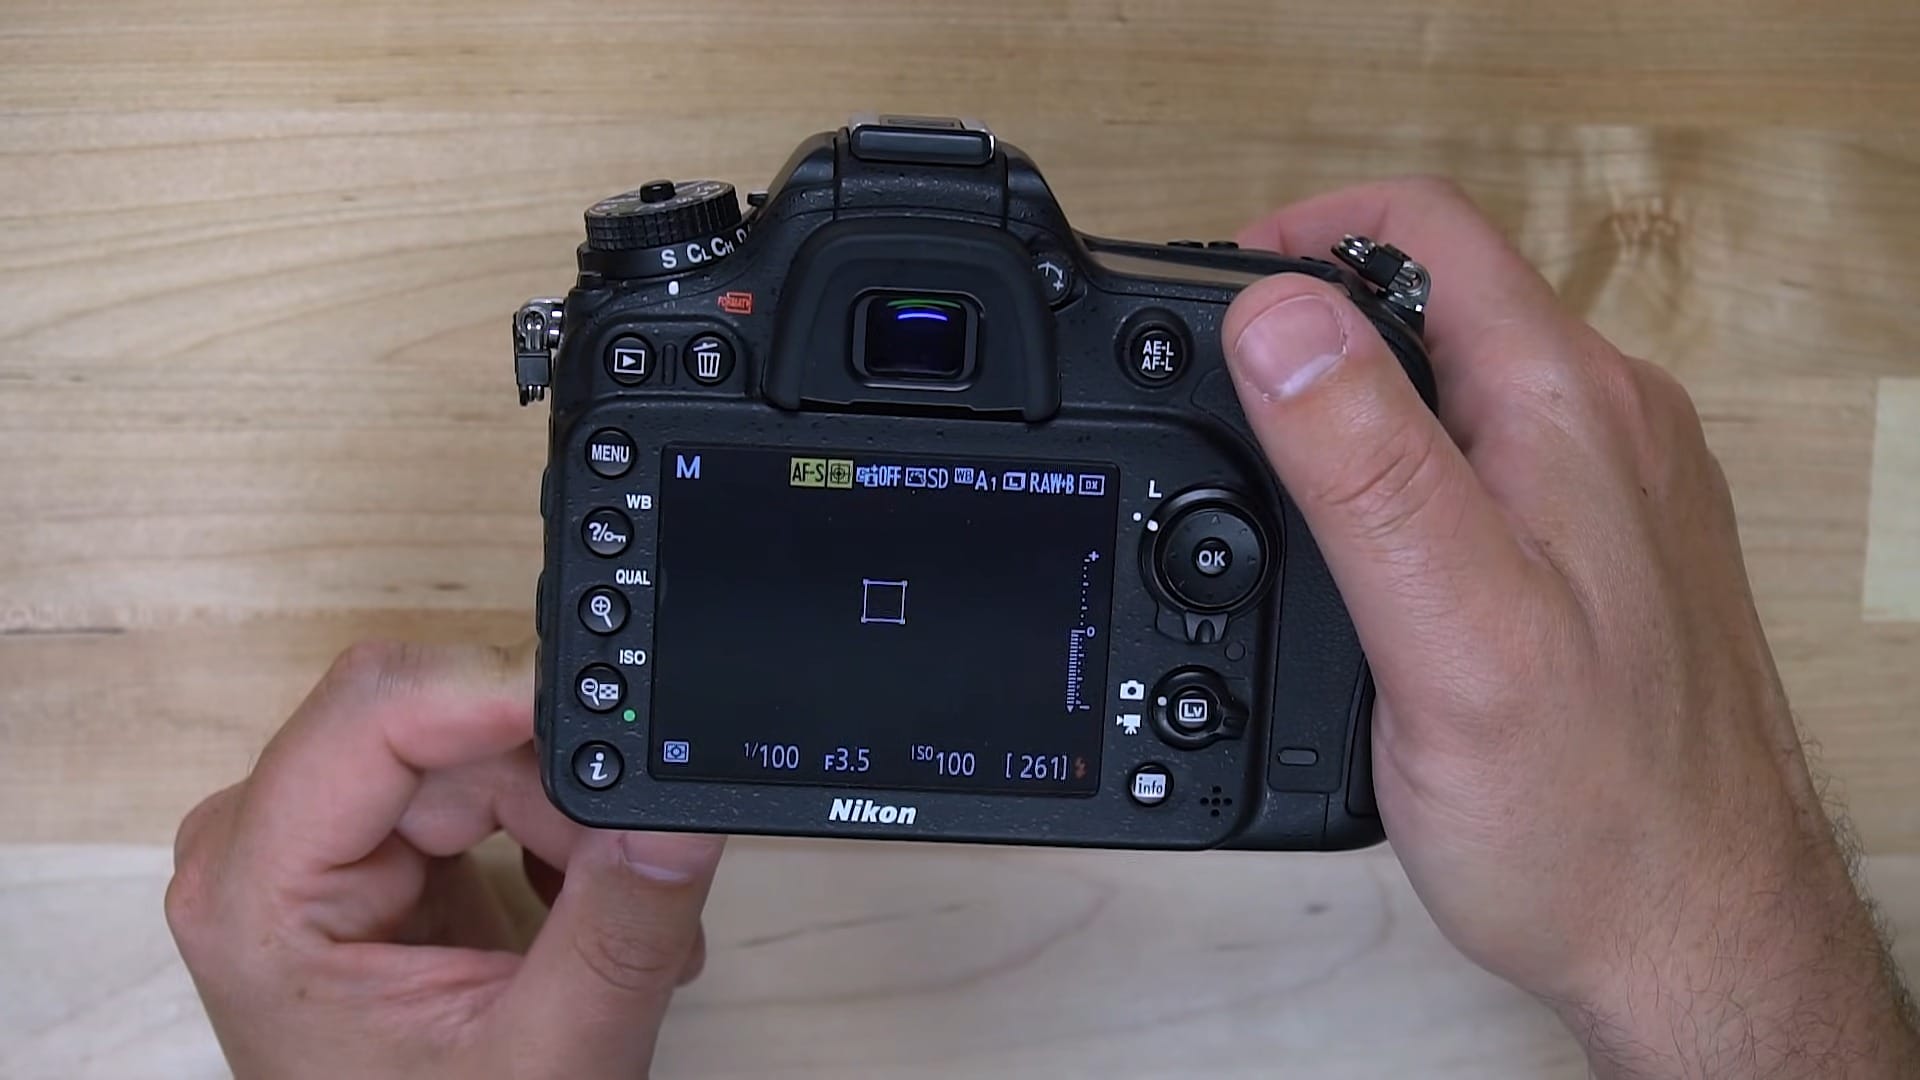
The best thing to do is play with them, try them all out, and see what works best for you. For me, in live view, I stay in AF-S and use normal-area. That gives me a small focus point I can move anywhere in the frame with the multi selector, so I can tell the camera exactly where I want focus to be. That way there’s no mistaking it. Cameras make mistakes with autofocus sometimes, and I like having an AF point that I can move around.
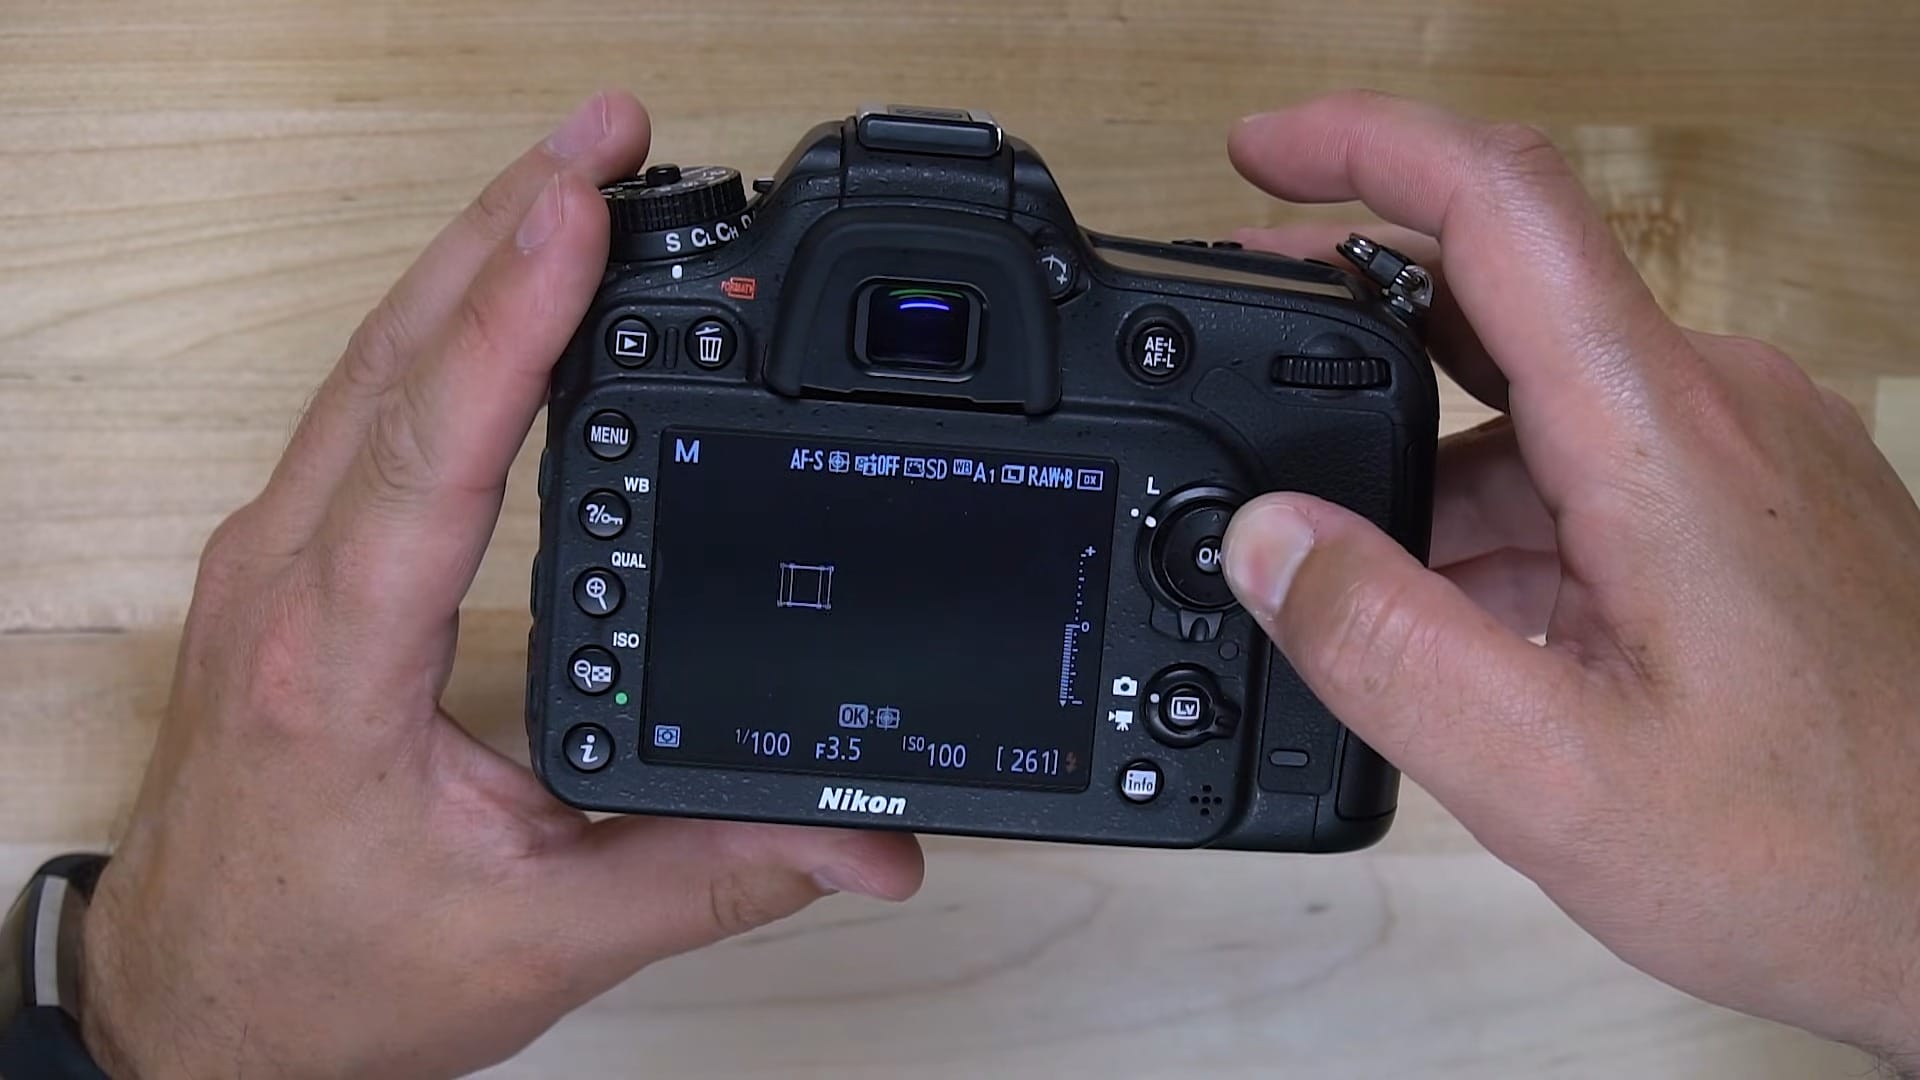
Sure, it’s not as quick as using wide-area, and it’s not as flexible. But when I’m shooting photos, I want that focus to be tack sharp and exactly where I want it. That’s why I set my camera up that way.
3. Turn Off Active D-Lighting
The third setting is making sure Active D-Lighting is turned off. Active D-Lighting is a feature that lets Nikon add a little bit of fluffiness, or enhancement, to your photo right in the camera. That can be good or bad.
If you’re sharing photos straight from the camera to the internet, the Active D-Lighting effect might not be a bad idea. But if you want to edit your photos and have full control over them, you definitely don’t want your camera doing any of the editing for you.
Setting it to Off means the camera isn’t adding that processing to your photo, and you get the most pure image to edit later in something like Adobe Lightroom.
How to Turn Off Active D-Lighting
The quick way: Press the i button on the back of the camera, scroll down to Active D-Lighting, and set it to Off.
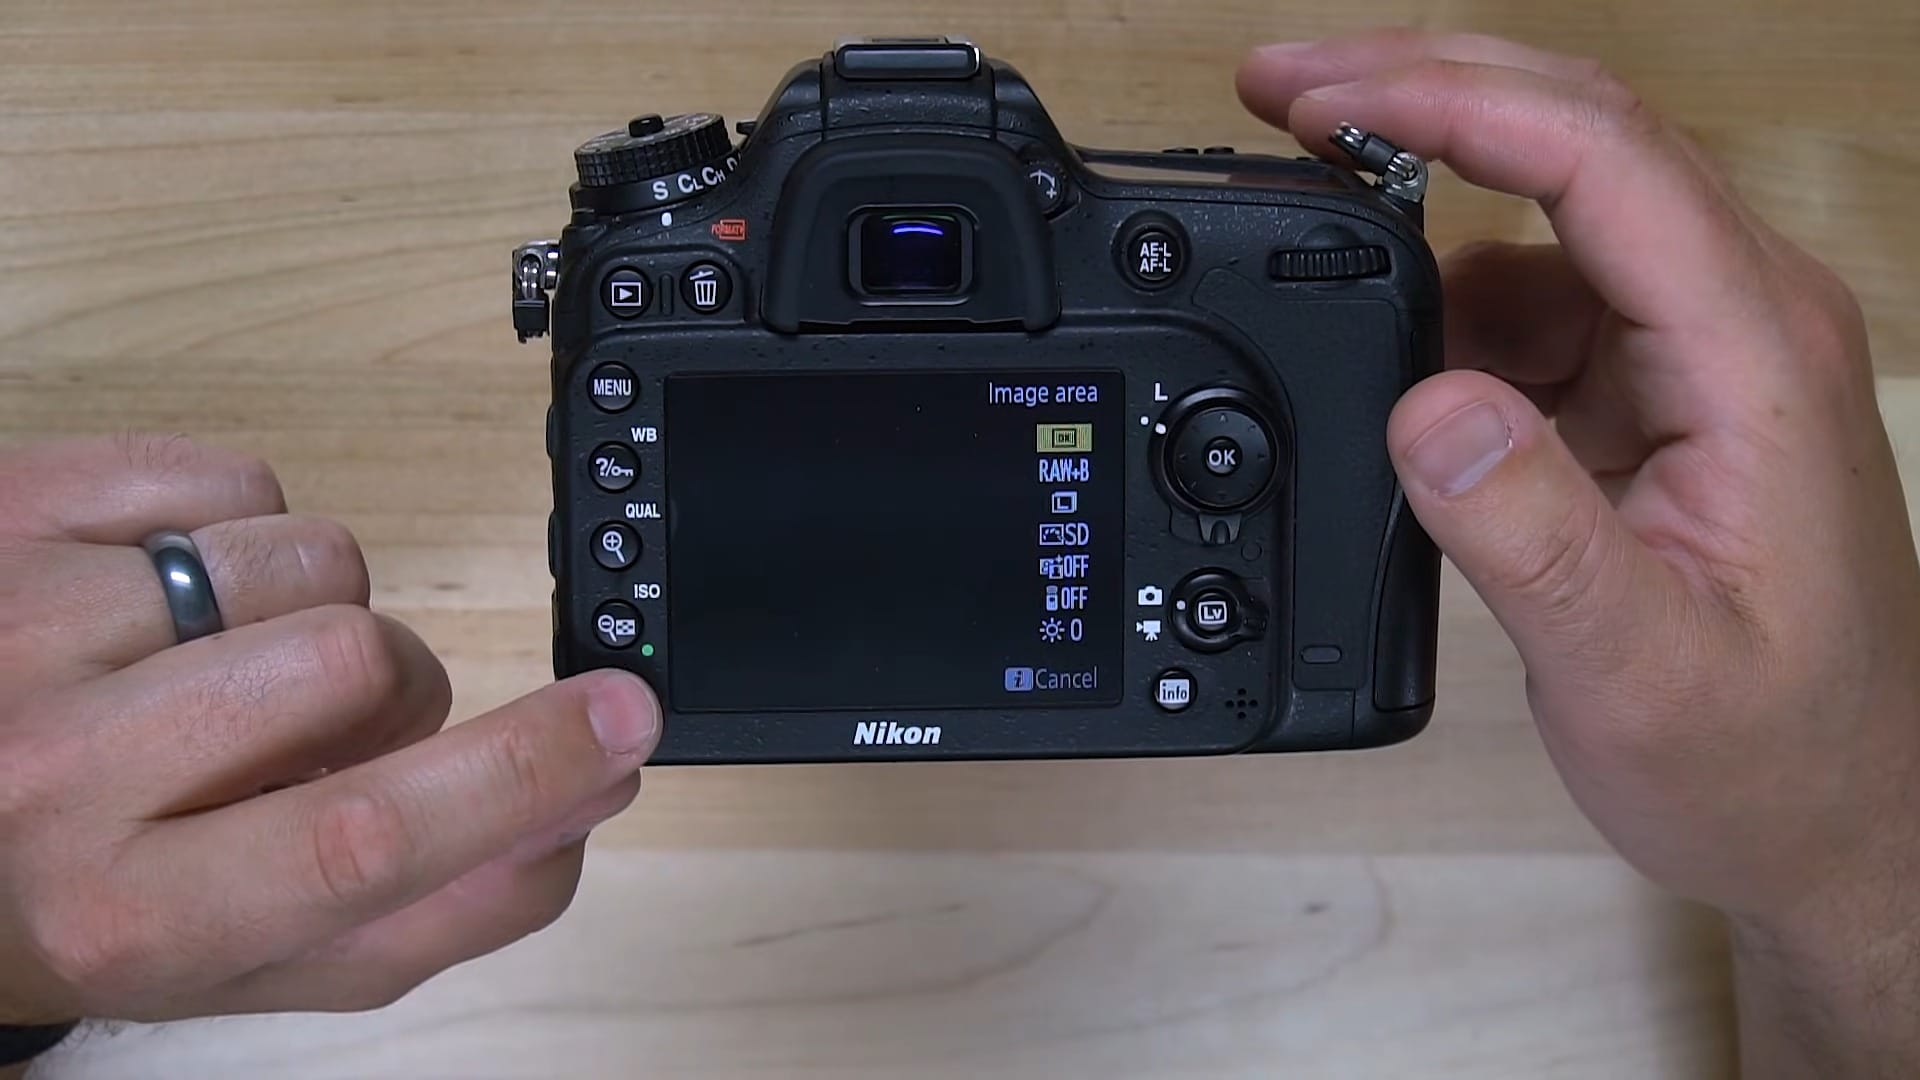
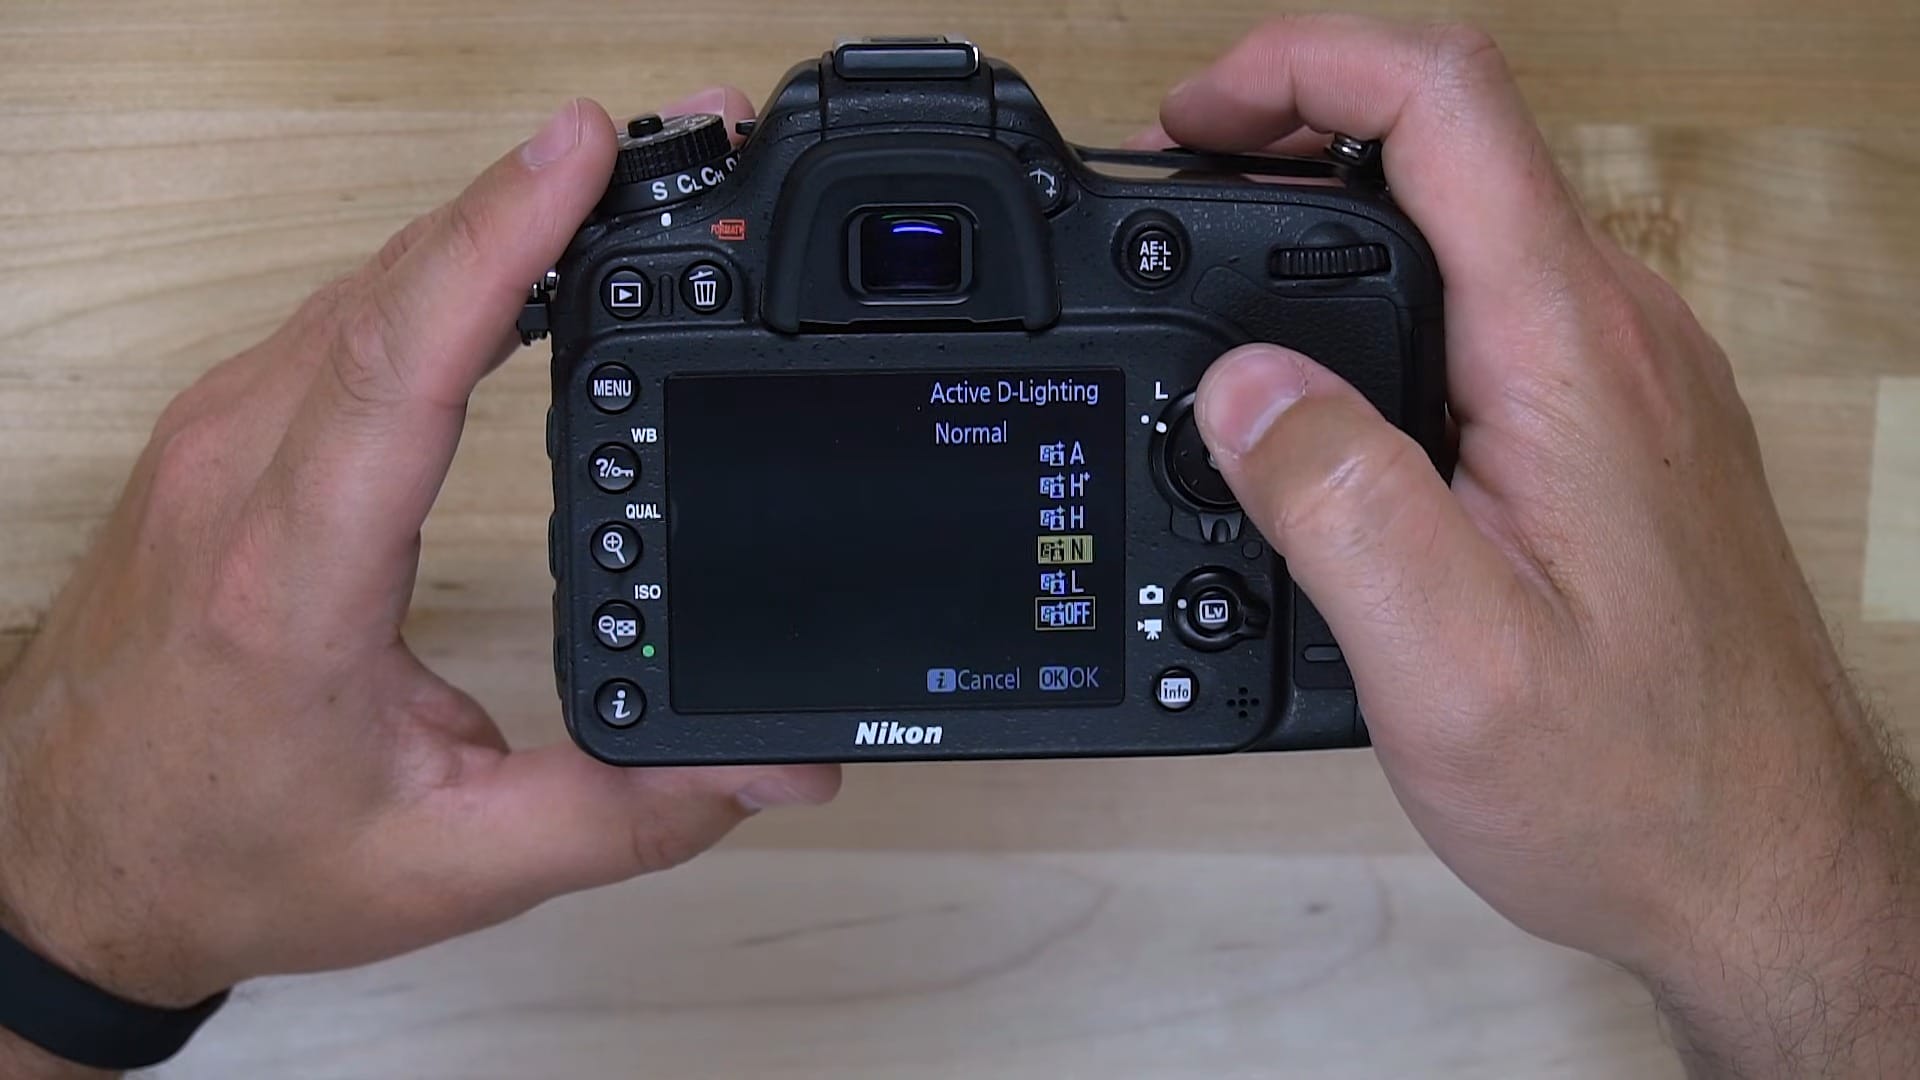
Through the menu: Press MENU, go to the Photo Shooting Menu, scroll down to Active D-Lighting, and choose Off. Your options there are Auto, Extra high, High, Normal, Low, and Off.
4. Turn Off the Beep
The next setting I change is turning off the beep. I don’t like my camera beeping. I’m a professional shooter, and when I’m shooting weddings or other events, I don’t want my camera beeping to confirm every little thing I do.
You don’t need it anyway. There are visual displays all over the camera that show you when something is in focus. When you’re looking through the viewfinder, there’s a green light in the bottom left-hand corner that lets you know when your subject is in focus. In live view, your focus box lights up green. So there’s no need to have a beep going off, which is just distracting.
How to Turn Off the Beep
- Press MENU and go to the Custom Setting Menu (the pencil icon).
- Choose d Shooting/display.
- Select d1 Beep, then Volume.
- Set it to Off.
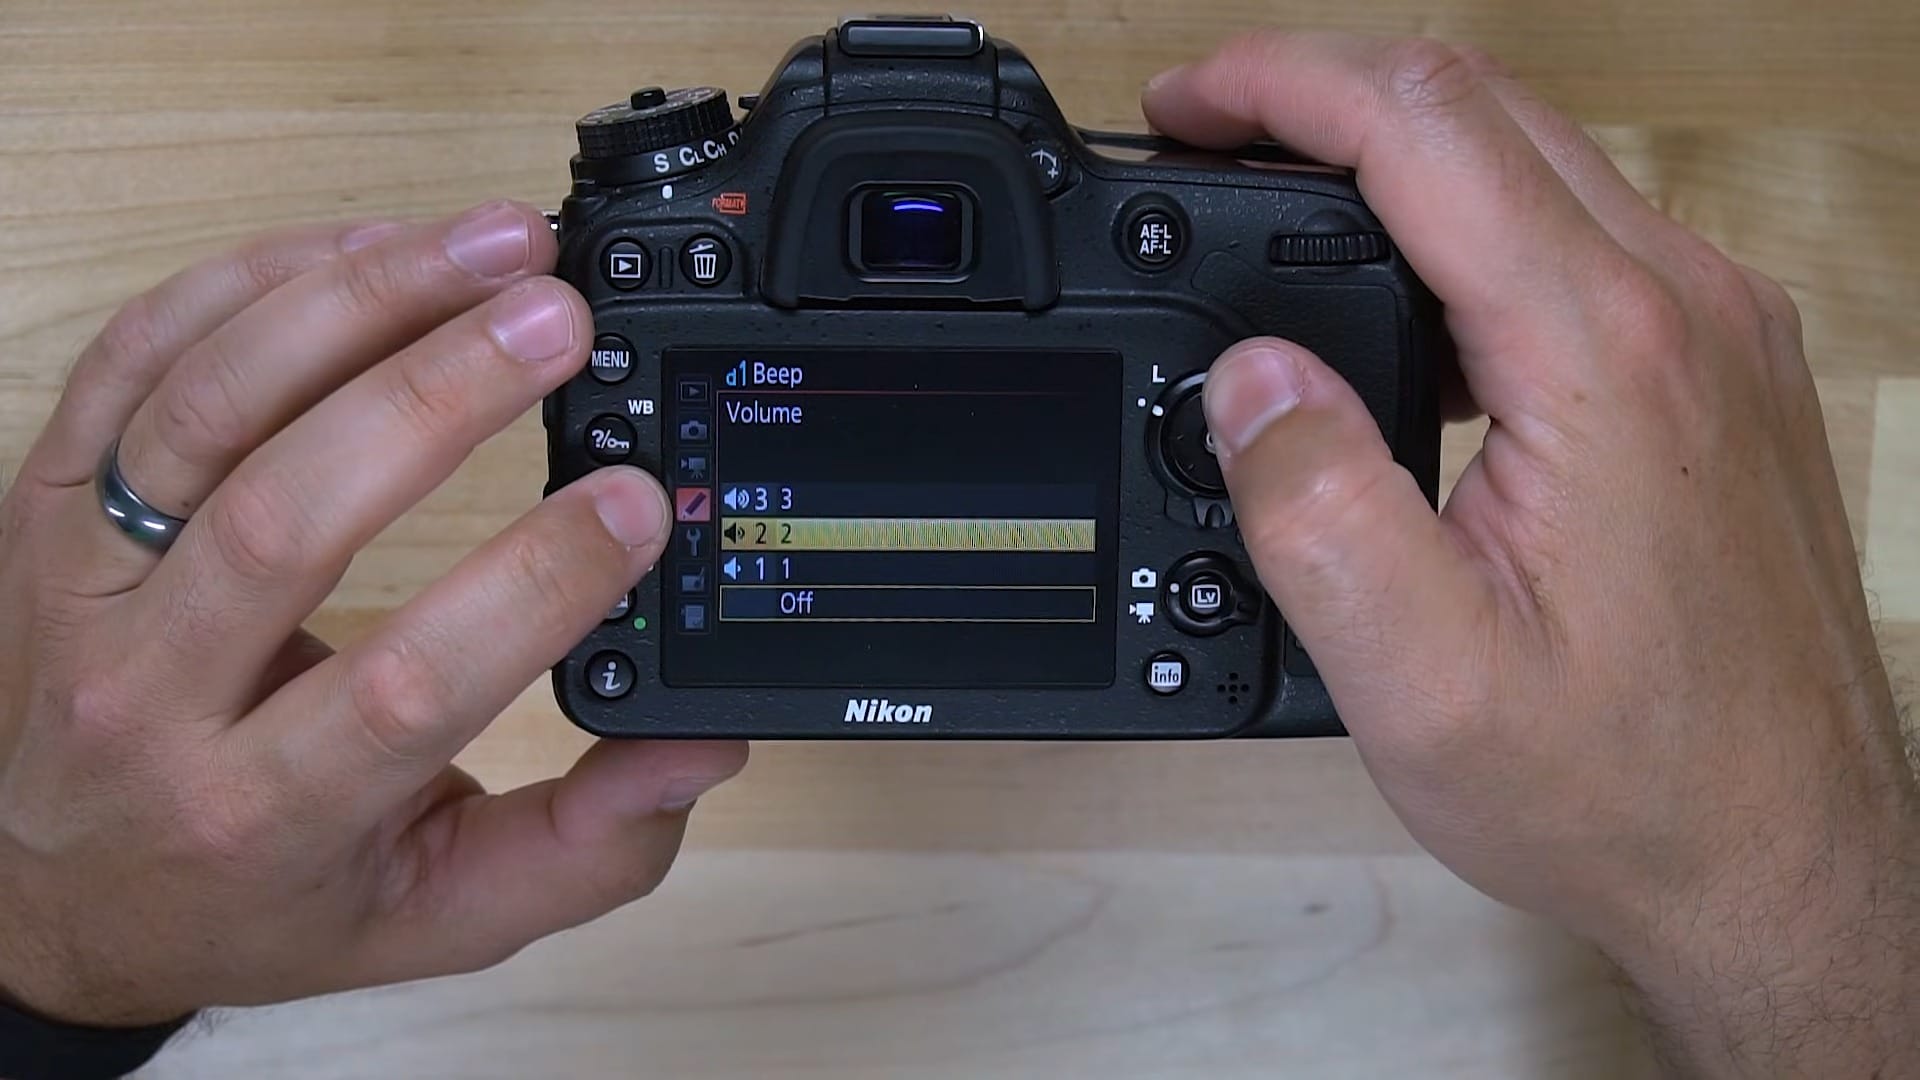
There are three volume levels too, and the camera plays a preview of each one as you scroll through them. I leave mine on Off.
5. Get Your Video Settings Ready Before You Need Them
I shoot a lot of video, so I want my video settings right before I ever need them. That way when I switch from photo to video, the camera is ready to capture video. Everything in this section is in the Movie Shooting Menu.
Frame Size and Frame Rate
If I’m shooting action and I might want to make a slow-motion video out of it, I shoot at 1920×1080 60p. If I’m not shooting action and I want a more cinematic look, I go down to 1920×1080 at 24p.
You can always make changes like this later when you’re editing your video, but most people will tell you it’s best to get it right in camera based on what you’re doing.
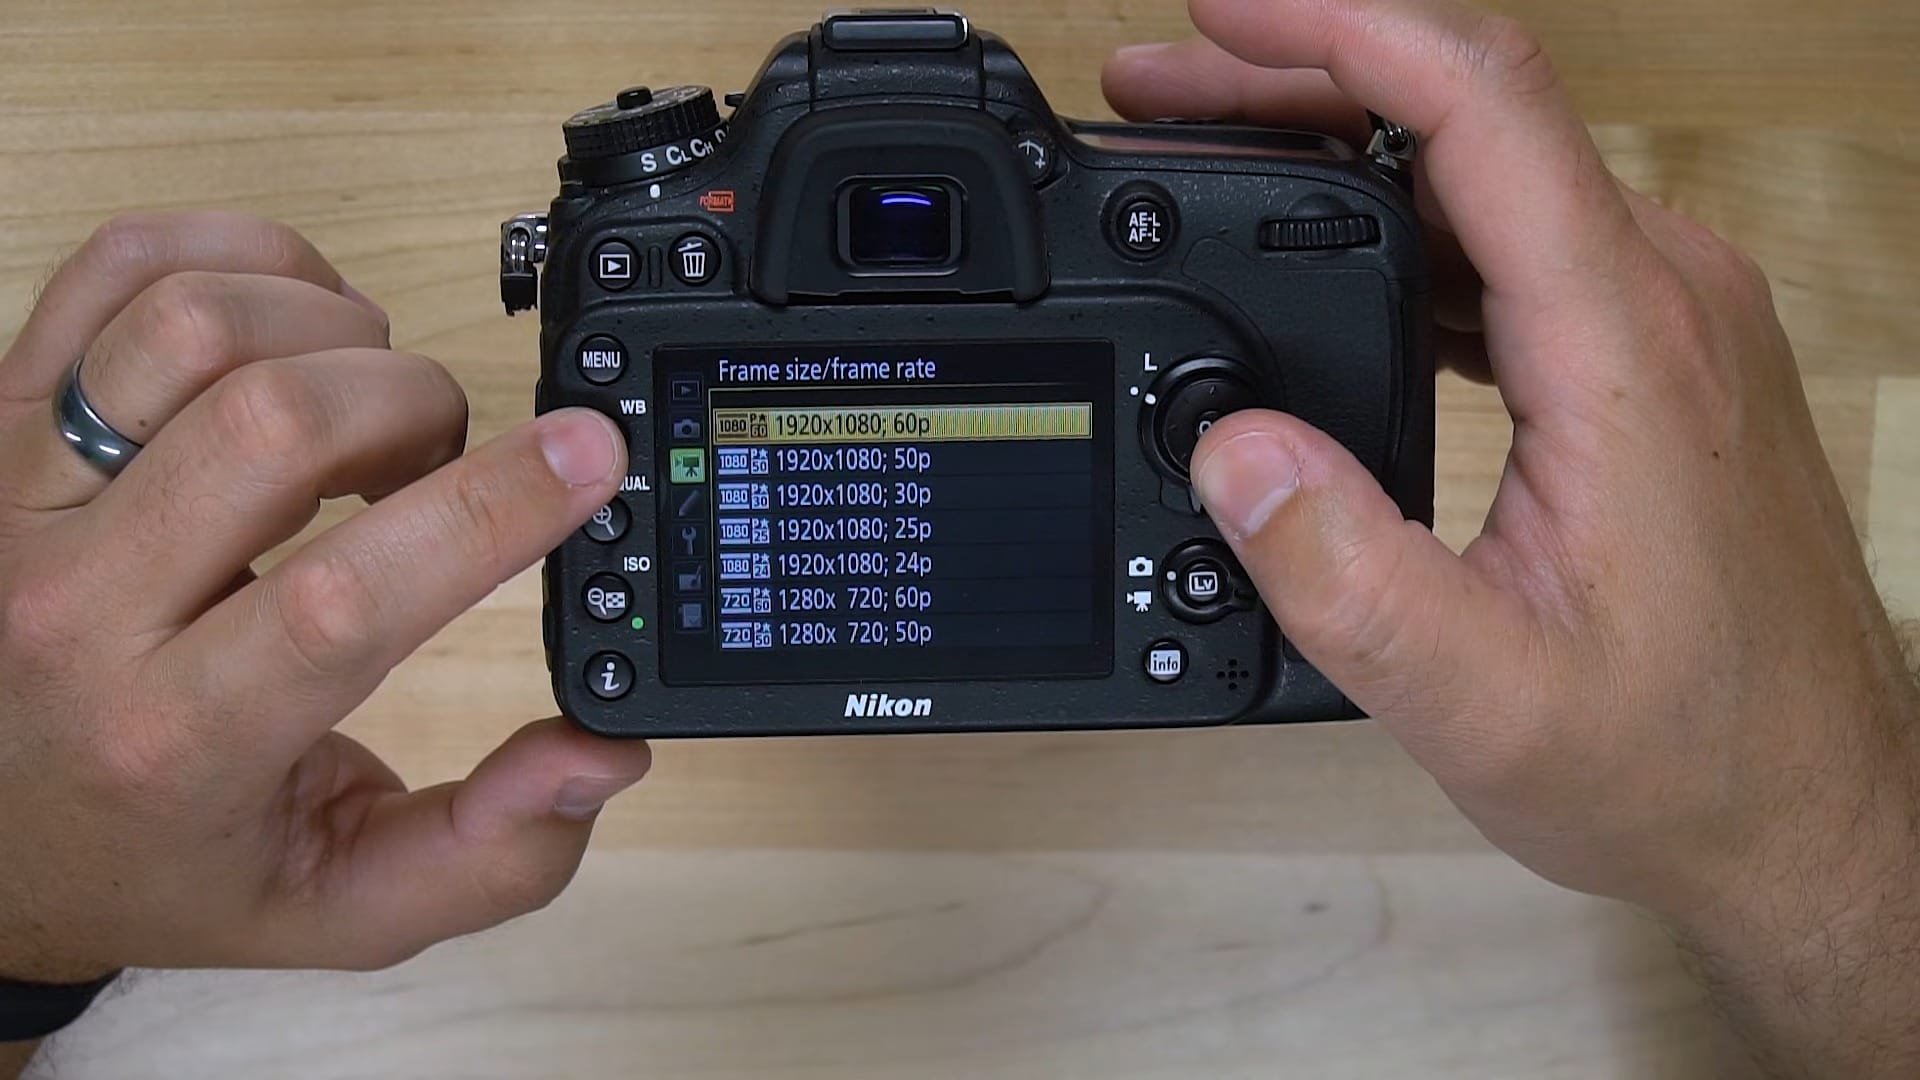
Note: On the D7200, 1080 60p is only available when Image area in the Movie Shooting Menu is set to 1.3x (18×12), so your framing gets a little tighter when you shoot 60p. At 60p in High quality, you can record up to 10 minutes per clip.
Movie Quality
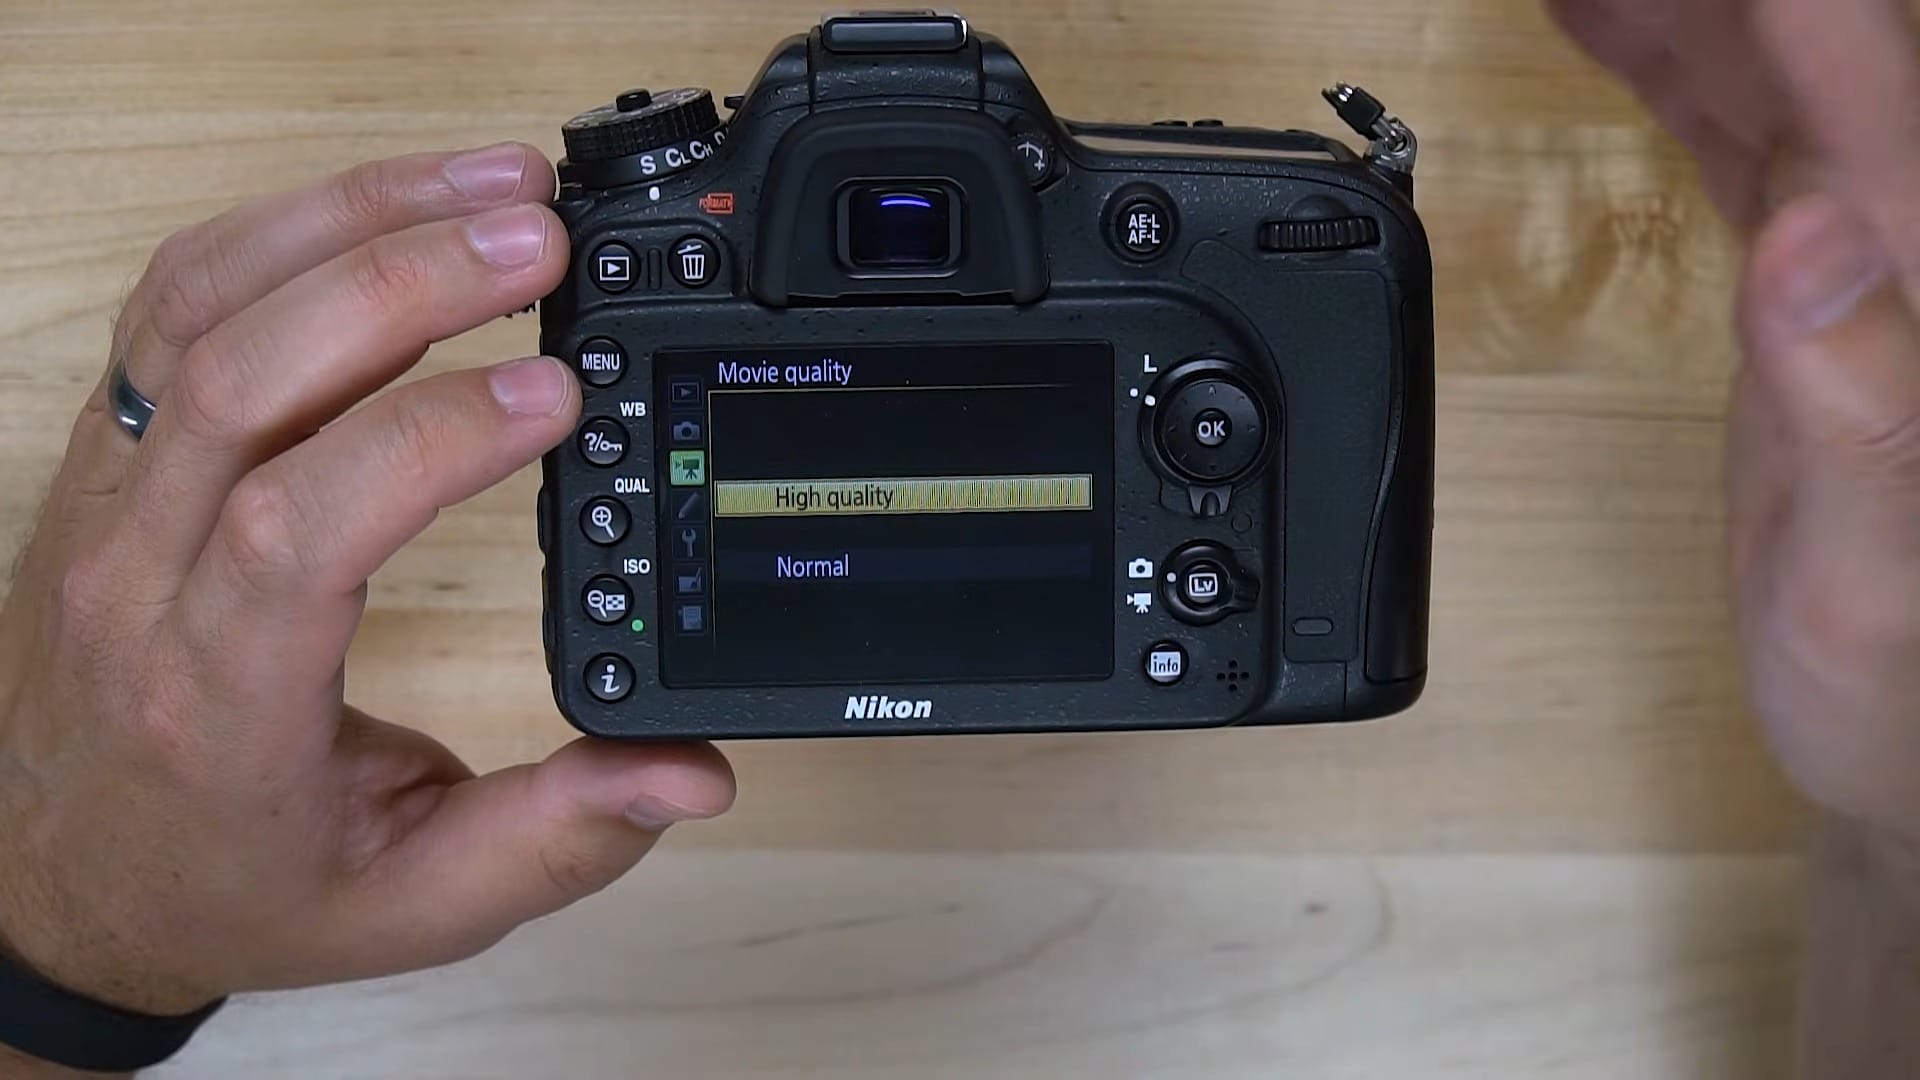
I set Movie quality to High quality. I want the best quality video that I’m able to get.
Microphone Sensitivity
By default, microphone sensitivity is set to Auto. I set mine to Manual sensitivity. Whether you’re using the built-in microphone or an external mic like a Rode VideoMic, you want to take manual control over your audio.
The reason is that on Auto, whenever there’s a dip in your audio, like when a person stops talking or the noise you set your levels for goes away, the camera raises the audio levels trying to find something to record. That’s when you get a lot of background noise, fuzz, and stuff like that. Putting your audio in manual keeps that from happening.
Picture Control: Flat
The last thing I do is set my Picture Control to Flat. A flat picture is a much more flexible image for post-production. When I color correct my video in an editor like Premiere Pro or Final Cut Pro X, I have more room to move in both directions with my exposure and my contrast.
If you’re not interested in that, just leave it on Standard, or play with Neutral or Vivid to see what those do. But I always scroll down to Flat, at the bottom of the list, and select it because it gives me the most flexible image in post-production.
Bonus: Show the Focus Point When You Review Your Photos
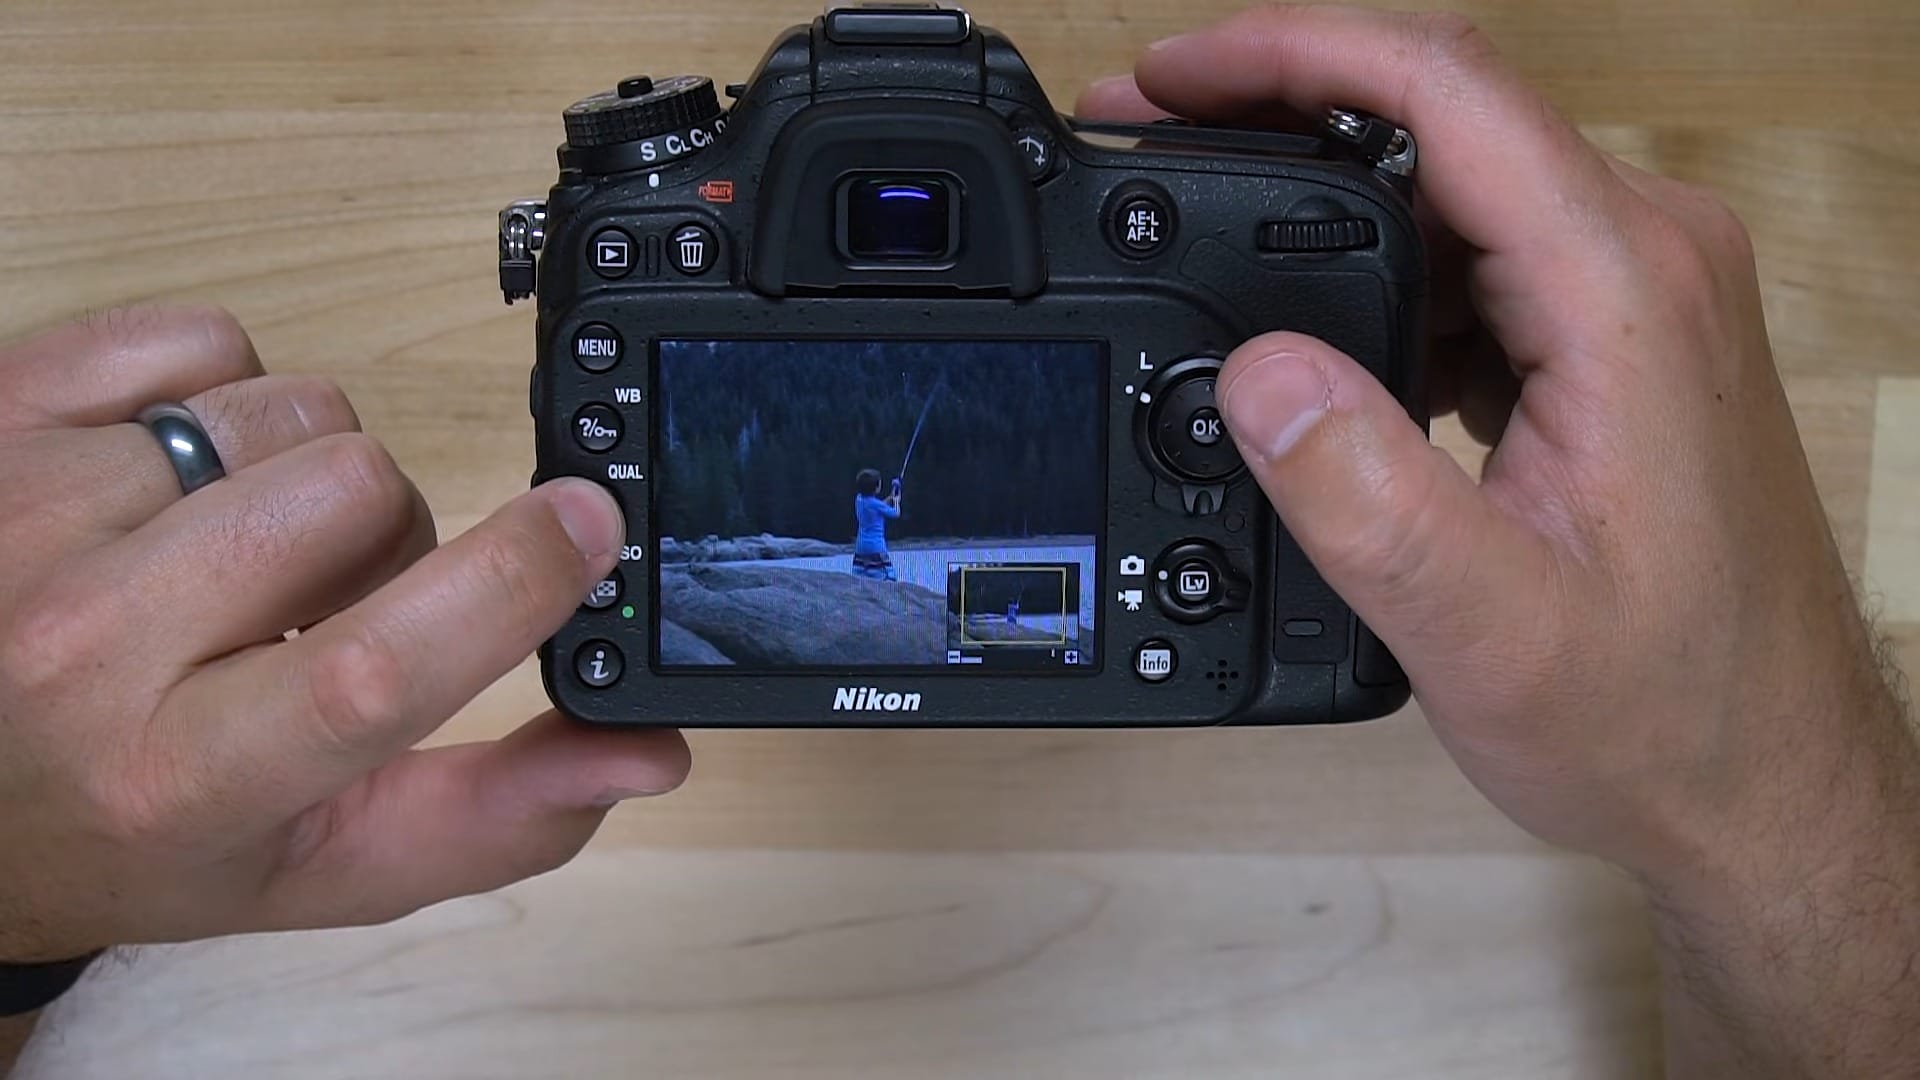
One of the options I really like on the D7200 is the feedback it gives you when you’re previewing the images you just captured. When you’re looking at your photos on that small screen, it’s really important to know your image was in focus. A photo can look like it’s in focus, but it’s even more important to know if focus was perfect, so you still have the opportunity to grab another photo.
How to Turn On the Focus Point Display
- Press MENU and go to the Playback Menu.
- Select Playback display options.
- Highlight Focus point and press right on the multi selector to check it.
- Press OK.
Now when you preview your images, the camera shows the AF points that were active when that image was captured. Depending on which autofocus settings you’re using, this can look completely different, but it lets you know quickly which part of your image was in focus. That makes it a lot easier to tell whether you got the shot.
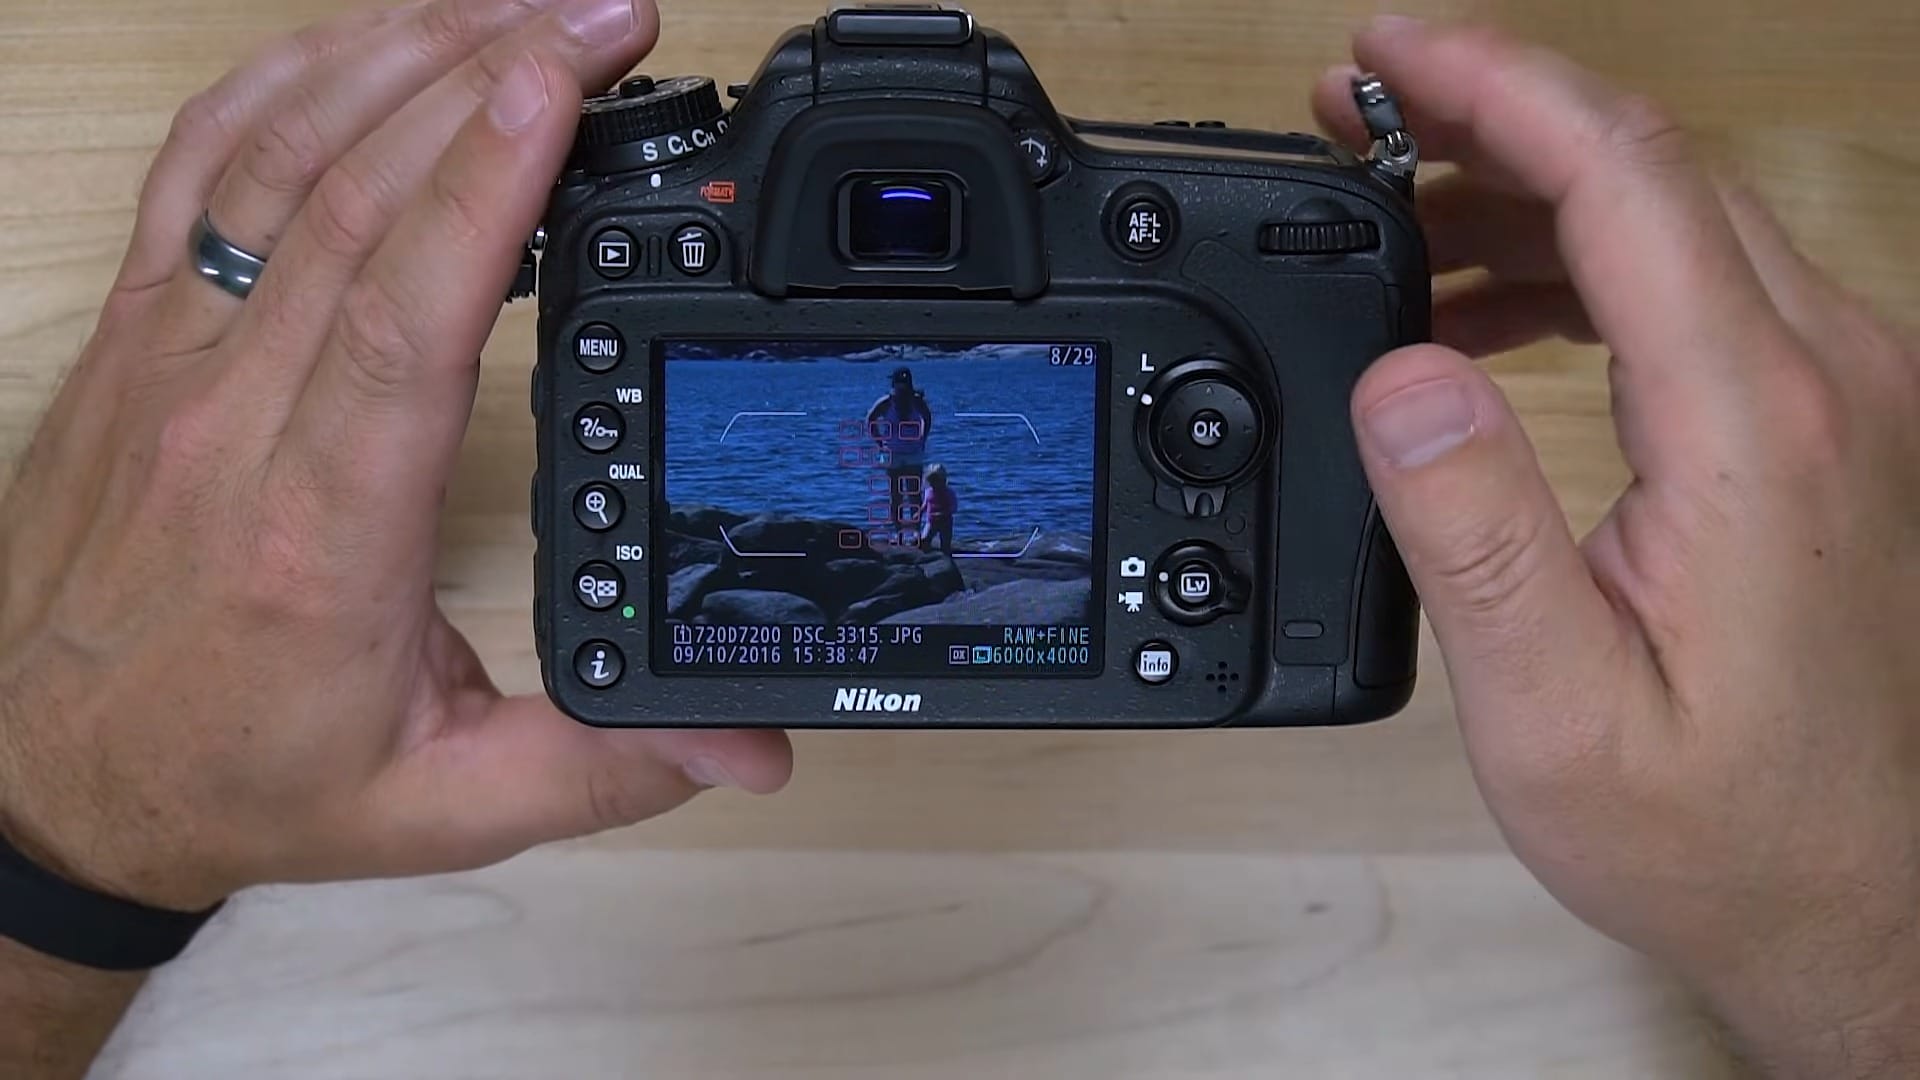
I don’t use this all the time because it can be annoying. I typically turn it on when I don’t have a lot of time to check whether I got the image I wanted. The other way to do it is to leave it off, pull up an image in playback, and hit the magnifying glass button to zoom in and check your focus.
Bonus: Set Up Back Button Focus
Back button focus is definitely one of the things I set up on my camera. It takes a little more time, so I made a separate video on it, but here’s the short version.
Back button focus takes autofocus off of the shutter button and puts it on a button on the back of the camera. That way you take pictures with the shutter button and focus with the back button. It limits the opportunity for mistakes, like when you prefocus on something, let off, go to prefocus again, and your camera accidentally focuses on the wrong thing.
- Press MENU, go to the Custom Setting Menu, and choose f Controls.
- Select f4 Assign AE-L/AF-L button, choose Press, and set it to AF-ON.
- Go back to the Custom Setting Menu and choose a Autofocus.
- Select a4 AF activation and choose AF-ON only.
Now half-pressing the shutter button won’t start autofocus. The AE-L/AF-L button does that instead. With AF-C set, hold that button down and the camera keeps focusing as you shoot. Let off of it, and focus stays right where it is.
For the full walkthrough, watch my video on how to enable back button focus on the Nikon D7200.
Still shooting in Auto? If you want to understand what all of these settings actually do, check out my free Ditch Auto course. It walks you through shutter speed, aperture, and ISO so you can get out of Auto for good.
Was this helpful?
Frequently Asked Questions
Should I shoot RAW or JPEG on the Nikon D7200?
Why can't I select AF-C in live view on the D7200?
Should I turn off Active D-Lighting on the D7200?
How do I turn off the beep on the Nikon D7200?
What frame rate should I use for video on the Nikon D7200?
Should I set microphone sensitivity to manual on the D7200?
What is the Flat Picture Control on the D7200 used for?
How can I tell if a photo is in focus on the D7200?
How do I set up back button focus on the Nikon D7200?
