Sony RX100 VII Setup Guide: The 12 Settings I Change First
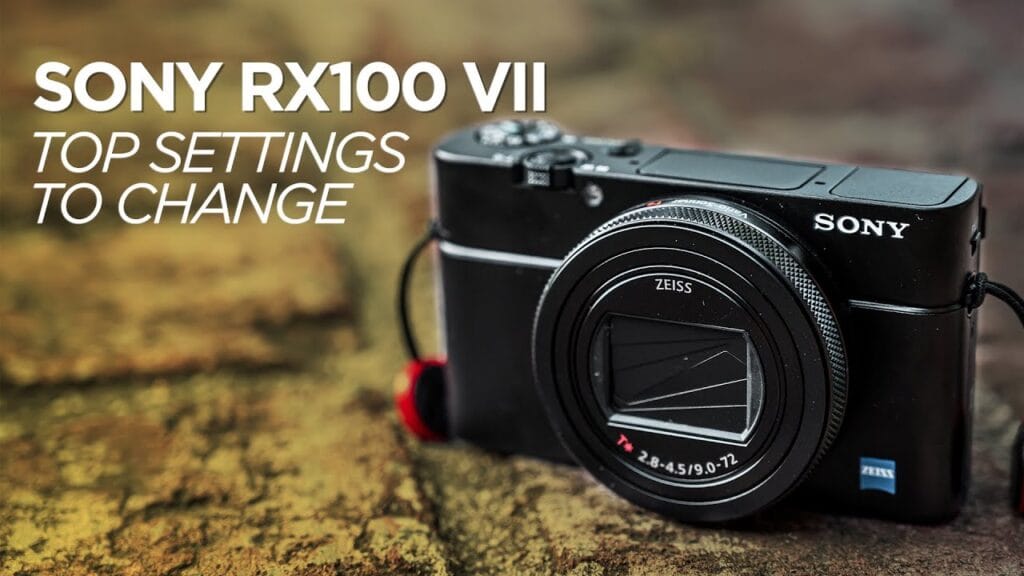
Before I change anything, I set the date, time, and time zone, put the camera in manual mode, and format the SD card in the camera. Then I change 12 settings on the RX100 VII: RAW & JPEG, Flexible Spot (M) focus area, Neutral Creative Style, XAVC S 4K at 30p 100M, ISO on the right side of the control wheel, audio signals to shutter only, Manual Exposure for movies, a rule of thirds grid, 2-second Auto Review, the touch pad for the EVF, copyright info, and a custom file name prefix.
Video
Whenever I get a new camera, I change some settings to fit the way I shoot. These are the top 12 settings I change on the Sony RX100 VII. I had the previous version of this camera too, and a lot of these settings apply to the earlier RX100 models as well. If you just want the list, it’s in the table below.
Sony RX100 VII Settings Quick Reference
| # | Setting | Where to Find It | What I Use |
|---|---|---|---|
| 1 | File Format (still) | Camera Settings1 > File Format | RAW & JPEG |
| 2 | Focus Area | Fn > Focus Area | Flexible Spot: M |
| 3 | Creative Style | Camera Settings1 > Creative Style | Neutral |
| 4 | Movie File Format and Record Setting | Camera Settings2 > File Format / Record Setting | XAVC S 4K, 30p 100M |
| 5 | Control wheel right button | Camera Settings2 > Custom Key | ISO (instead of Flash Mode) |
| 6 | Audio signals | Camera Settings2 > Audio signals | On:Shutter Only |
| 7 | Movie Exposure Mode | Camera Settings2 > Exposure Mode (dial on Movie) | Manual Exposure |
| 8 | Grid Line | Camera Settings2 > Grid Line | Rule of 3rds Grid |
| 9 | Auto Review | Camera Settings2 > Auto Review | 2 Sec. |
| 10 | Touch Panel/Pad | Setup > Touch Panel/Pad | Touch Panel+Pad, Relative, right half |
| 11 | Copyright Info | Setup > Copyright Info | My name, All Rights Reserved |
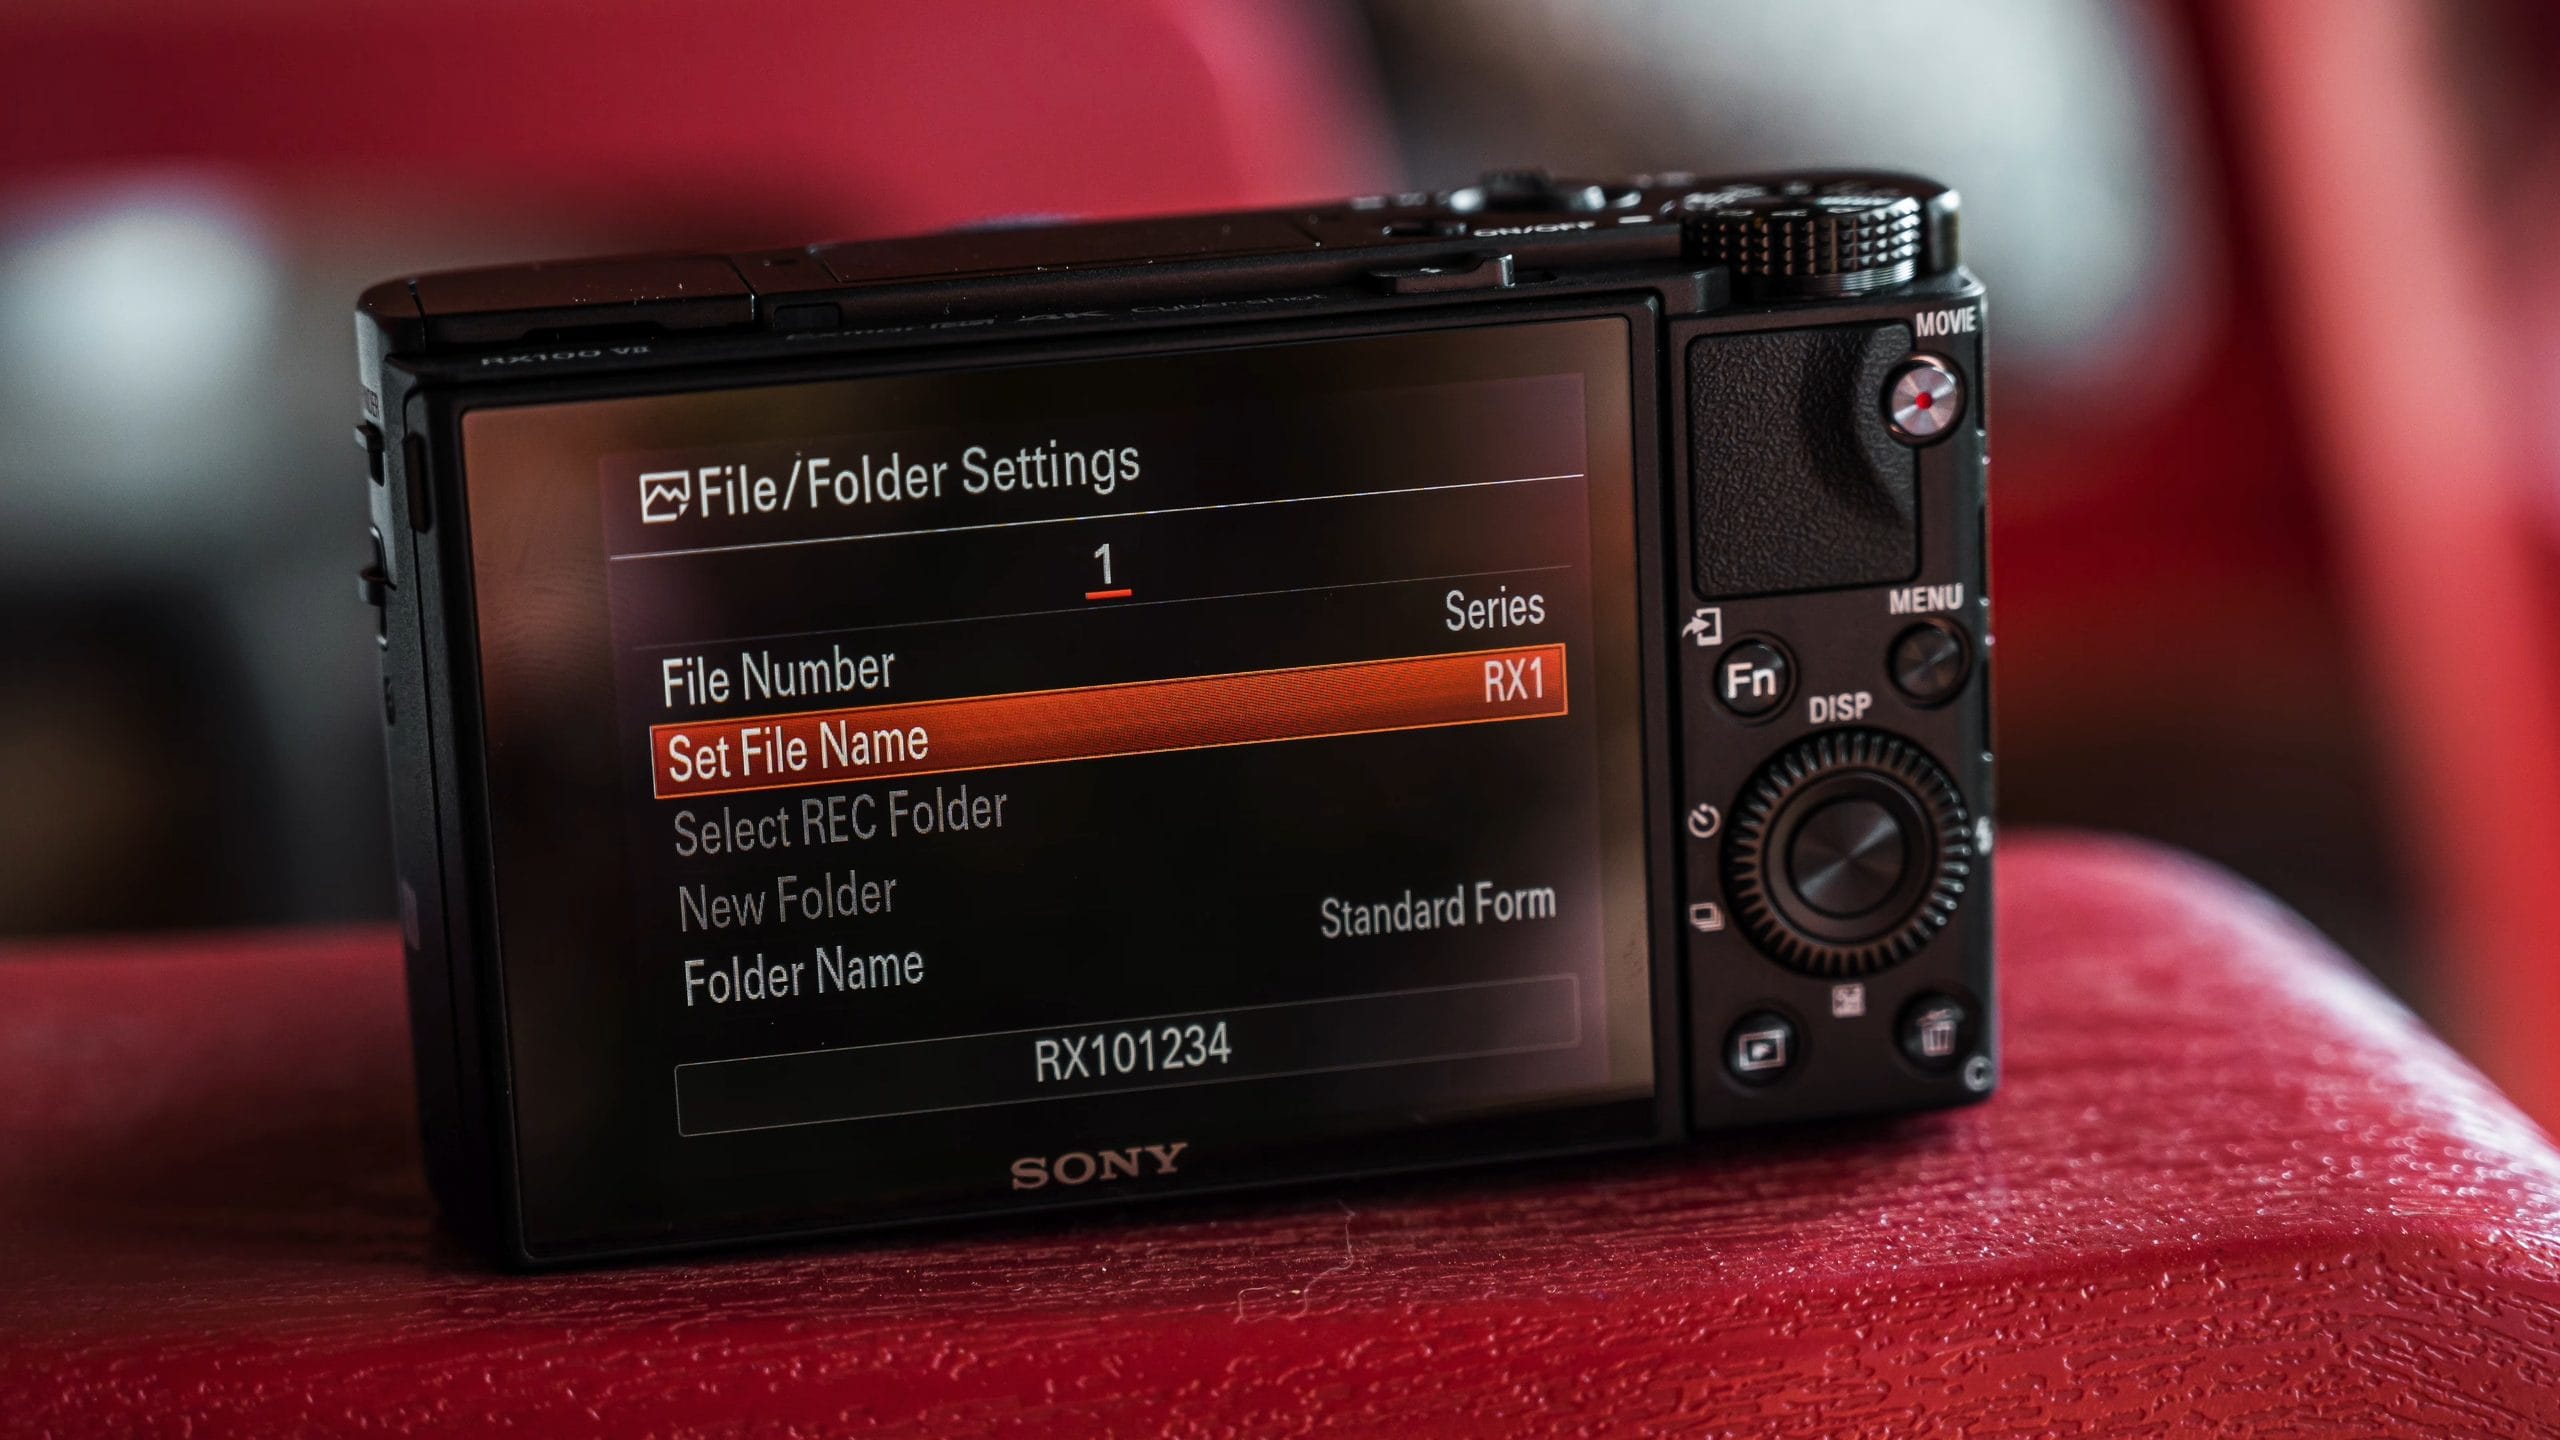
| 12 | File name prefix | Setup > File/Folder Settings > Set File Name | A prefix specific to this camera |
Before You Change Anything
There are a couple of things I do before I jump into the settings.
Set the Date, Time, and Time Zone
Even though it’s super exciting to get a new camera and you want to jump right in, the first thing you want to do is set the date, time, and the right time zone. If you don’t, you’re going to have issues when you upload your photos to services like Google Photos. They won’t be organized very well, and it’s just going to be frustrating. I customize all of this up front so I don’t have to deal with that later.
Put the Camera in Manual Mode
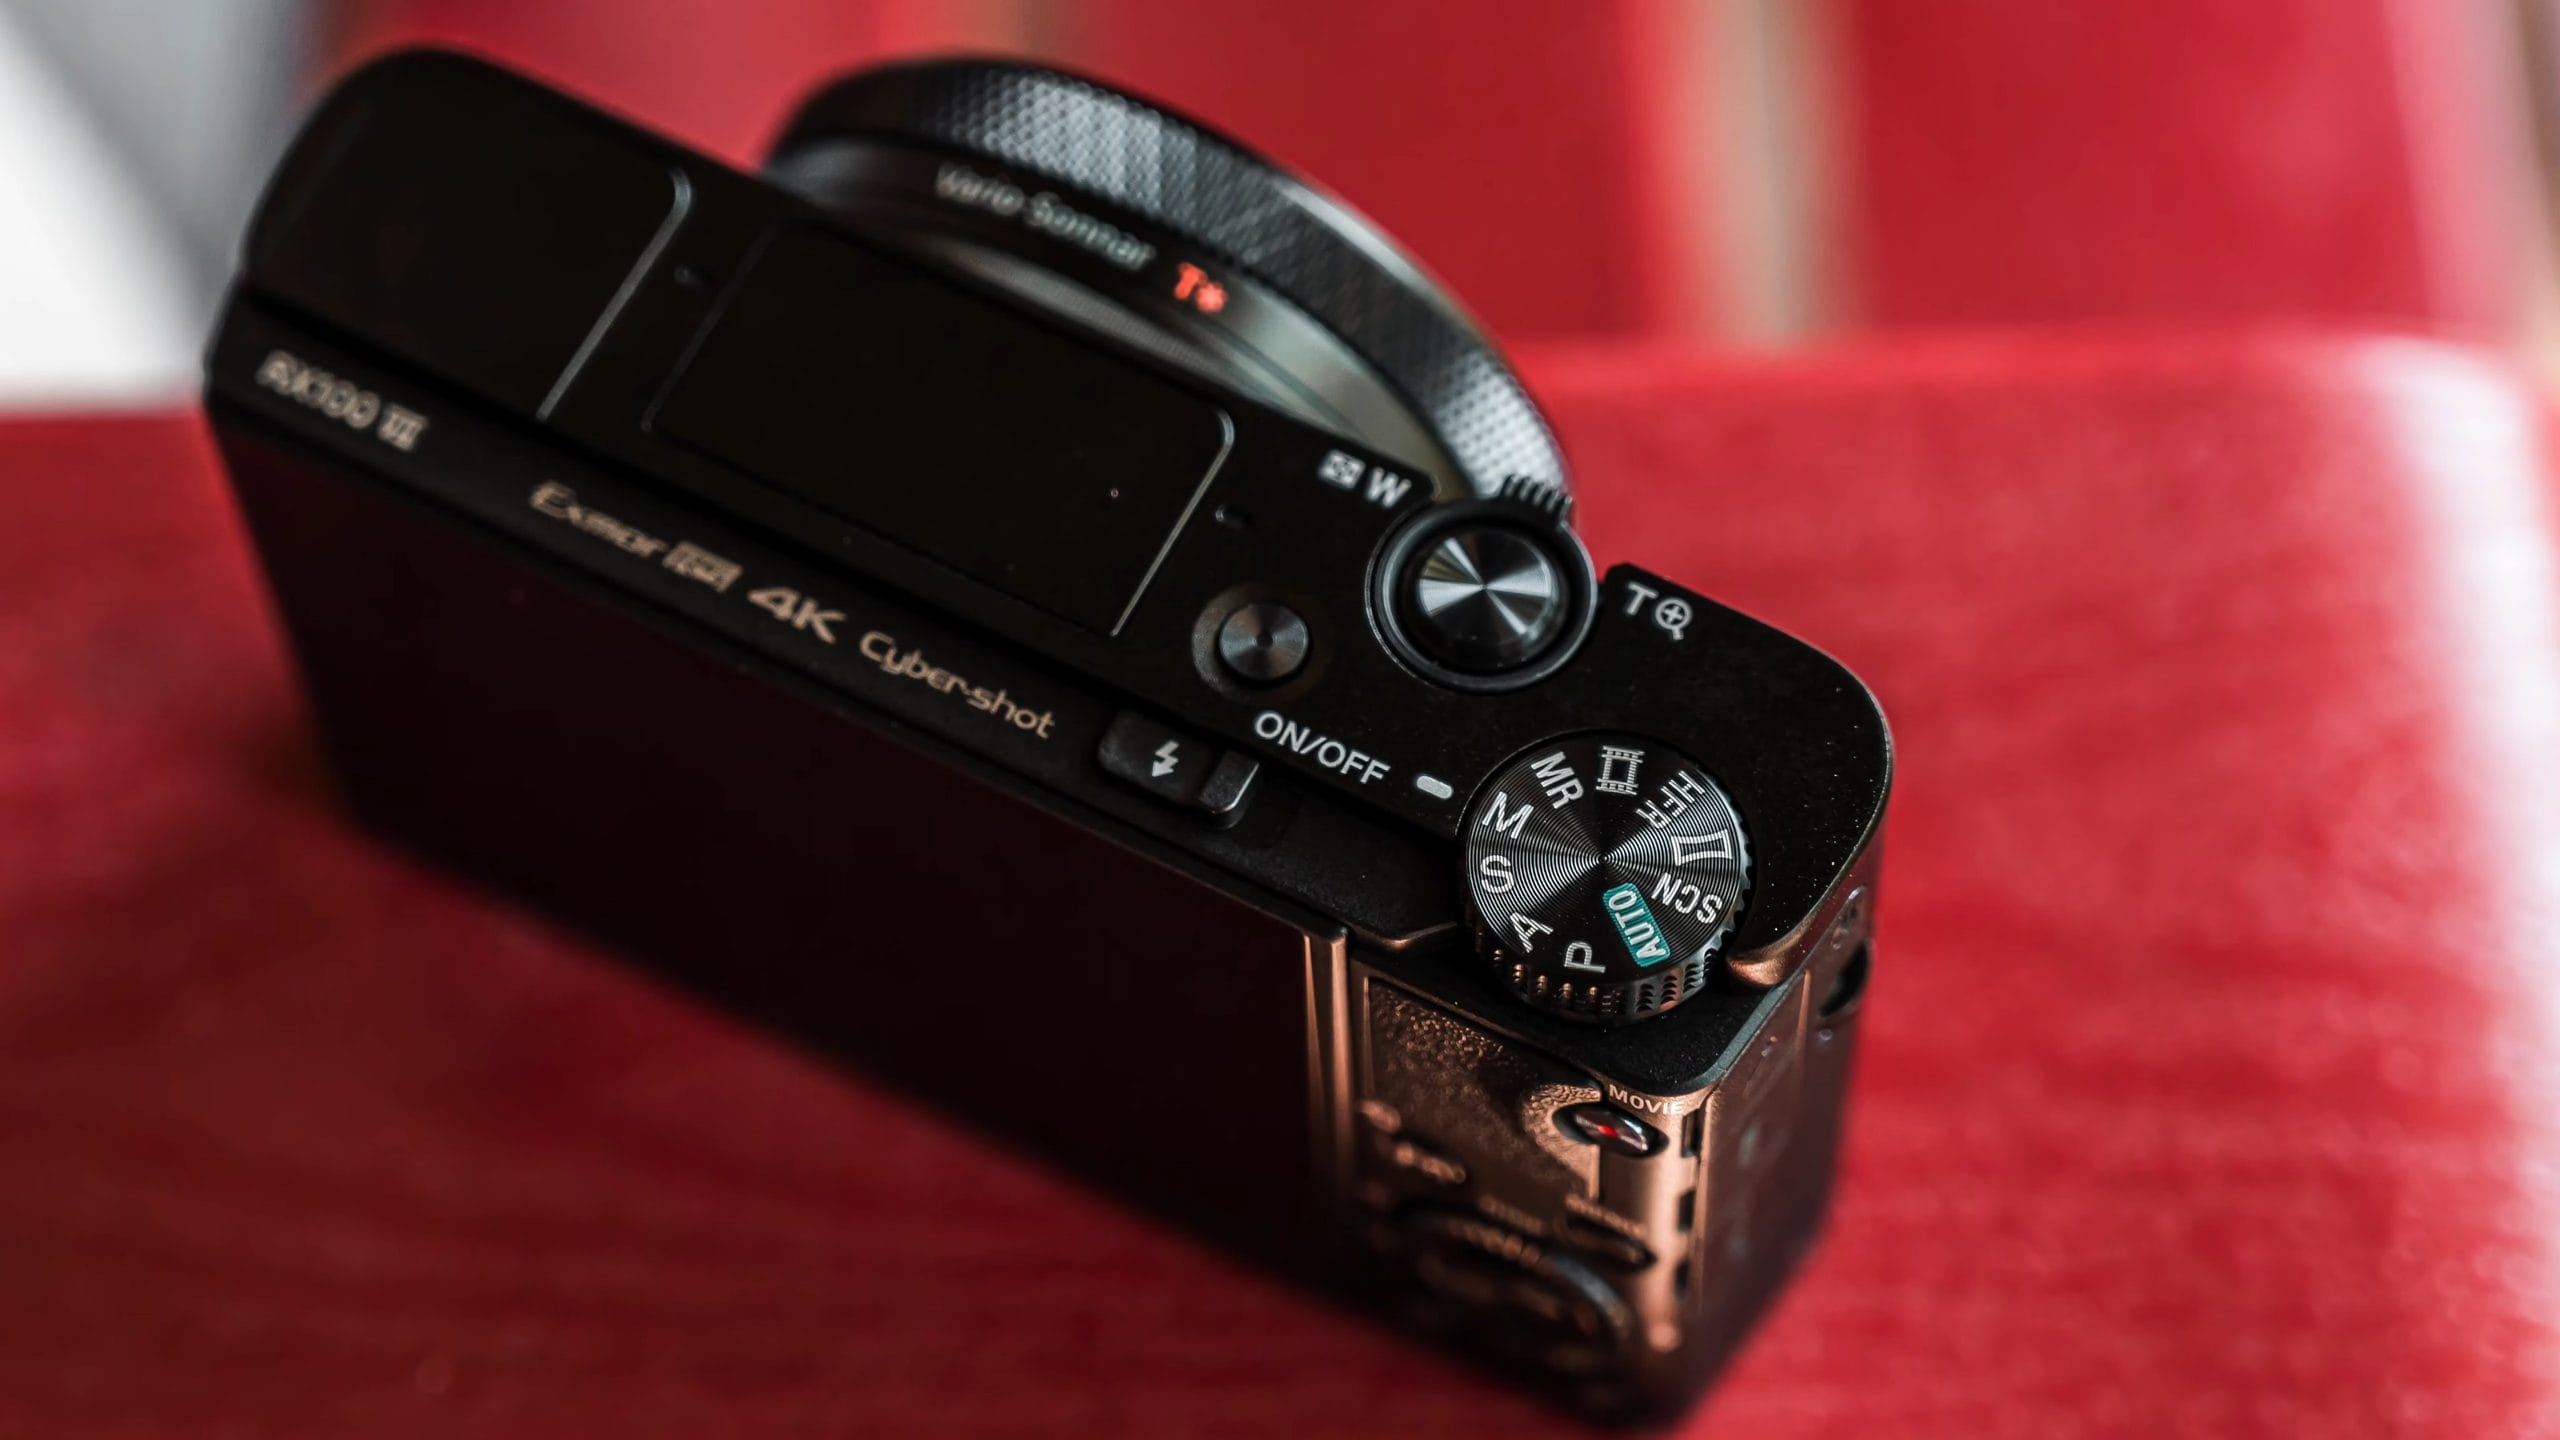
This little camera is absolutely awesome, but one of the reasons you’d spend this kind of money is to get the pro controls you deserve, and you’re not going to get those unless you shoot in manual mode. Aperture priority and shutter priority are good, but I prefer full manual so I can control the aperture, shutter speed, and ISO independently and make sure I get the exposure I’m looking for, not what the camera thinks is best.
Format Your SD Card in the Camera
Even if you’re coming from another Sony, once you make sure everything is off your SD card, put it in the camera and format it there. Don’t format your SD cards in other cameras and then put them in here, and don’t format them on your computer. You’ll get the best longevity and the best experience overall if you format the card in the camera. Because I do that, I don’t have issues with corrupt images or SD cards becoming unreadable.
1. Shoot RAW & JPEG
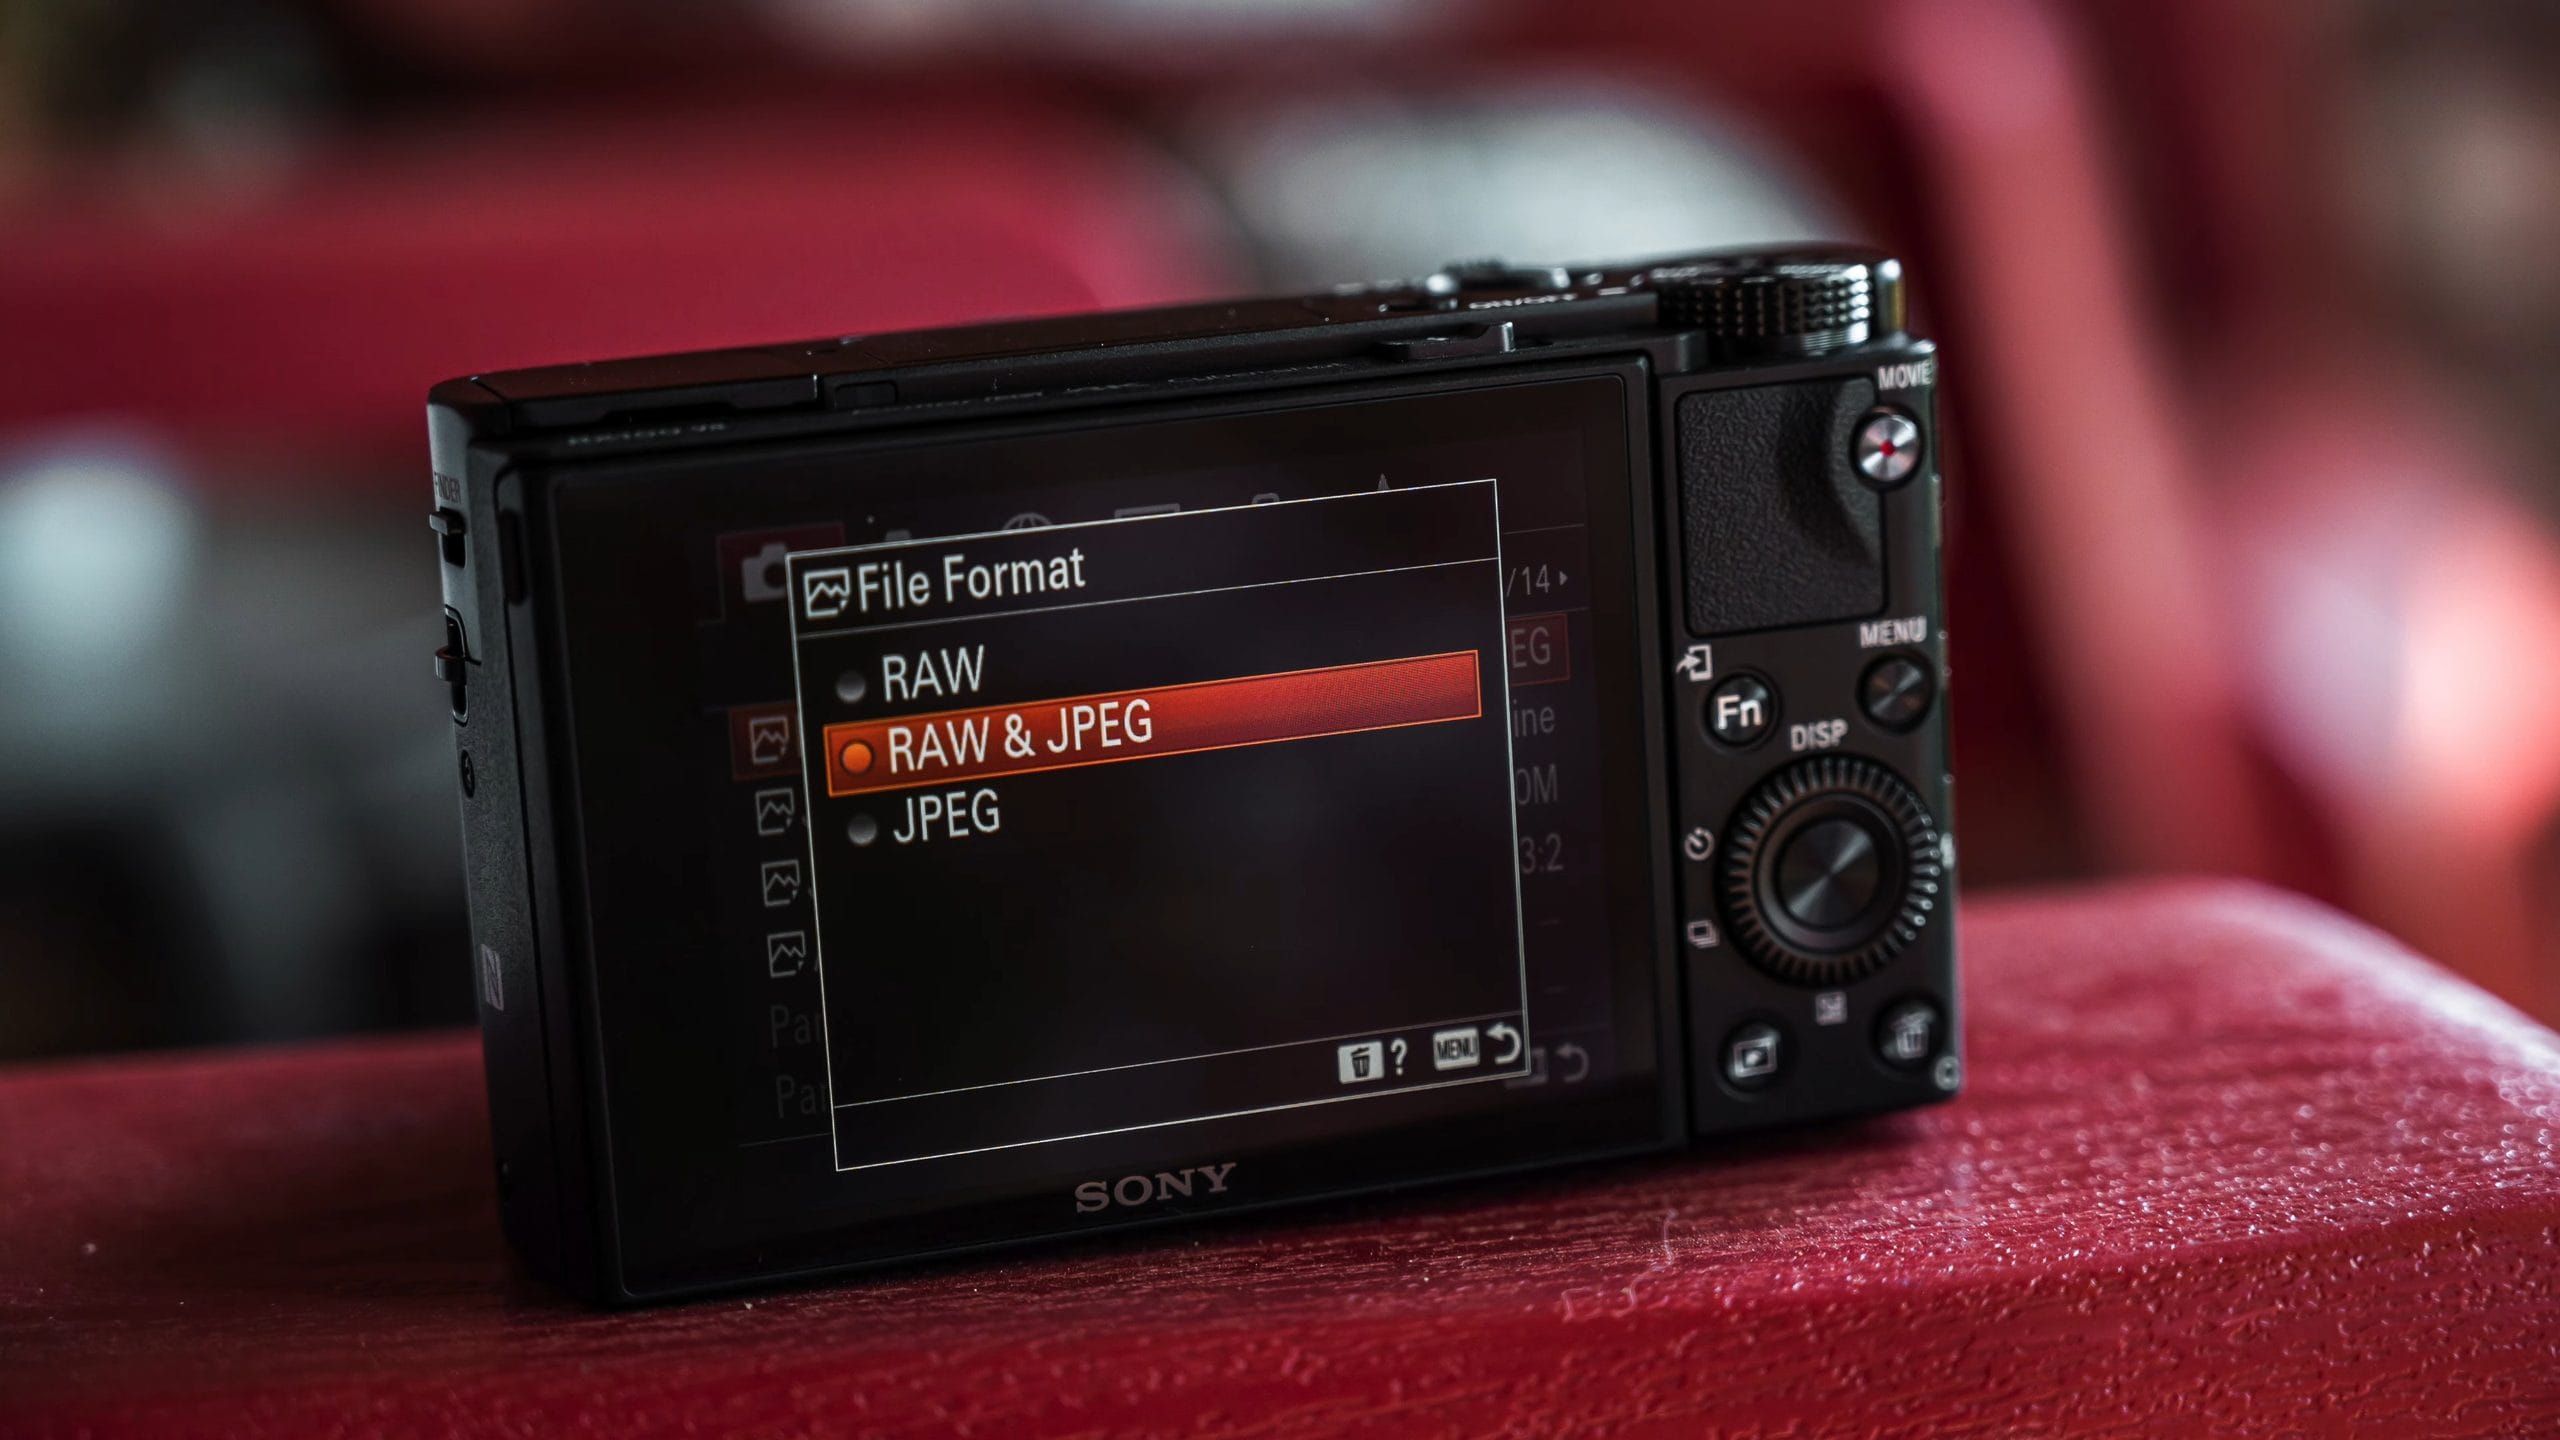
The first thing I do is go into the menu and change the File Format to RAW & JPEG. I want that RAW image. This camera is great, but there are some limitations because of its size, and I want to make sure I’m getting the most out of every image. With the RAW file, I can take it into an editor and have a lot more room for pulling back details. If a photo was overexposed I can pull it back, if it was underexposed I can bump it up, and I can color correct much better.
The reason I shoot JPEGs too is for when I want to transfer images from my camera to my smartphone. The RAW files are quite large and take longer to transfer. If you want to send a bunch of images to your phone to share them with others or on social media, having the JPEGs available makes that much quicker. The camera will convert a RAW to a JPEG for you when you copy it over, but that’s extra processing time and wear and tear on your battery. Shooting RAW & JPEG saves you that time.
I also like shooting RAW & JPEG because if one of your RAW images ever becomes corrupt, maybe through a conversion process or something else, you at least have the JPEG as a backup. I’ve had this happen to me before, which is why I keep shooting RAW & JPEG. There’s only one card slot in this camera, so you can’t write your images to two different SD cards. Of course, if the SD card itself has issues you’re out of luck, but let’s do as much as we can to prevent problems.
You’ll find it in MENU > Camera Settings1 > File Format.
2. Set Focus Area to Flexible Spot
Setting number two is customizing my autofocus. By default, autofocus uses the entire viewable area of the sensor and any point possible, and this camera has a lot of them. The autofocus is really great, and it’s one of the things being promoted as an amazing piece of technology in this camera. But for me, autofocus just doesn’t always get it right.
Autofocus is really great when there’s only one person or one pet in your image and only one set of eyes. But if you have multiple people on different planes, sometimes you want to choose which person is the focal point, and autofocus more often than not gets it wrong. It’s just not consistent. When you don’t have the opportunity to take the shot over and over again, it’s important to set the focus point yourself.
How to Set It
- Press the Fn button and slide over to Focus Area.
- Go down to Flexible Spot. I usually leave it on M for medium.
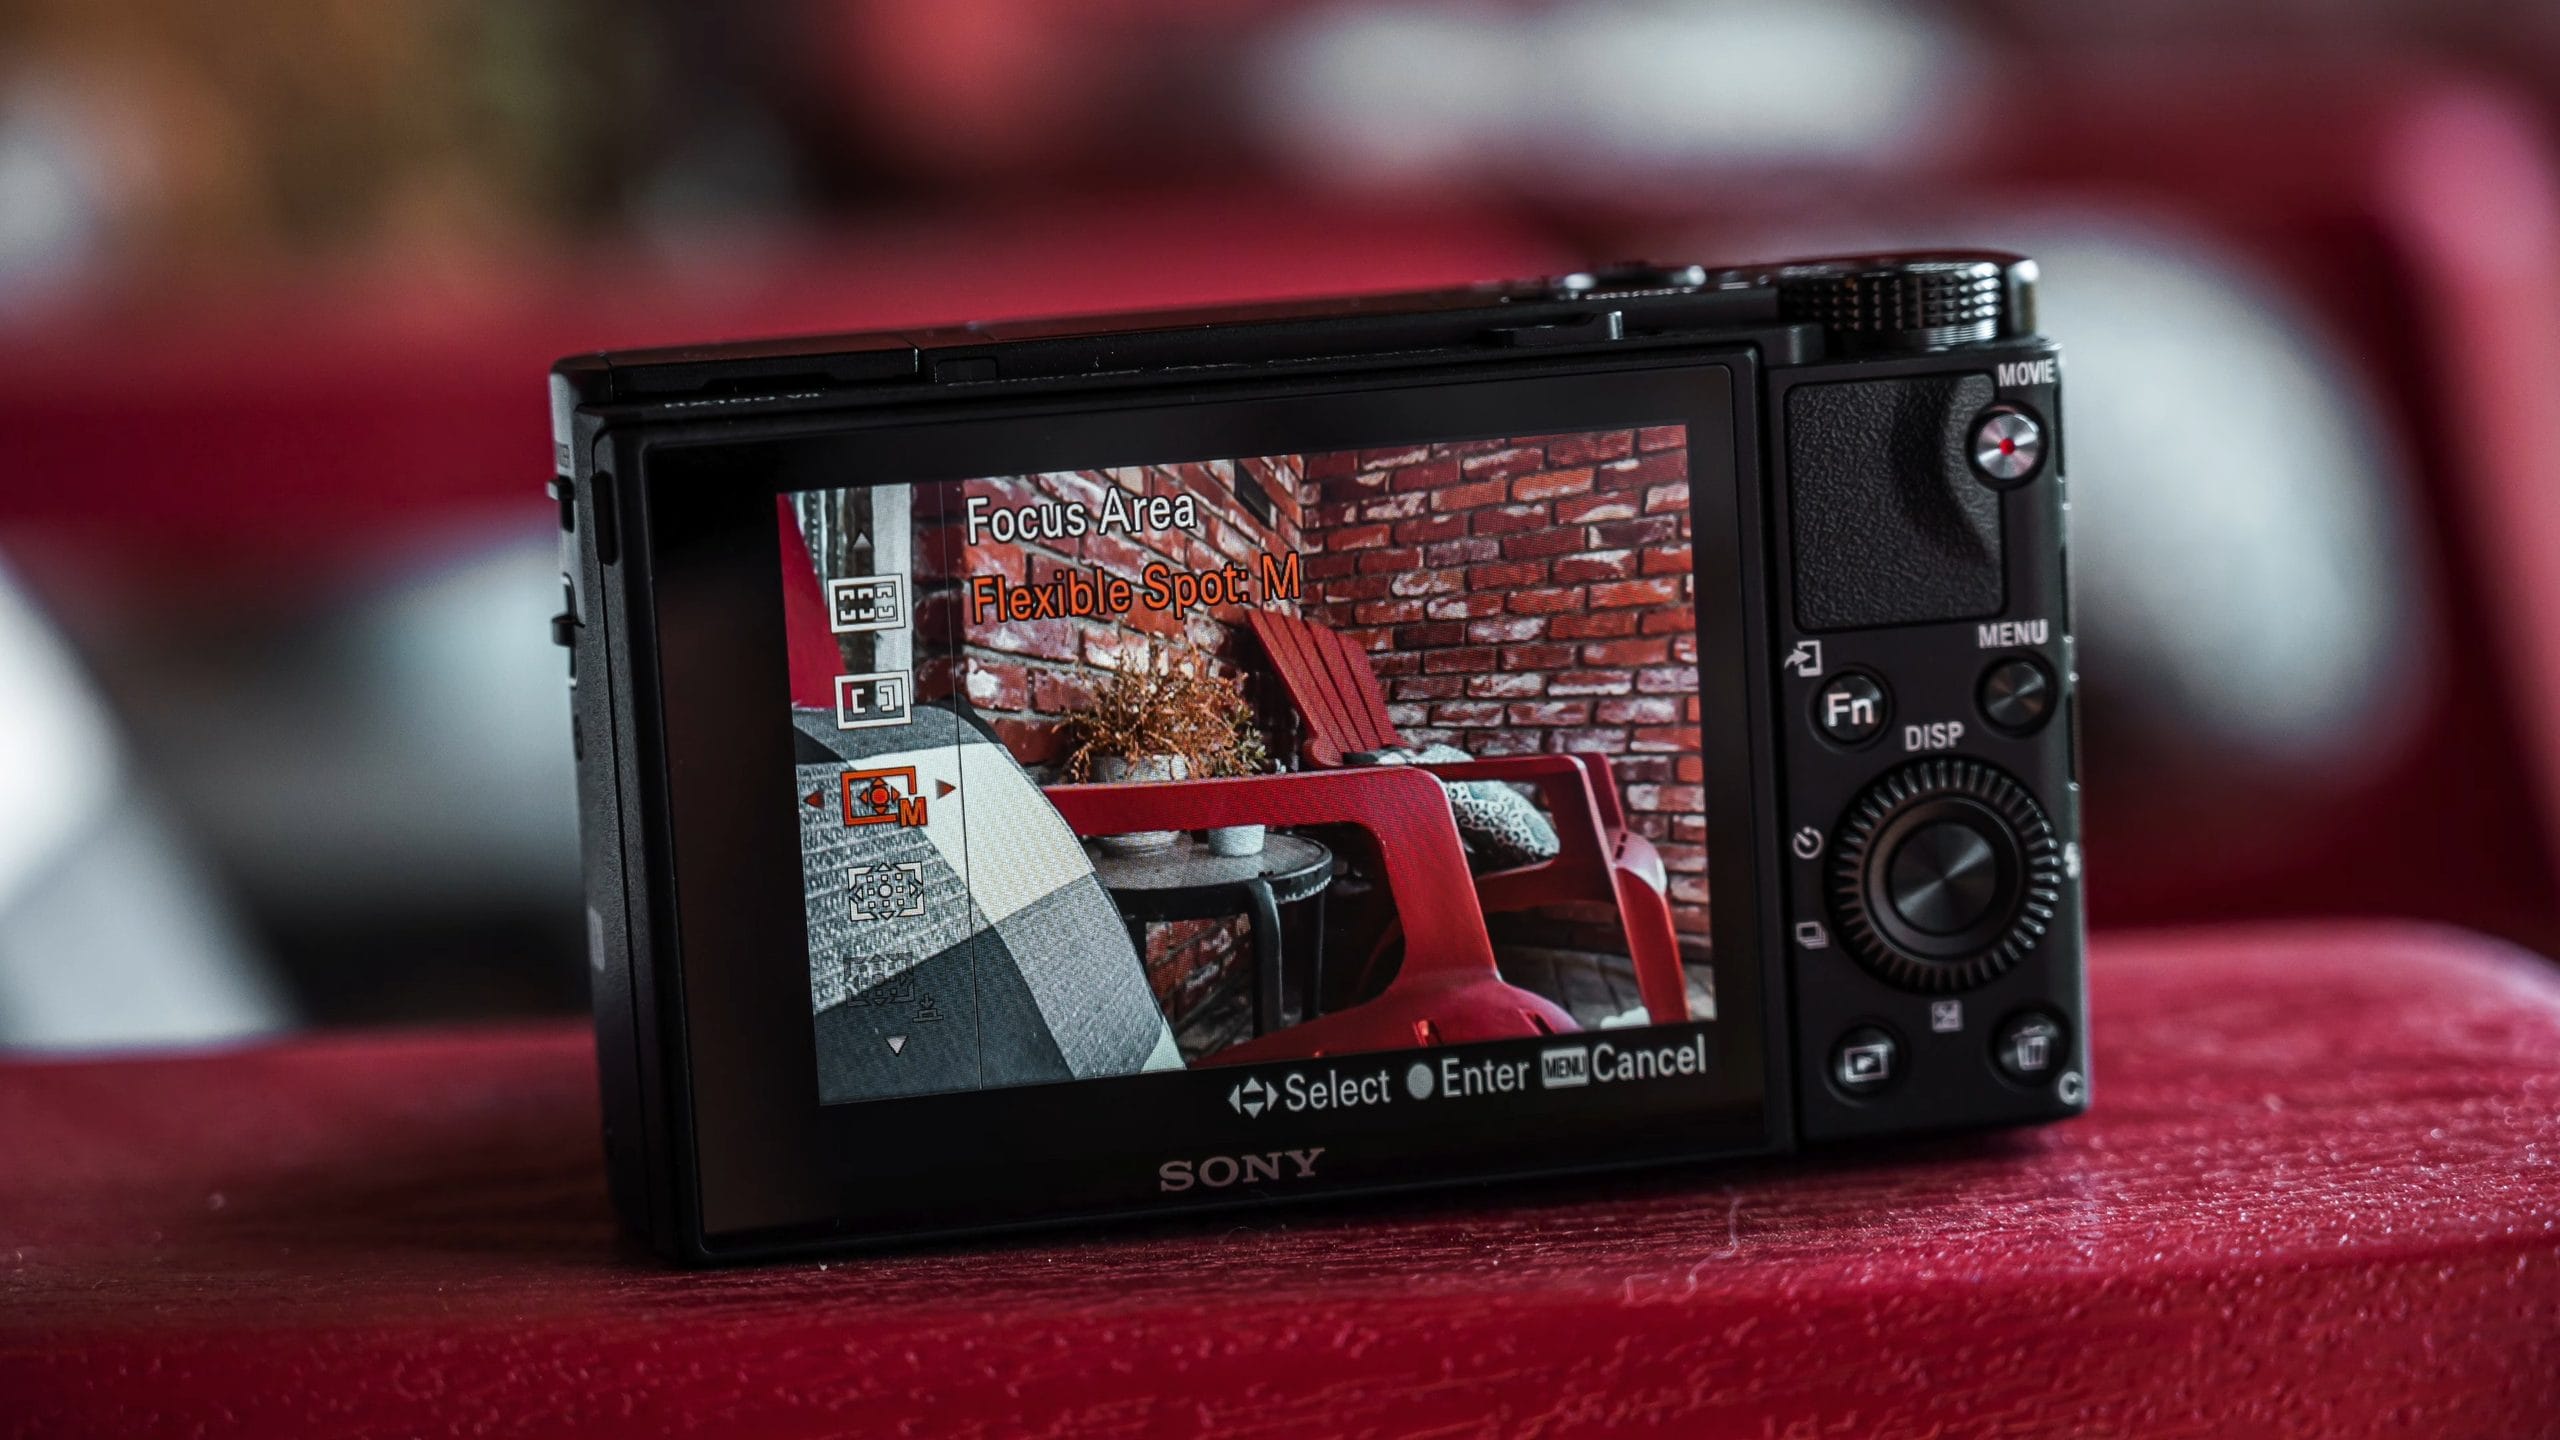
Now you can tap the screen to put the focus point wherever you want it, or press left, right, up, and down on the control wheel and then press the center to apply it. Now it’s locked into that position, so you can frame up your shot the way you want and put the focus point where you want it.
The touchscreen makes this really easy. There’s a really nice EVF on this camera, and I’ll use it in brighter situations, but most of the time with a camera this size I’m using the back screen, and I can just tap the focus point into position. I like that a lot more than having the entire screen available and letting the camera do all the work.
I do this on pretty much every camera, because none of them are perfect. They can’t read my mind, they often miss the shot, and then I miss an opportunity. Nothing feels worse than going through all my images and having to delete a bunch of them because the focus wasn’t in the right spot. It’s not that the camera failed to get focus. It just failed to get focus where I wanted it. I’d rather tell the camera where to focus and move that point around the screen myself.
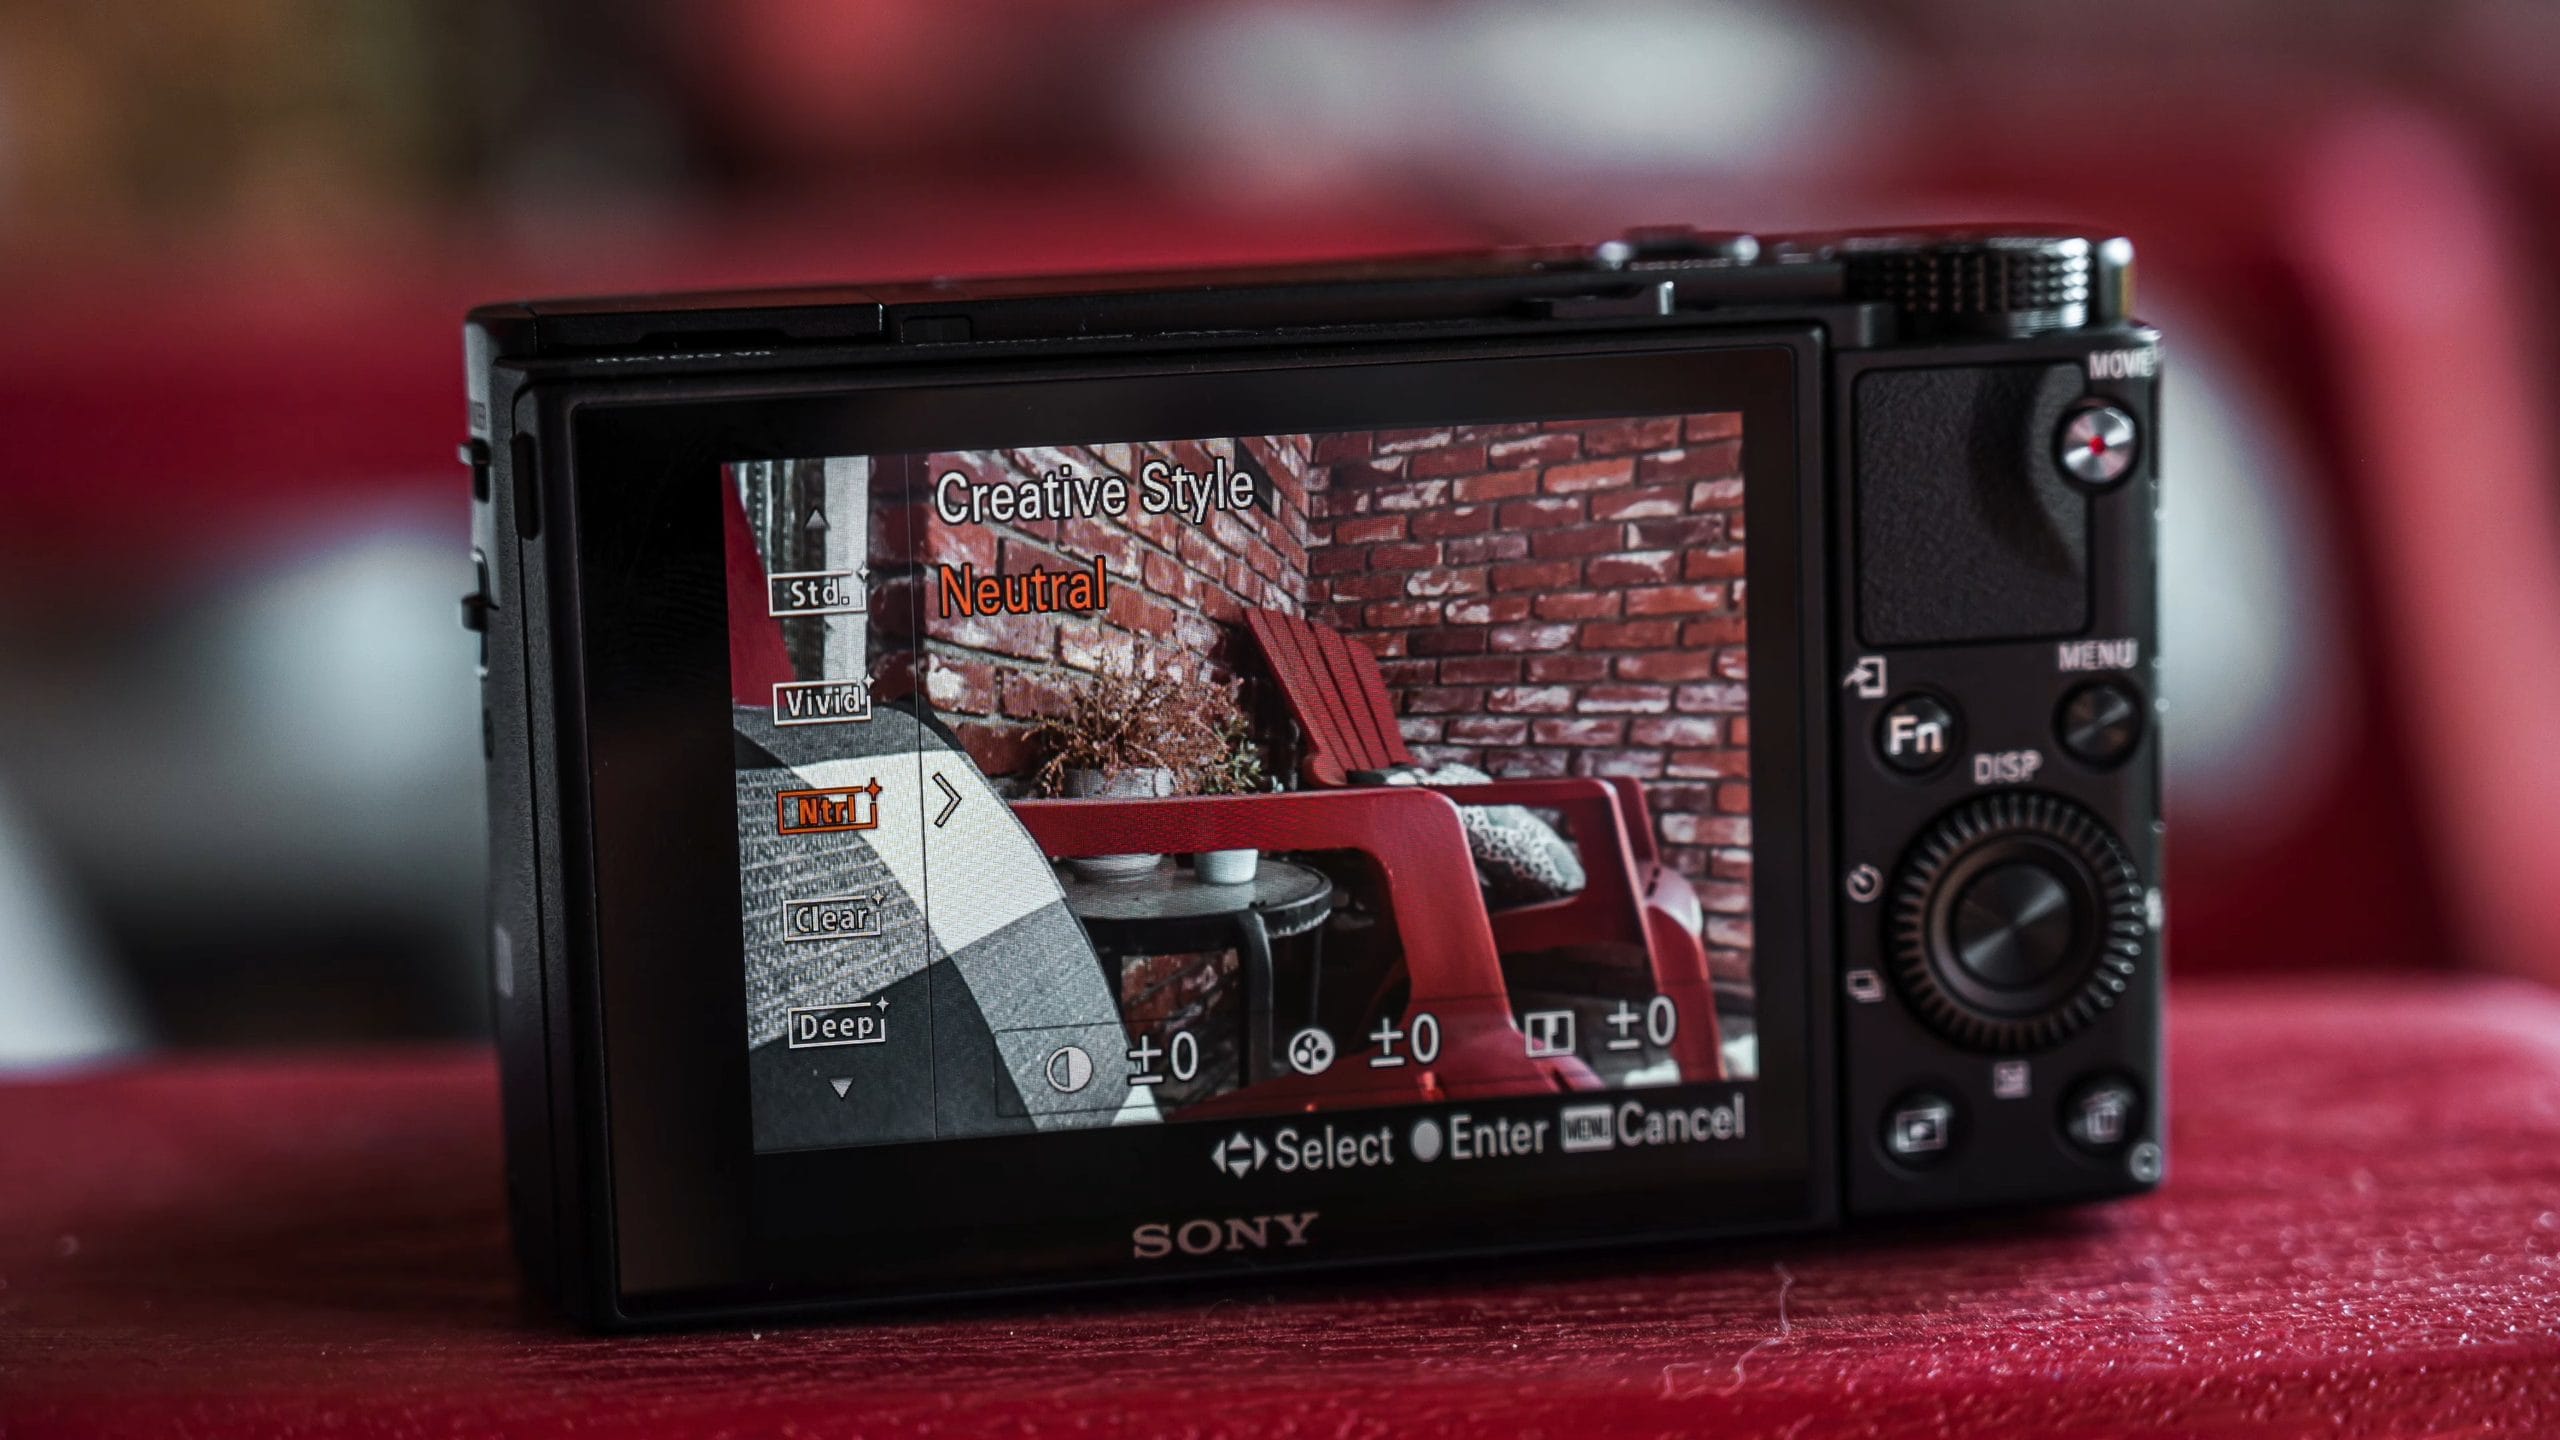
3. Change the Creative Style to Neutral
Number three is setting the Creative Style to Neutral. Creative Style basically applies to your JPEG images, and because I’m often moving my JPEGs from my camera to my smartphone to edit, I’d rather have that image be a little more flat. I don’t want the creative addition the camera throws on the image.
It’s not necessarily a bad thing, but you want as much out of that image as you can get. If the camera adds a bunch of contrast and stuff like that, you won’t have all of that available when you edit it on your phone. You can edit RAW images on your phone too, but those are bigger files, and they’ll clog up your phone if you don’t have a ton of storage. I’d rather just have the JPEG be a little more neutral.
So I change the Creative Style from Standard down to Neutral. You can even go to Clear, but Clear doesn’t really work for me. I’ve found Neutral is a little less contrasty, and that makes it much easier to apply changes in a photo editing app. Even if you’re taking your images straight into Instagram and applying a filter, that filter is going to look much better on a Neutral image than on Standard, because you have more contrast room to play with. You’re not stacking contrast on top of contrast.
You’ll find it in MENU > Camera Settings1 > Creative Style.
4. Shoot Video in 4K at 30p 100M
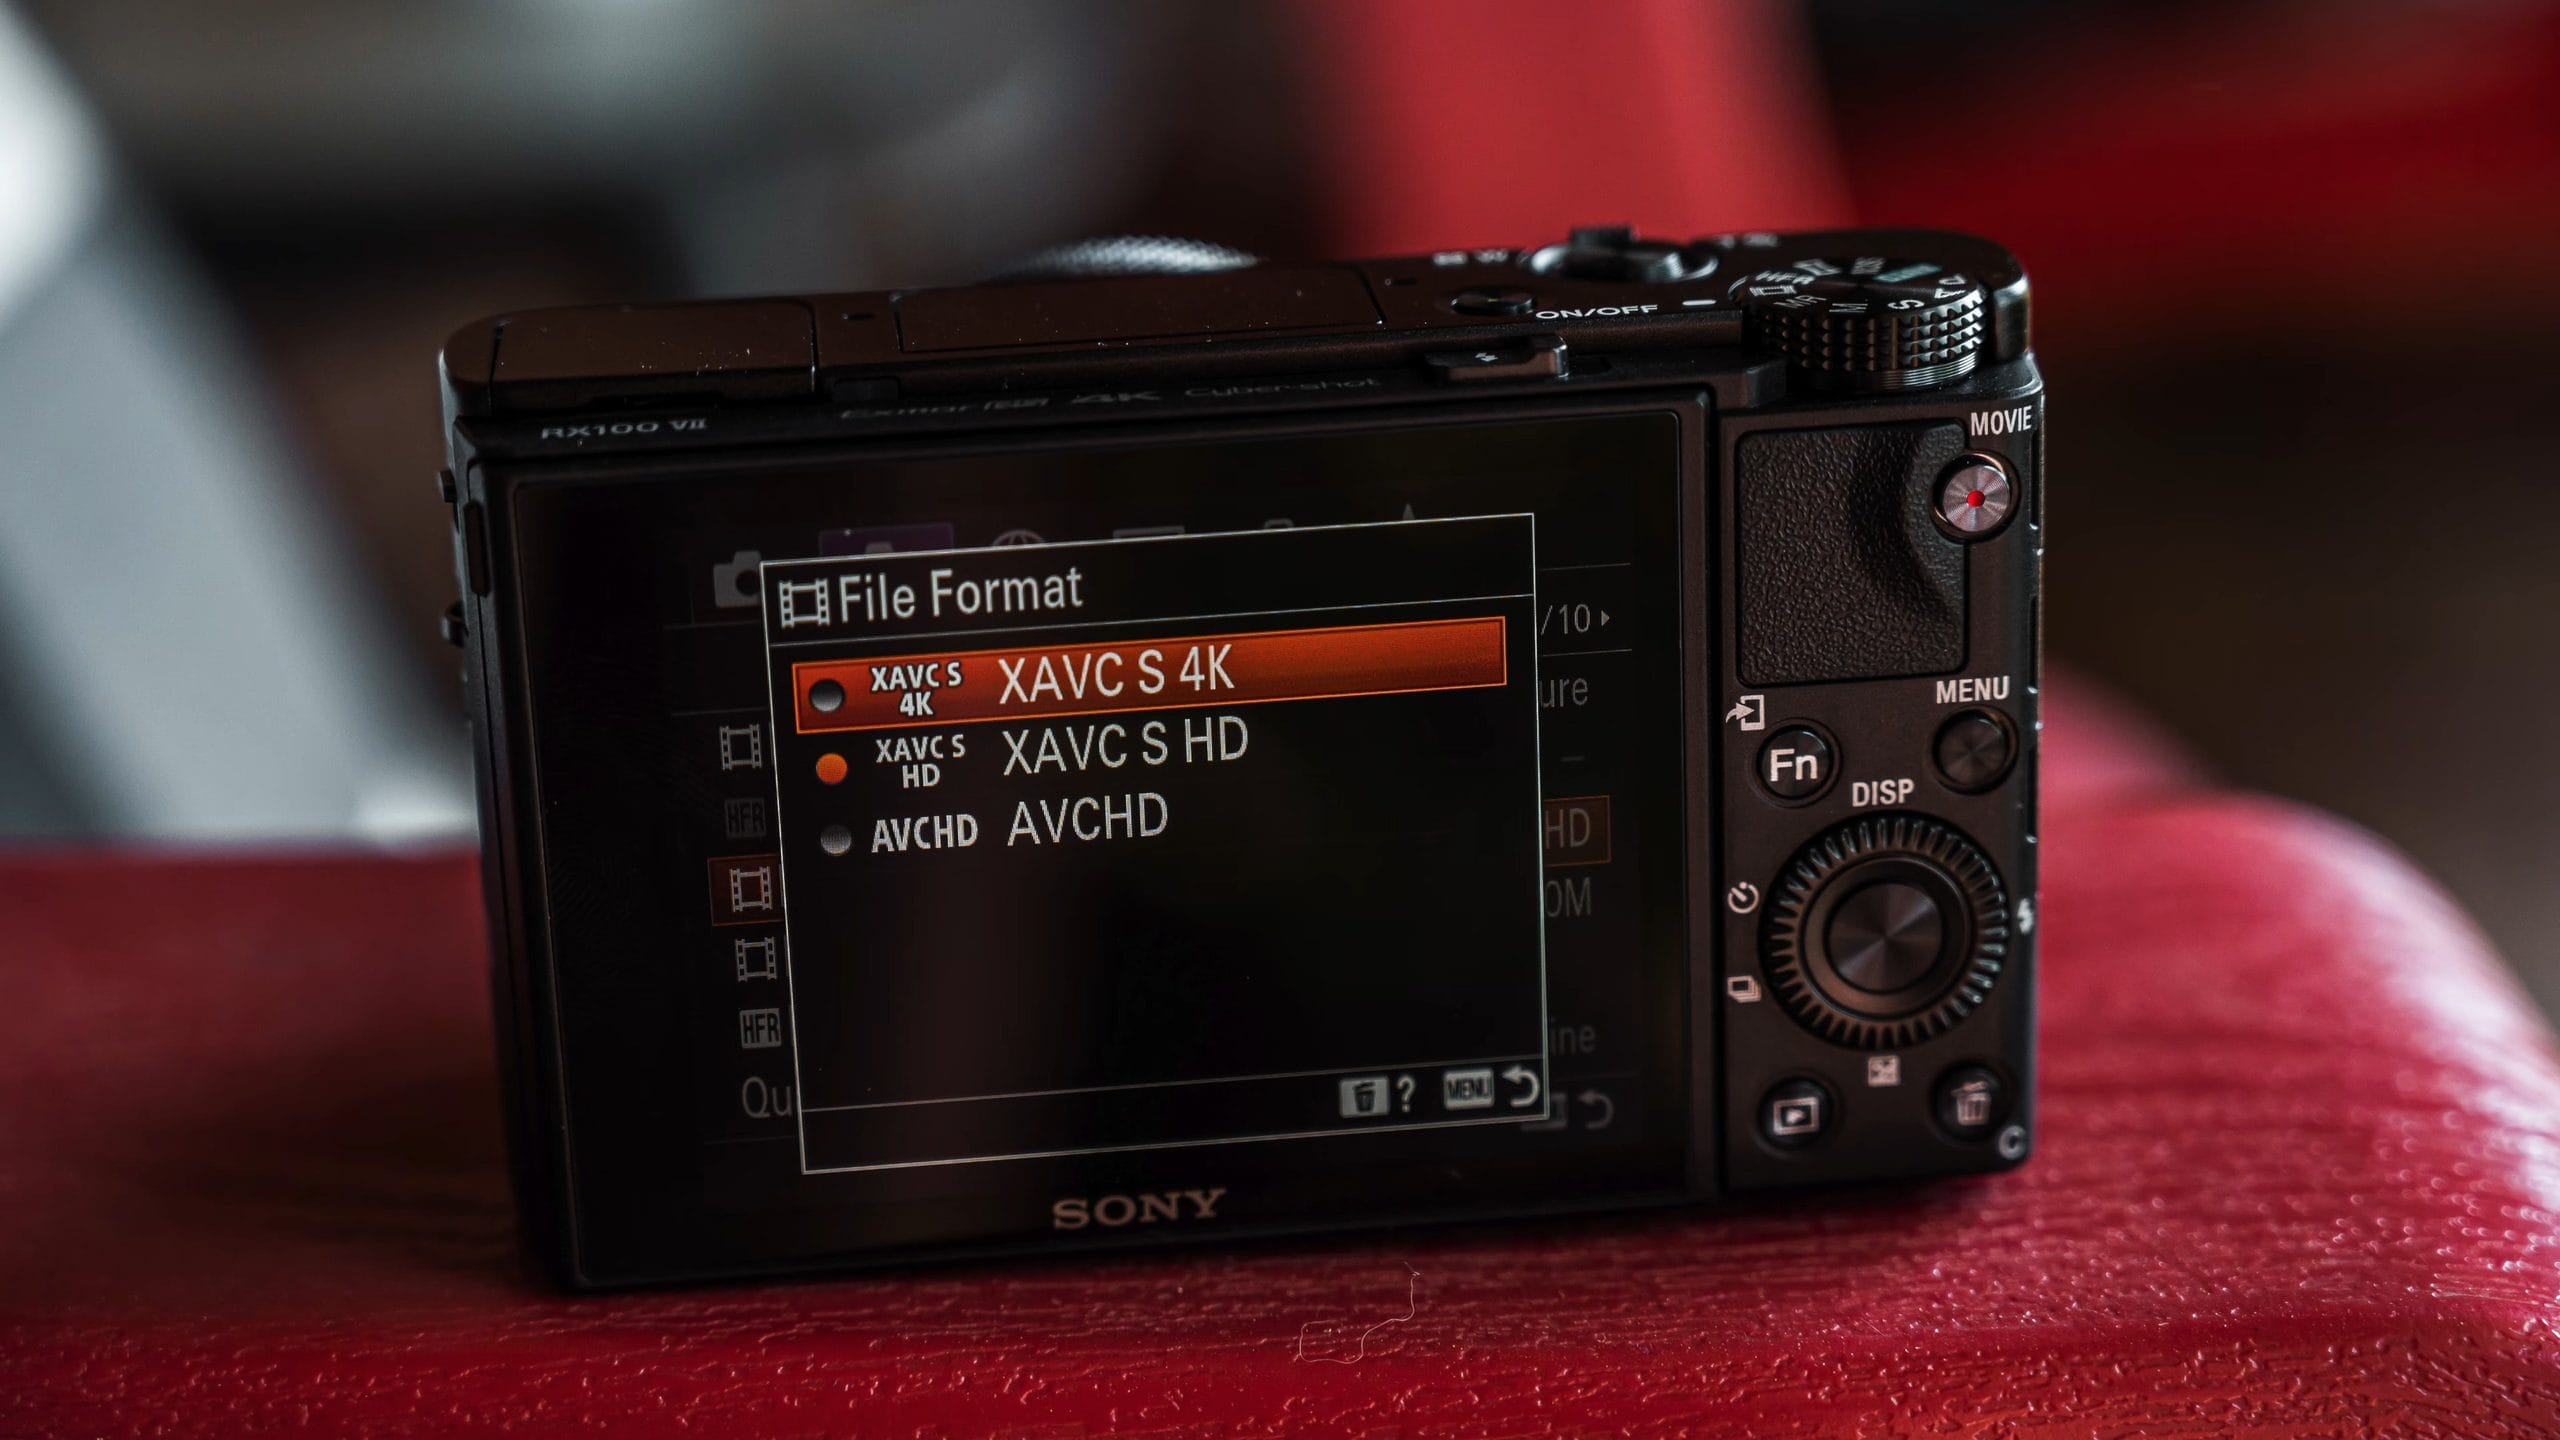
Moving over to the movie settings, I always set the movie File Format to XAVC S 4K. I’ve been shooting everything in 4K for a few reasons. Number one, it future-proofs the content I’m filming. And when people are viewing content now, most of the time it’s on something with a higher resolution than standard HD, so I want my content to come through as clear as possible.
Then I move down to Record Setting and set it to 30p 100M. I want the highest quality file I can get, so I want that bitrate set higher. I shoot 30p because I can slow it down to 24p if I want. You can’t really do much slow motion with 30p footage, but you have a little bit of room if you shoot 30p and edit in 24p.
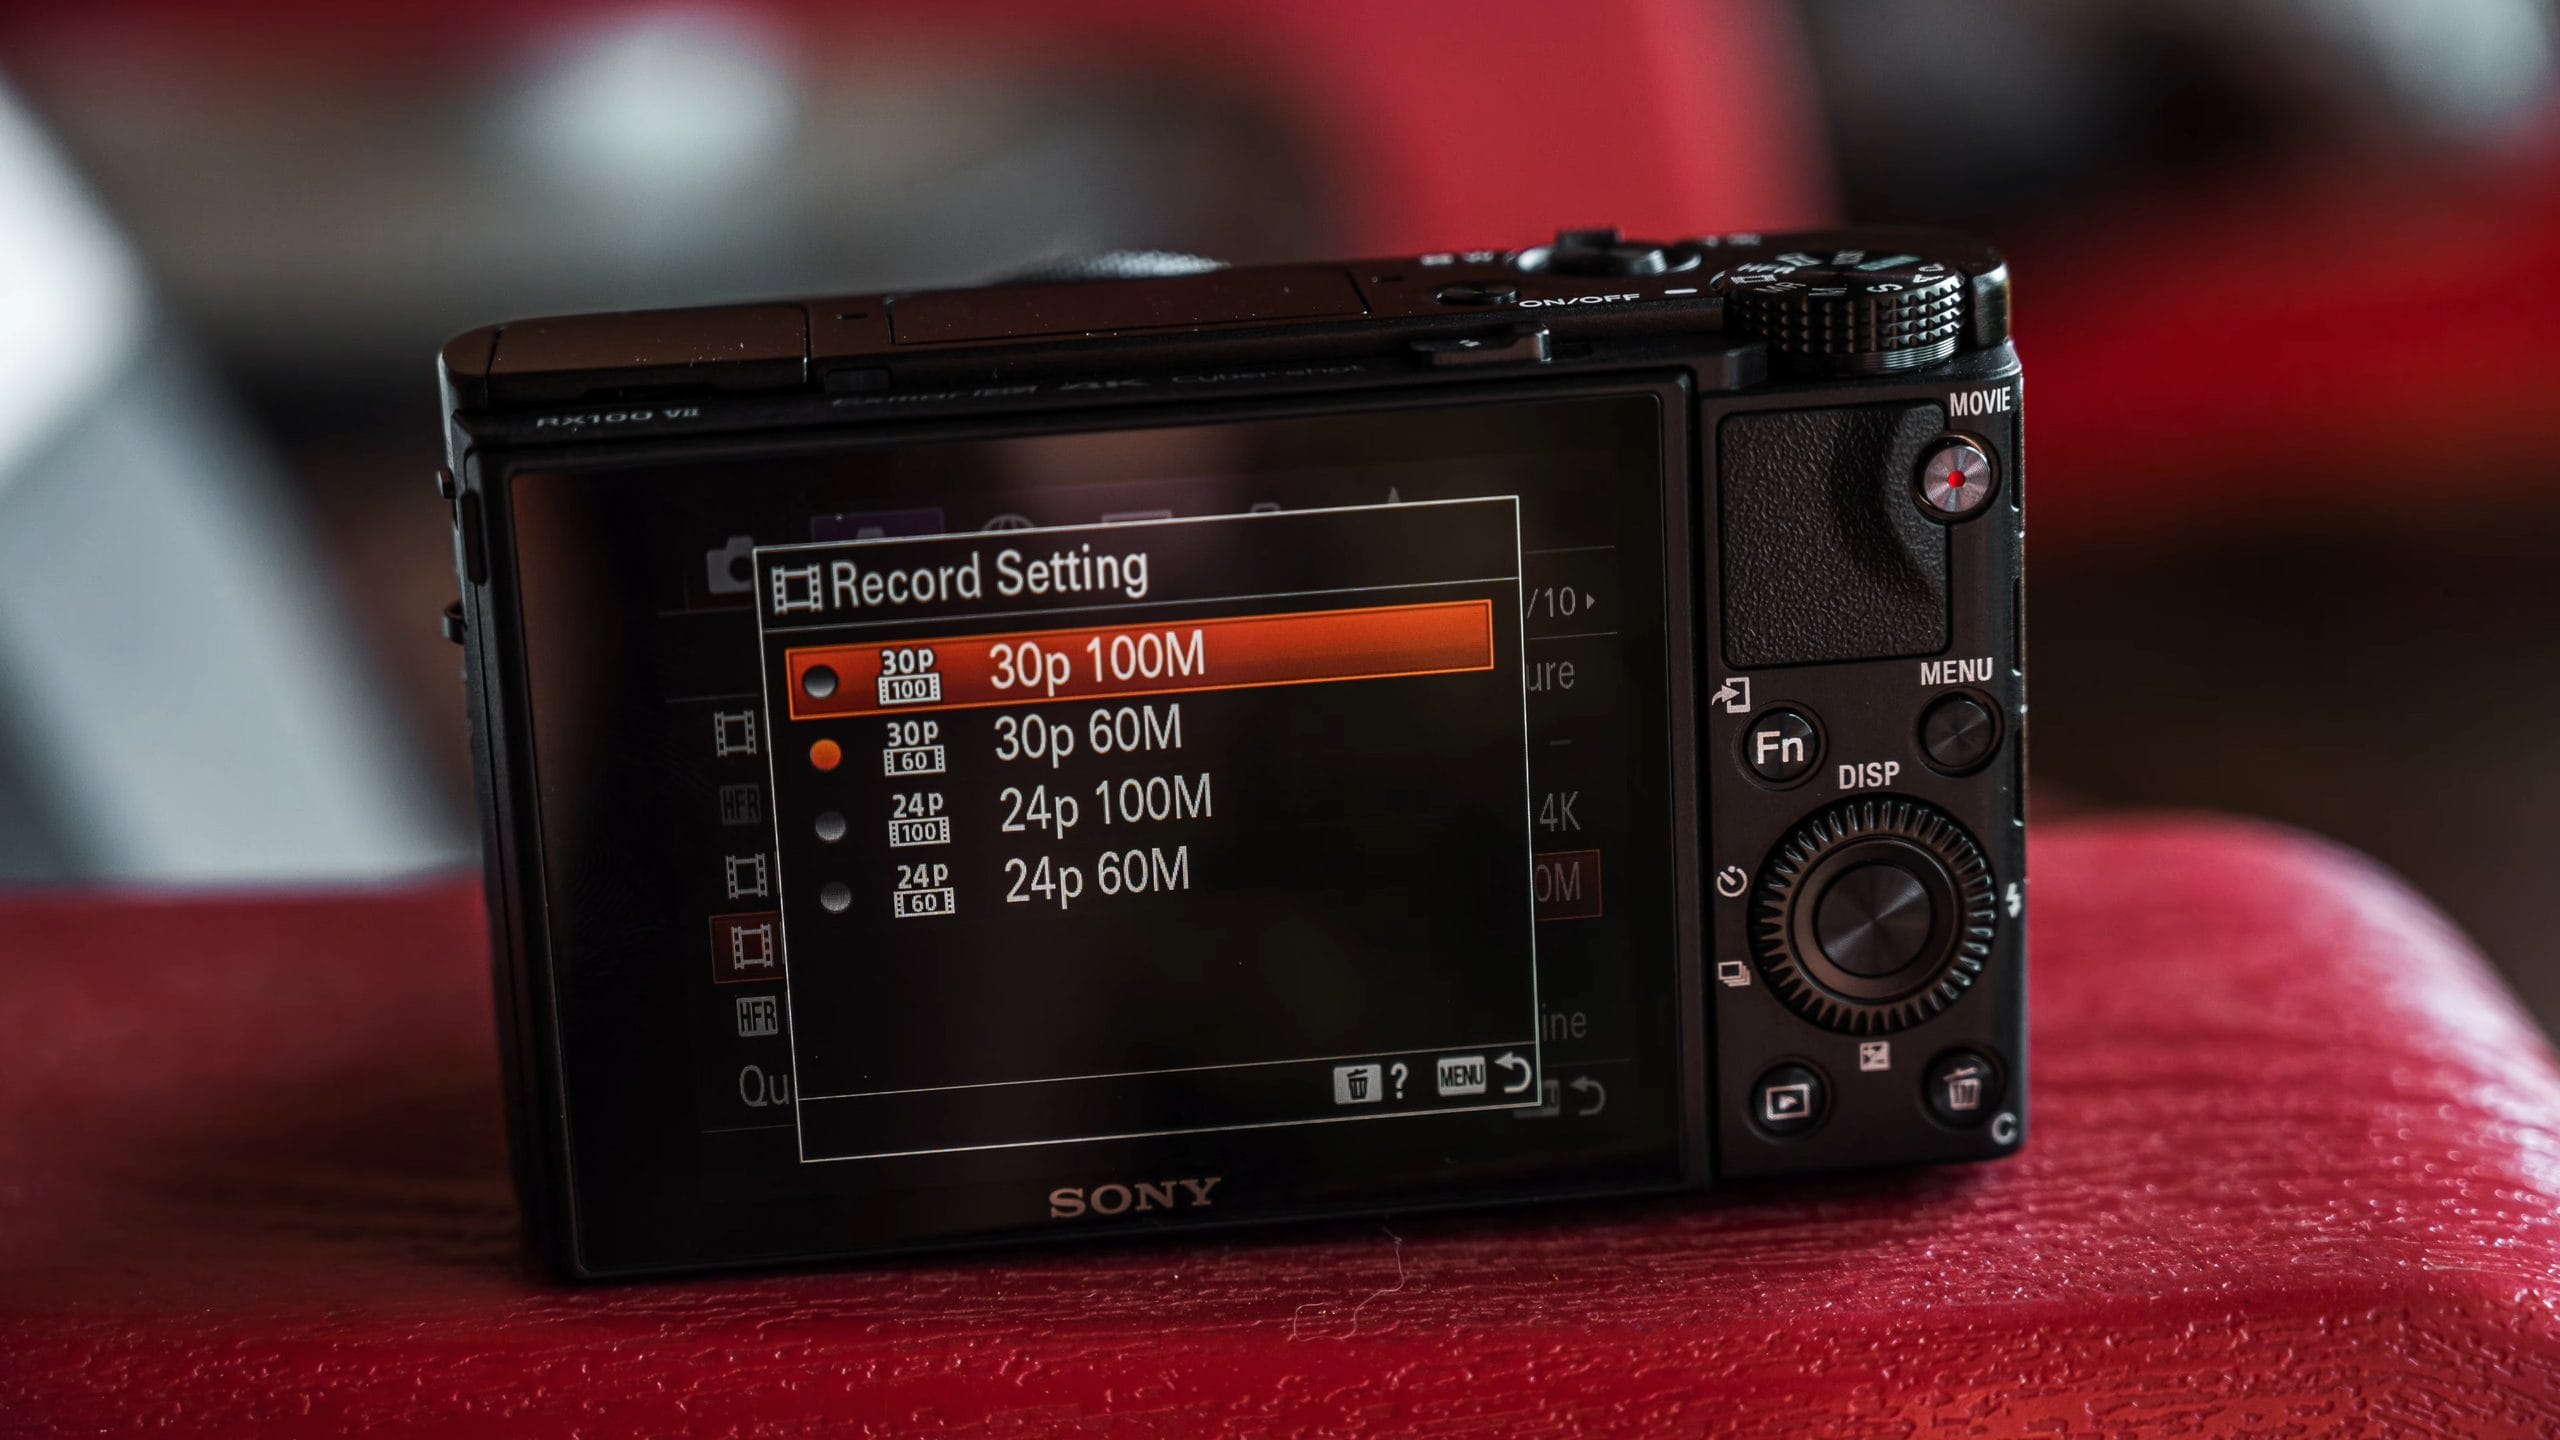
If you want higher frame rates for slow motion, you need to stay in HD. You can go all the way up to 120p, which is great for slow motion, but only in HD. I choose to shoot 4K and give up some of that slow-motion goodness, even though this camera is really good at it.
You’ll find both in MENU > Camera Settings2.
5. Put ISO on the Right Side of the Control Wheel
The next setting has to do with the control wheel on the back. Sony has remapped buttons over the years, but I also shoot with higher-end Sony cameras like the a7 line, where pressing the control wheel to the right controls ISO. On this camera, the right side controls flash settings. I rarely ever use the flash, and when I do I don’t really change the settings, so I’d rather press right and adjust my ISO.
How to Set It
- Go to MENU > Camera Settings2 > Custom Key.
- Find the Right Button, which is set to Flash Mode.
- Change it to ISO.
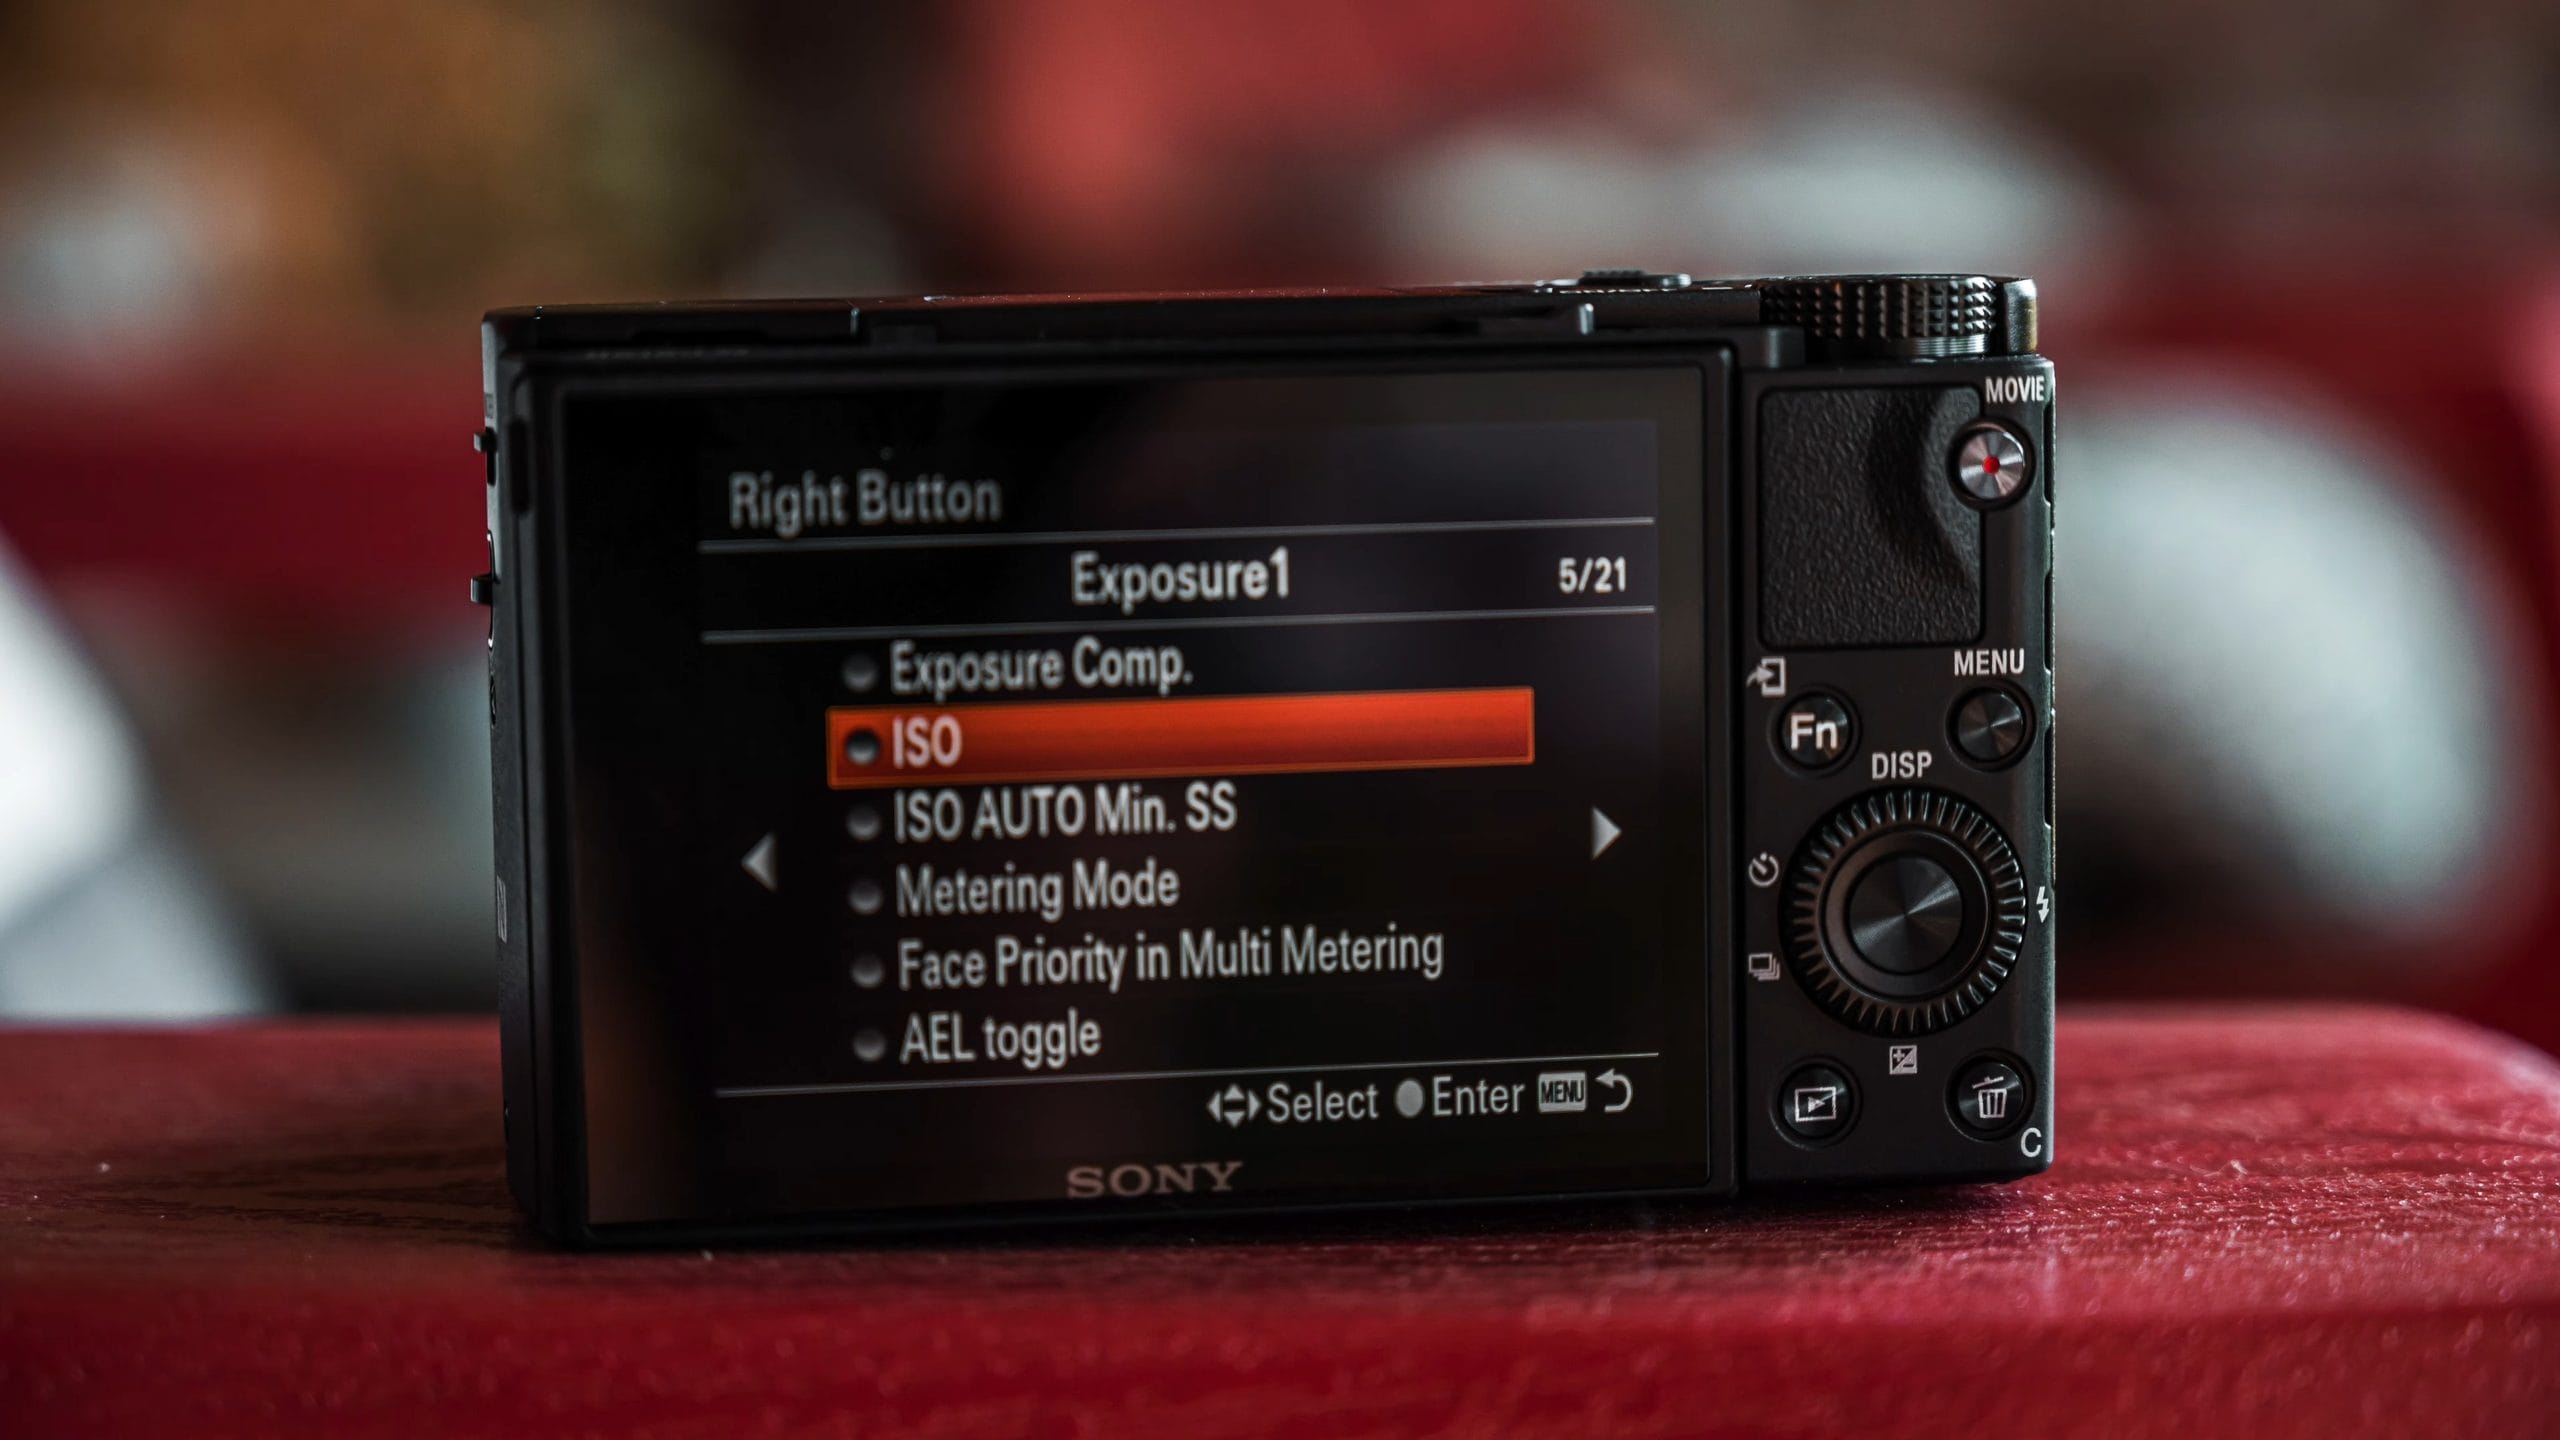
Now I just press right and start adjusting my ISO. By default, the trash can button is mapped to ISO, which is nice because you can tap the trash can and rotate the wheel to adjust ISO. But I’m so used to it being on the right on my other Sony cameras that I set this camera up the same way. Muscle memory is muscle memory, and I don’t want to do different things on different cameras.
If you make this change, ISO ends up on both the right button and the trash can, and you don’t need it on both. So you can remap the trash can to something else. Look through the options there and decide for yourself what would be most useful.
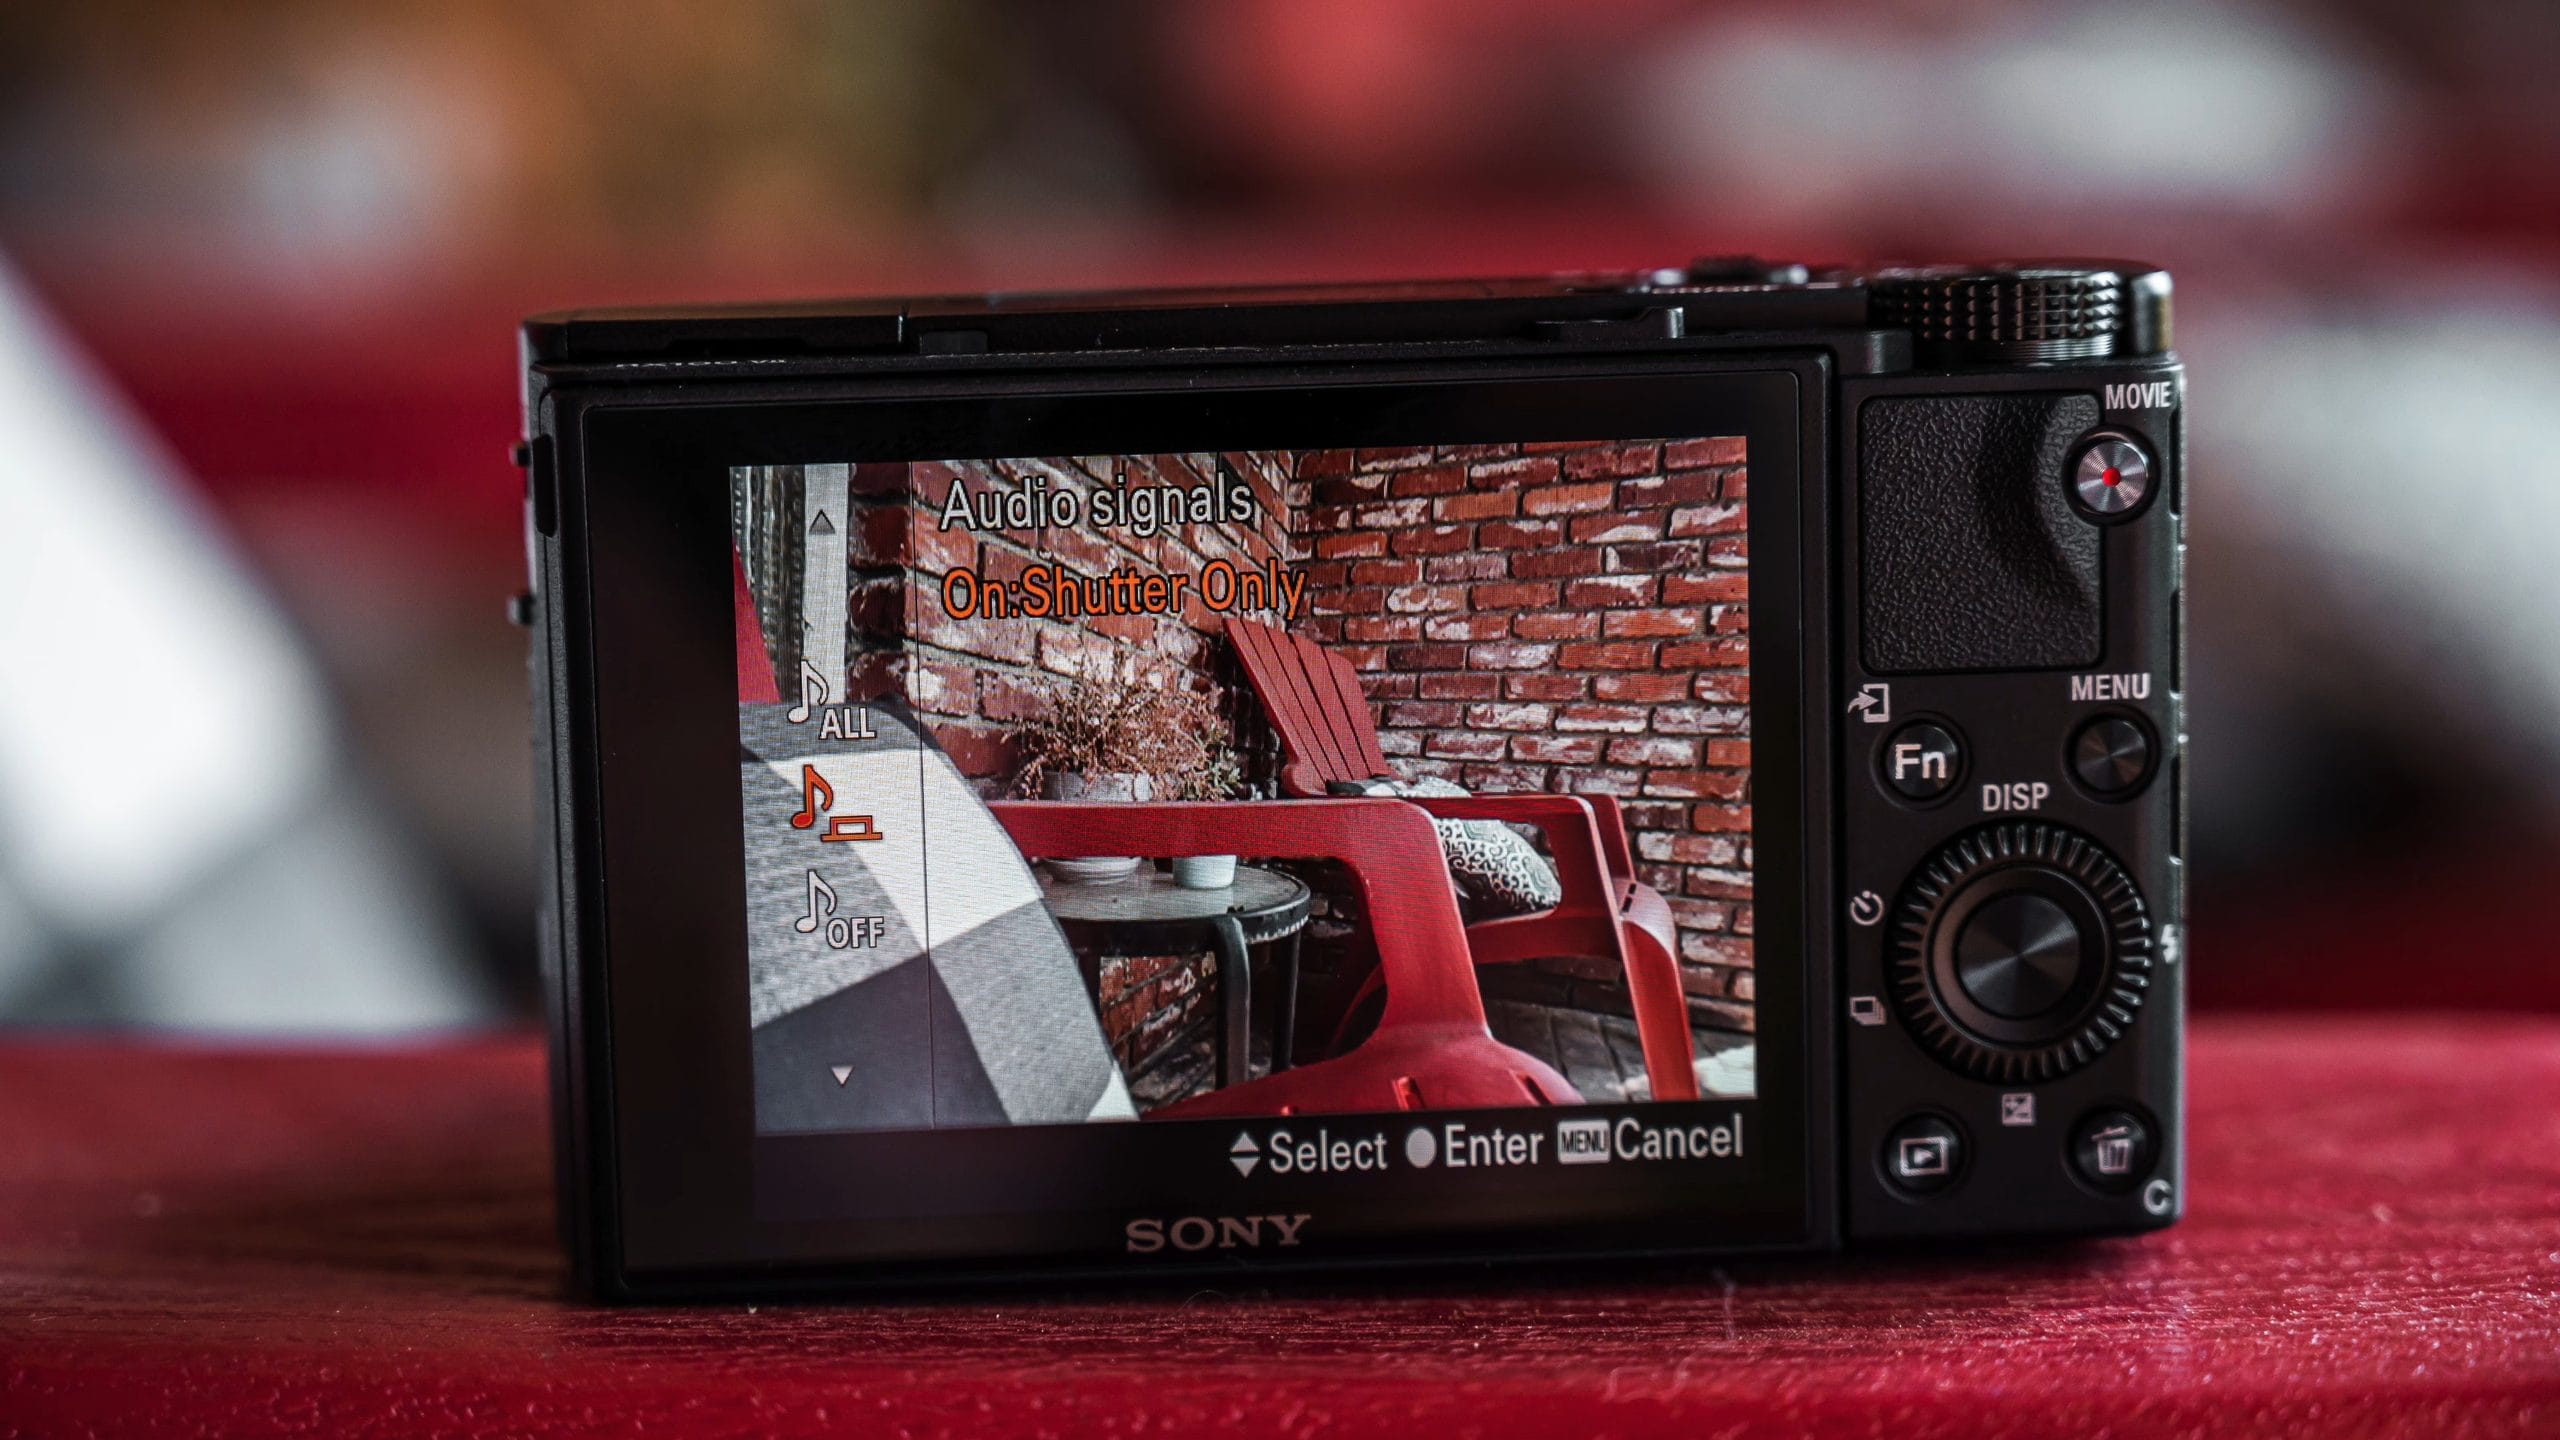
6. Change Audio Signals to Shutter Only
The camera uses an audible shutter sound to let you know you took a photo, but it also beeps for a lot of other things, like when you achieve focus. When you press the shutter button down a little bit and the camera achieves focus, it beeps. To me that’s a distraction, not only to me but to whoever I’m taking a photo of. If you keep pressing that button down and the camera keeps beeping, people think you’re taking a picture when you’re not ready yet.
Disabling that just totally makes sense to me. The camera gives you a visual signal when you’ve achieved focus. When I press the shutter button down, the box turns green, and that’s all I need to know. So I set MENU > Camera Settings2 > Audio signals to On:Shutter Only.
7. Use Manual Exposure for Video
Earlier, we put the camera in manual mode for photos just by rotating the dial. You need to do the same thing for video. I think video is best when you manually control it, and of course that means understanding video settings, which are a little different from how you’d set up your camera for photos.
- Turn the mode dial to Movie.
- Press MENU and go to Exposure Mode, under the second tab (Camera Settings2).
- By default it’s set to Program Auto. Change it to Manual Exposure.
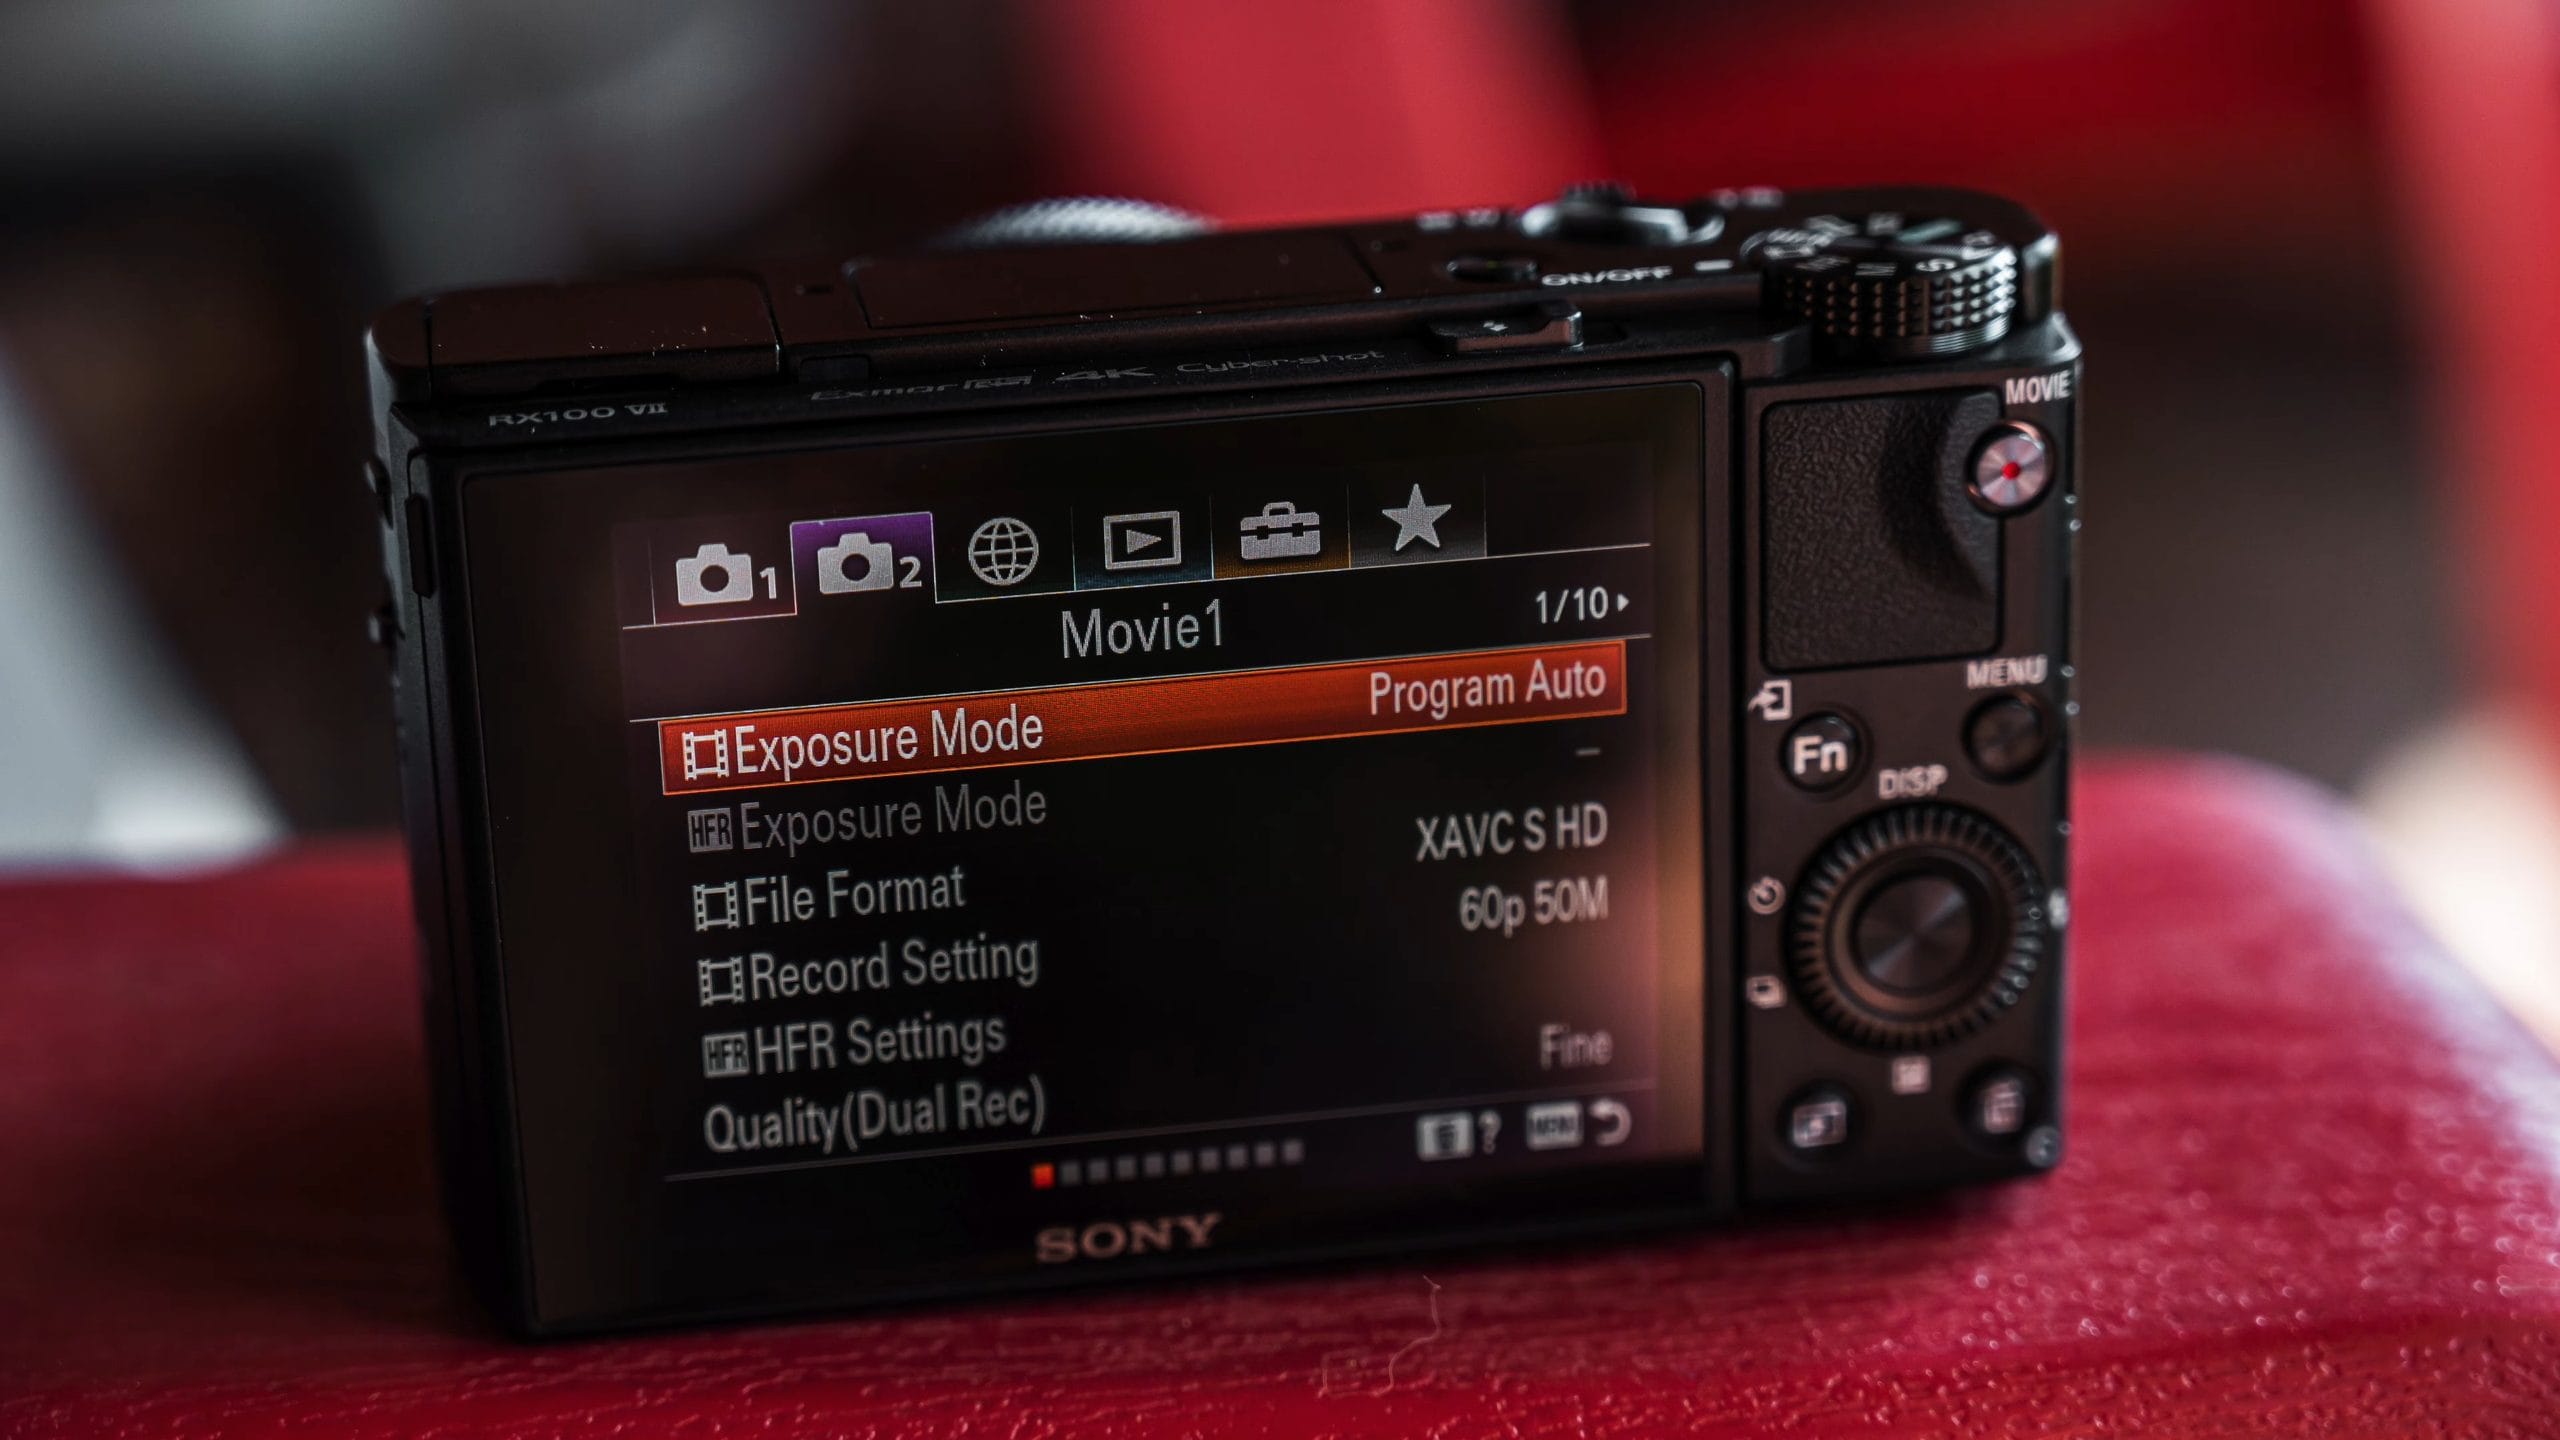
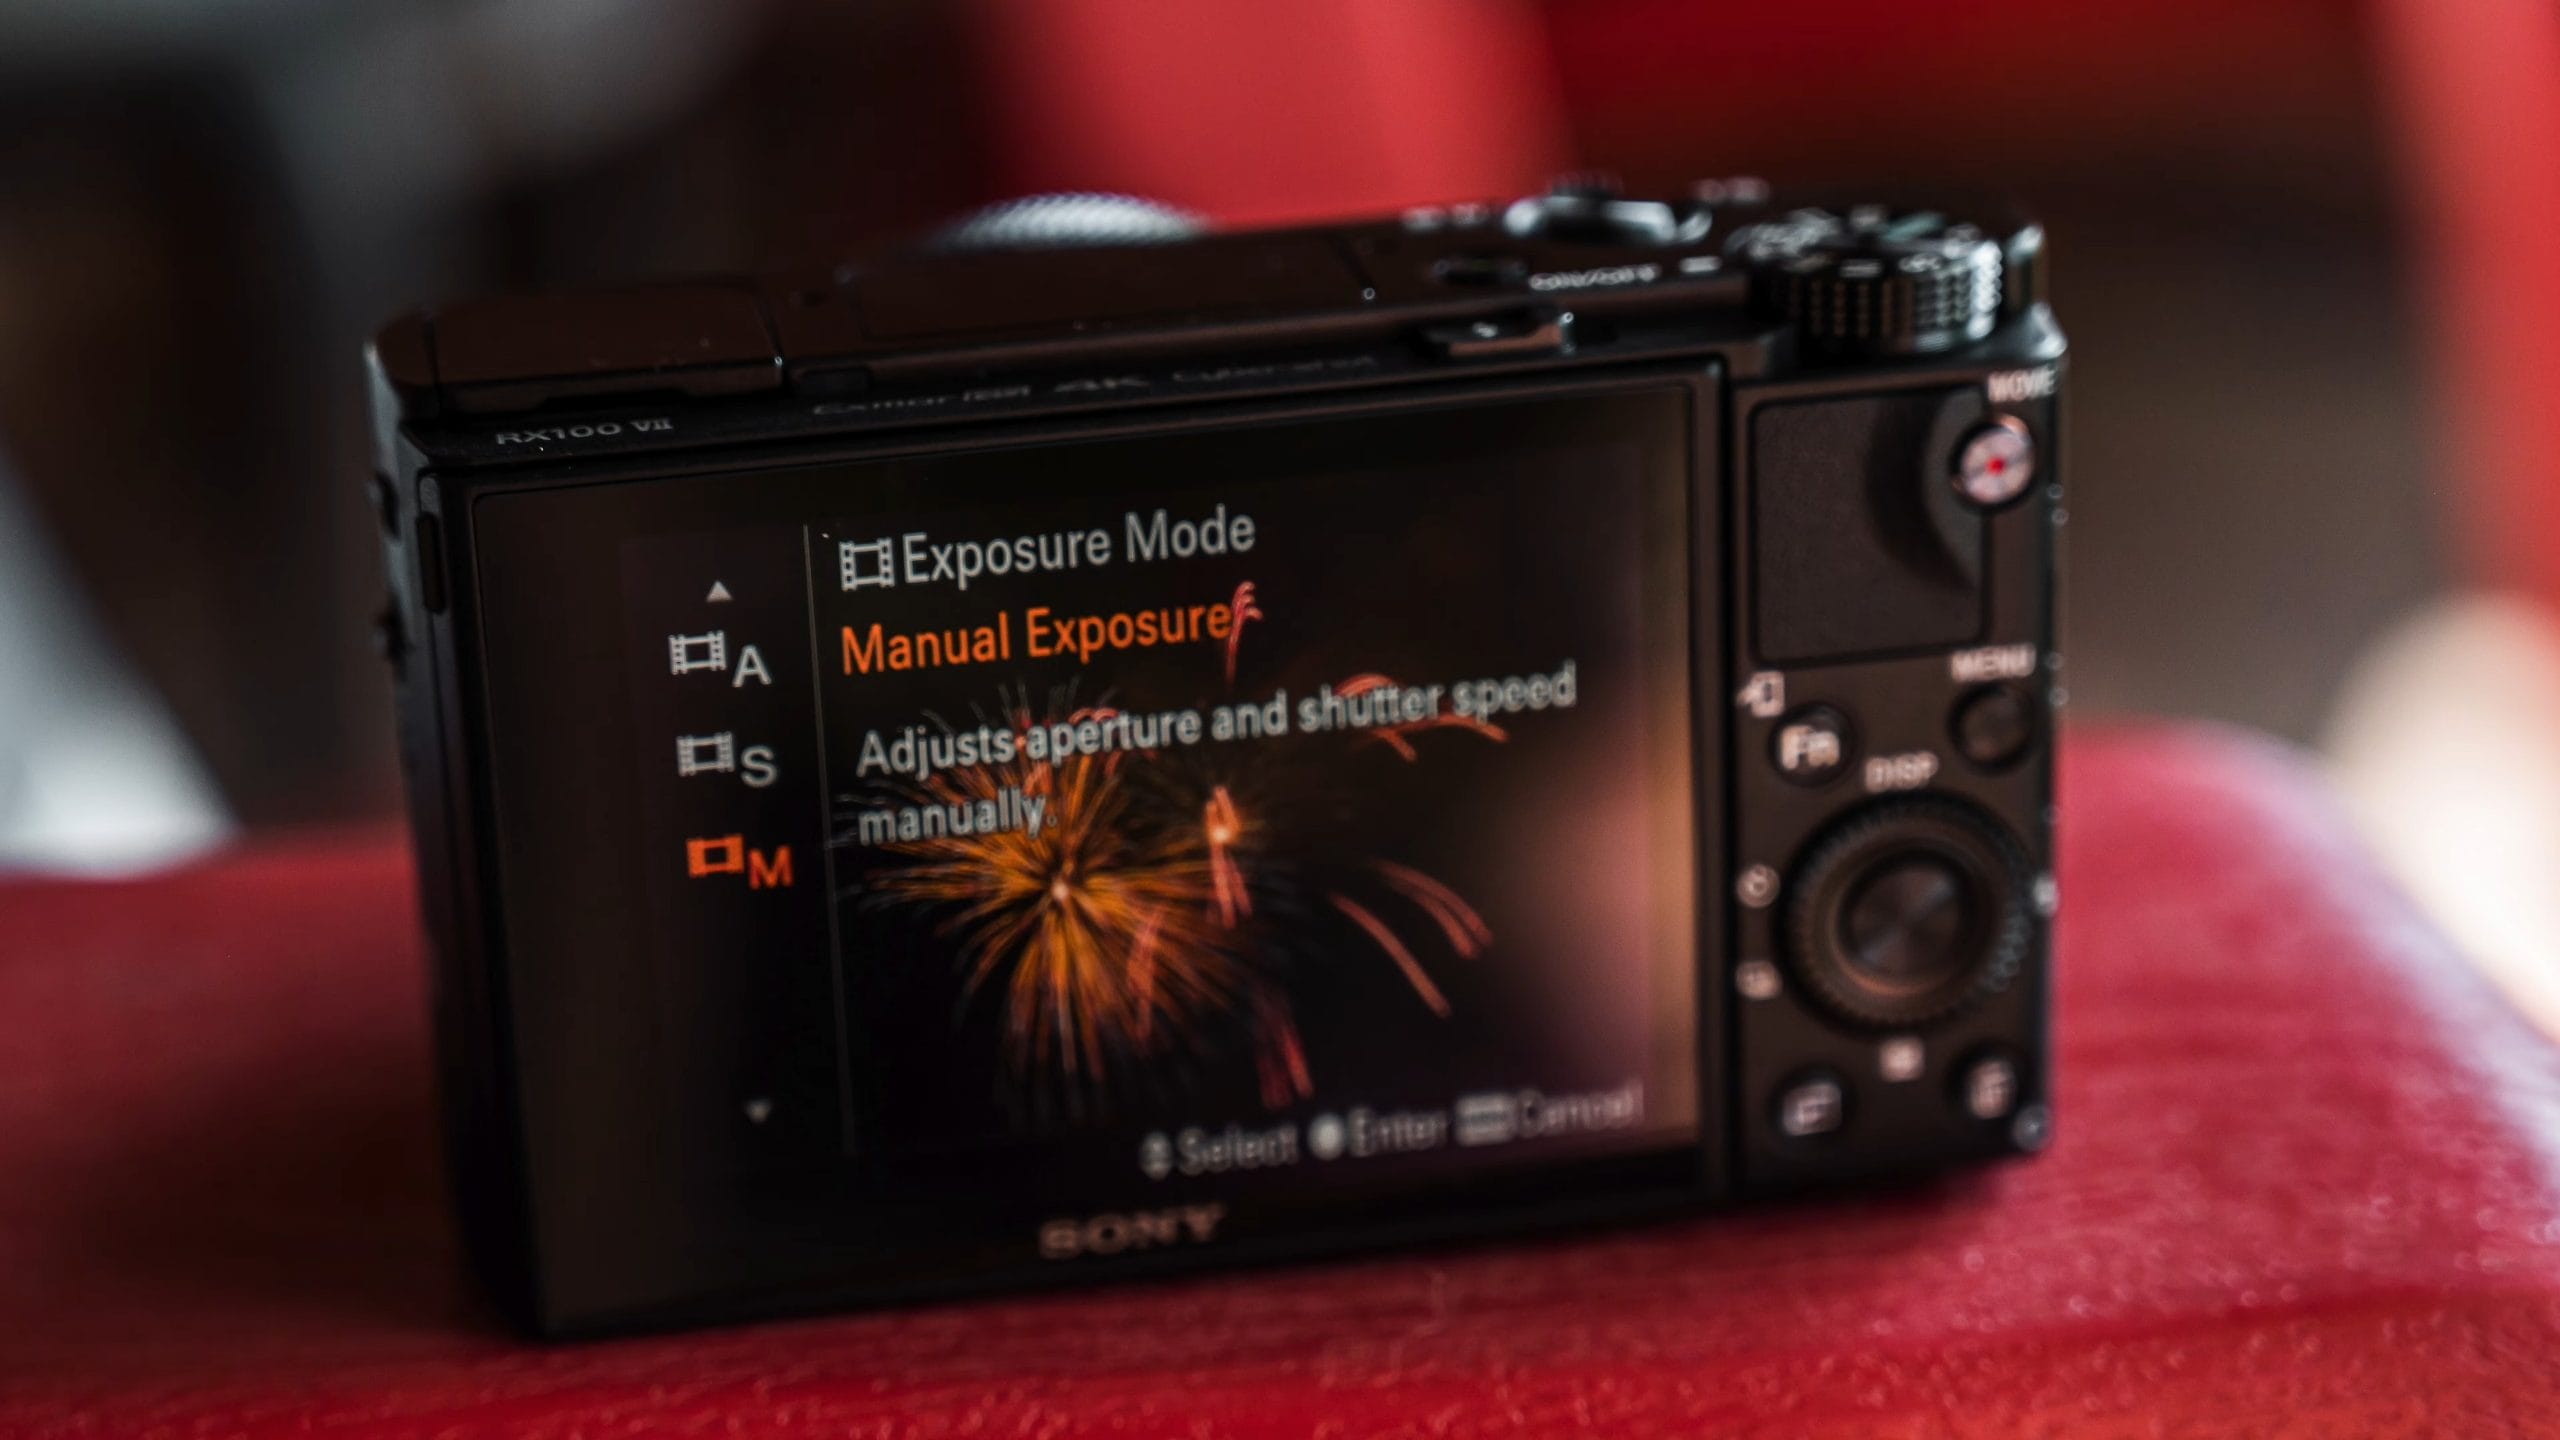
That lets you set your shutter speed, aperture, and ISO for your photos and your video independently.
8. Turn On the Rule of Thirds Grid
One setting that has always helped me get my shots composed well is turning on the rule of thirds grid line. There are a few options for the grid: Rule of 3rds Grid, Square Grid, and Diag. + Square Grid.
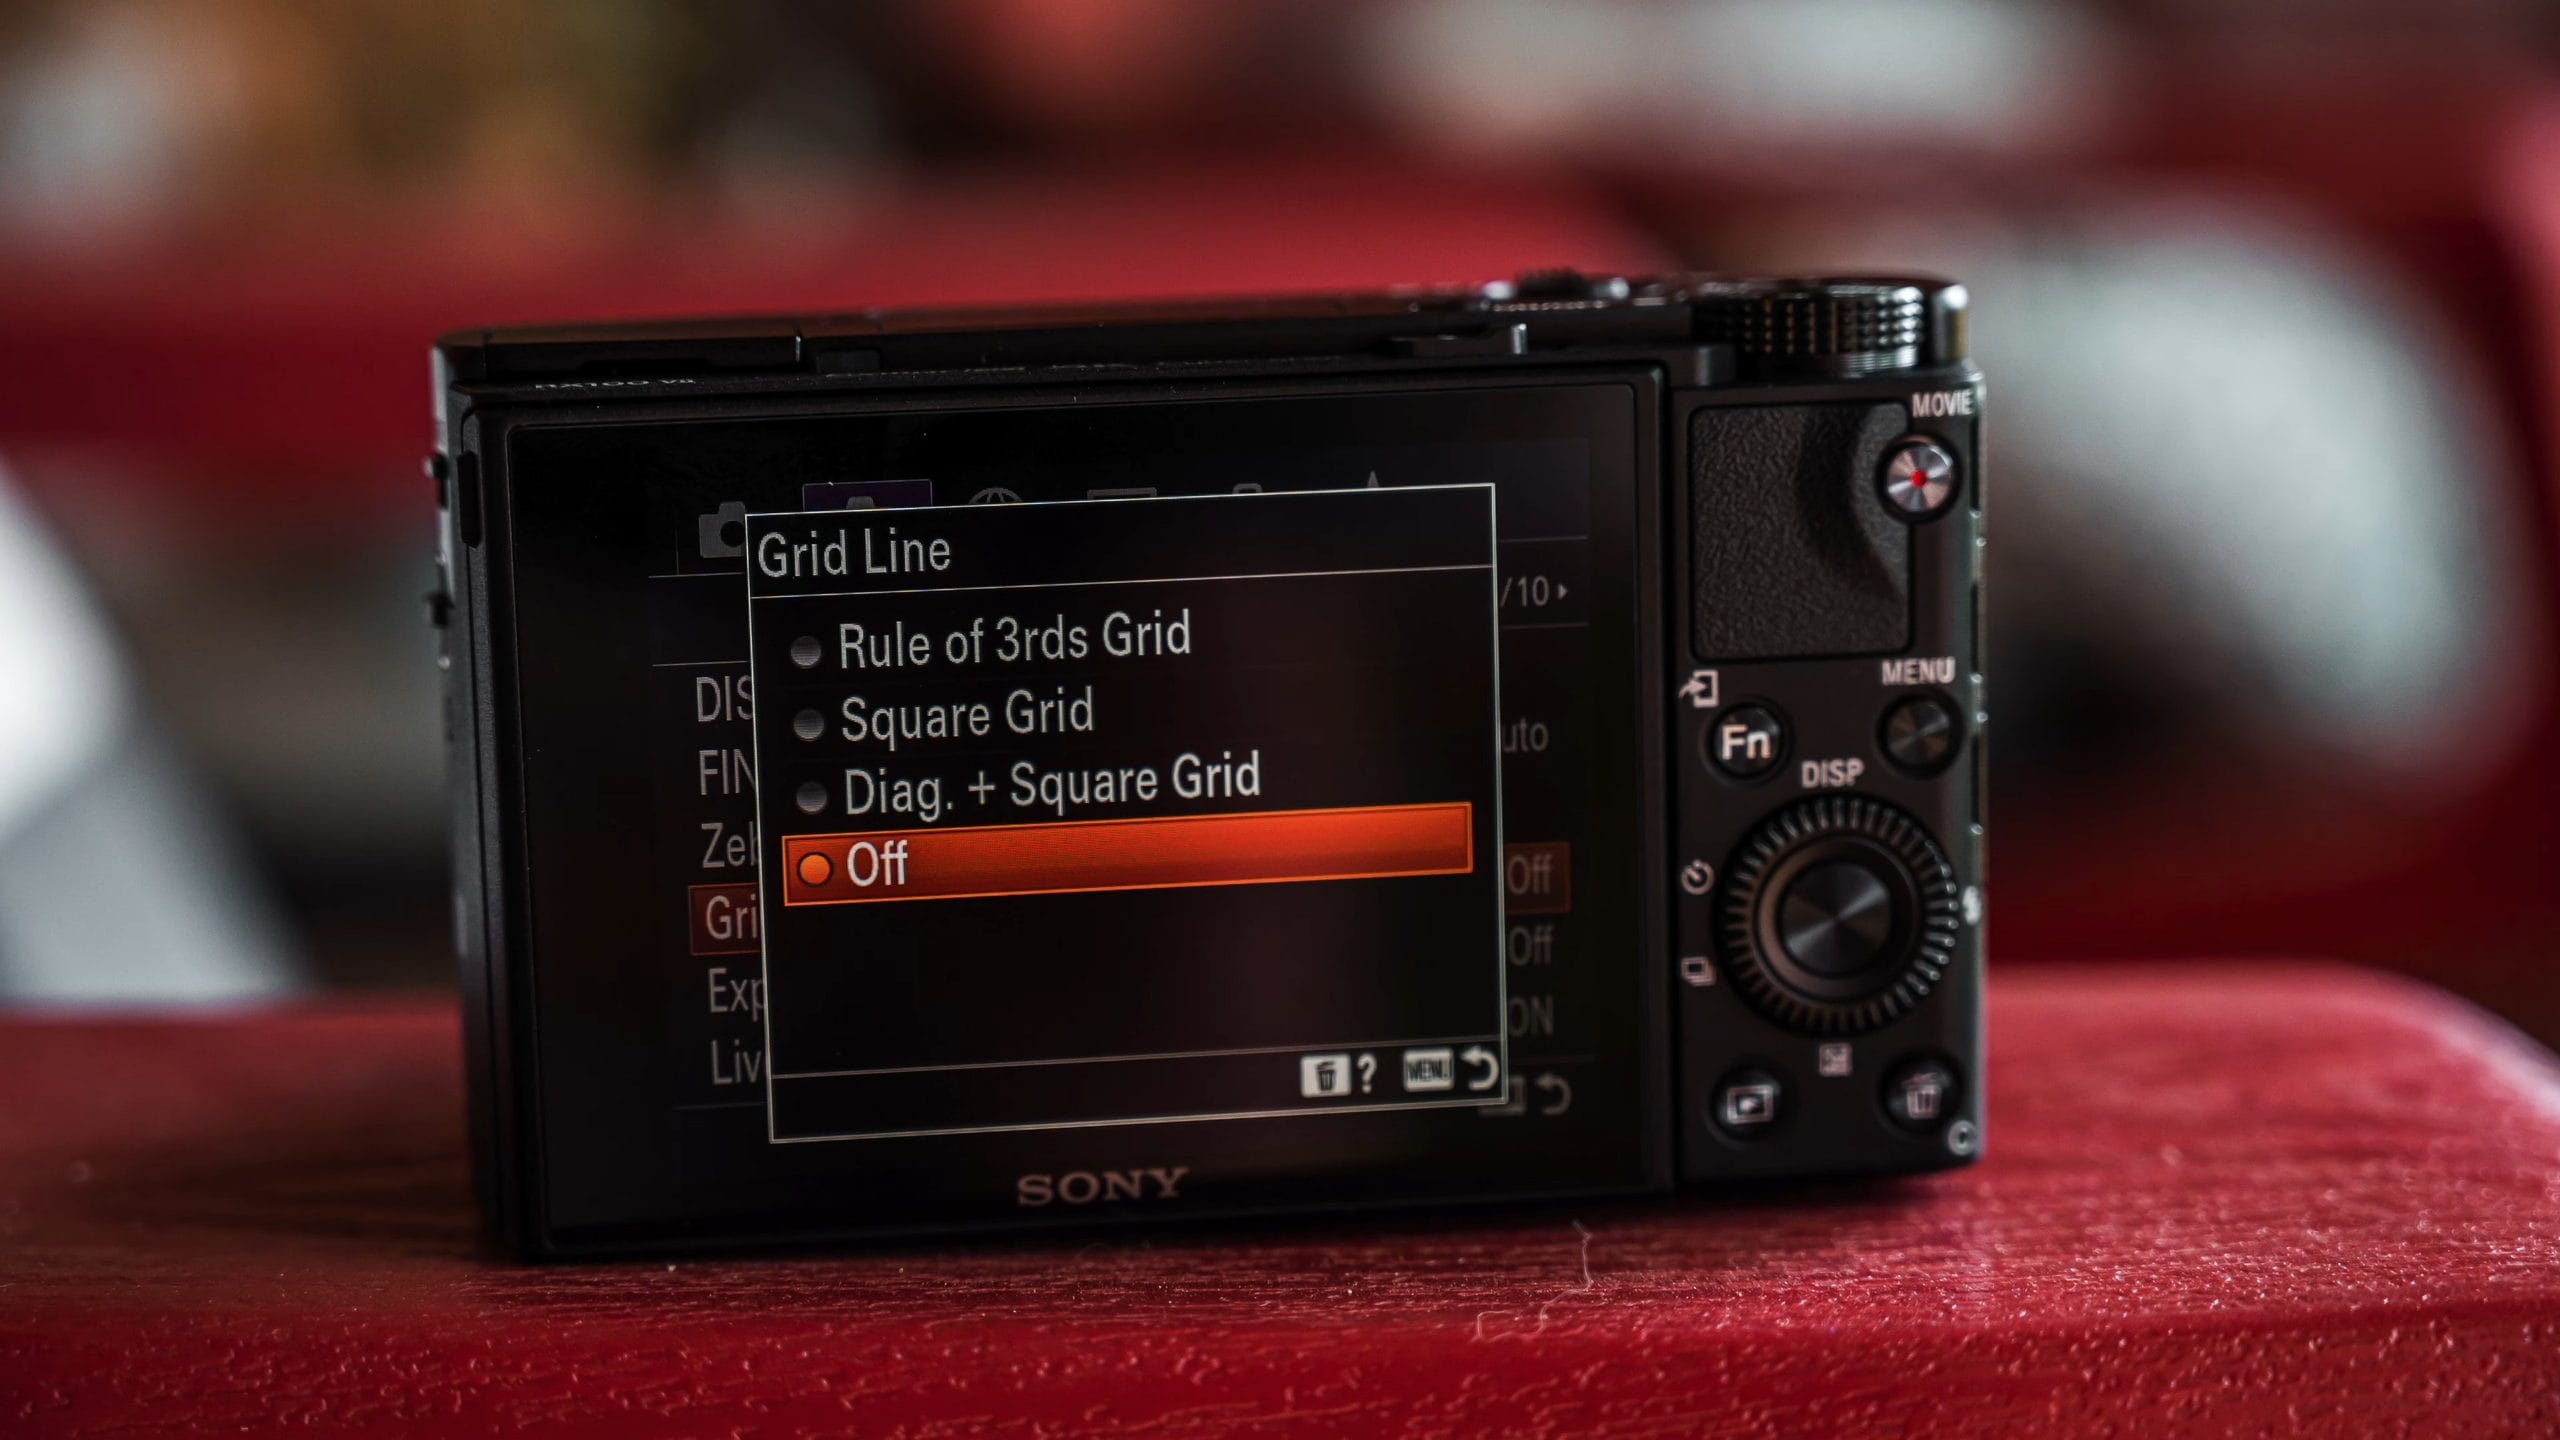
I set it to Rule of 3rds because it puts nice crosshairs across my screen and makes it easy to line things up and get my image composed the best I can in camera, so I don’t have to do a bunch of cropping later. Anytime I can get the shot right in camera without doing more work, that’s great. It saves me time, I can share my image much faster, and it’s an all-around win. You’ll find it in MENU > Camera Settings2 > Grid Line.
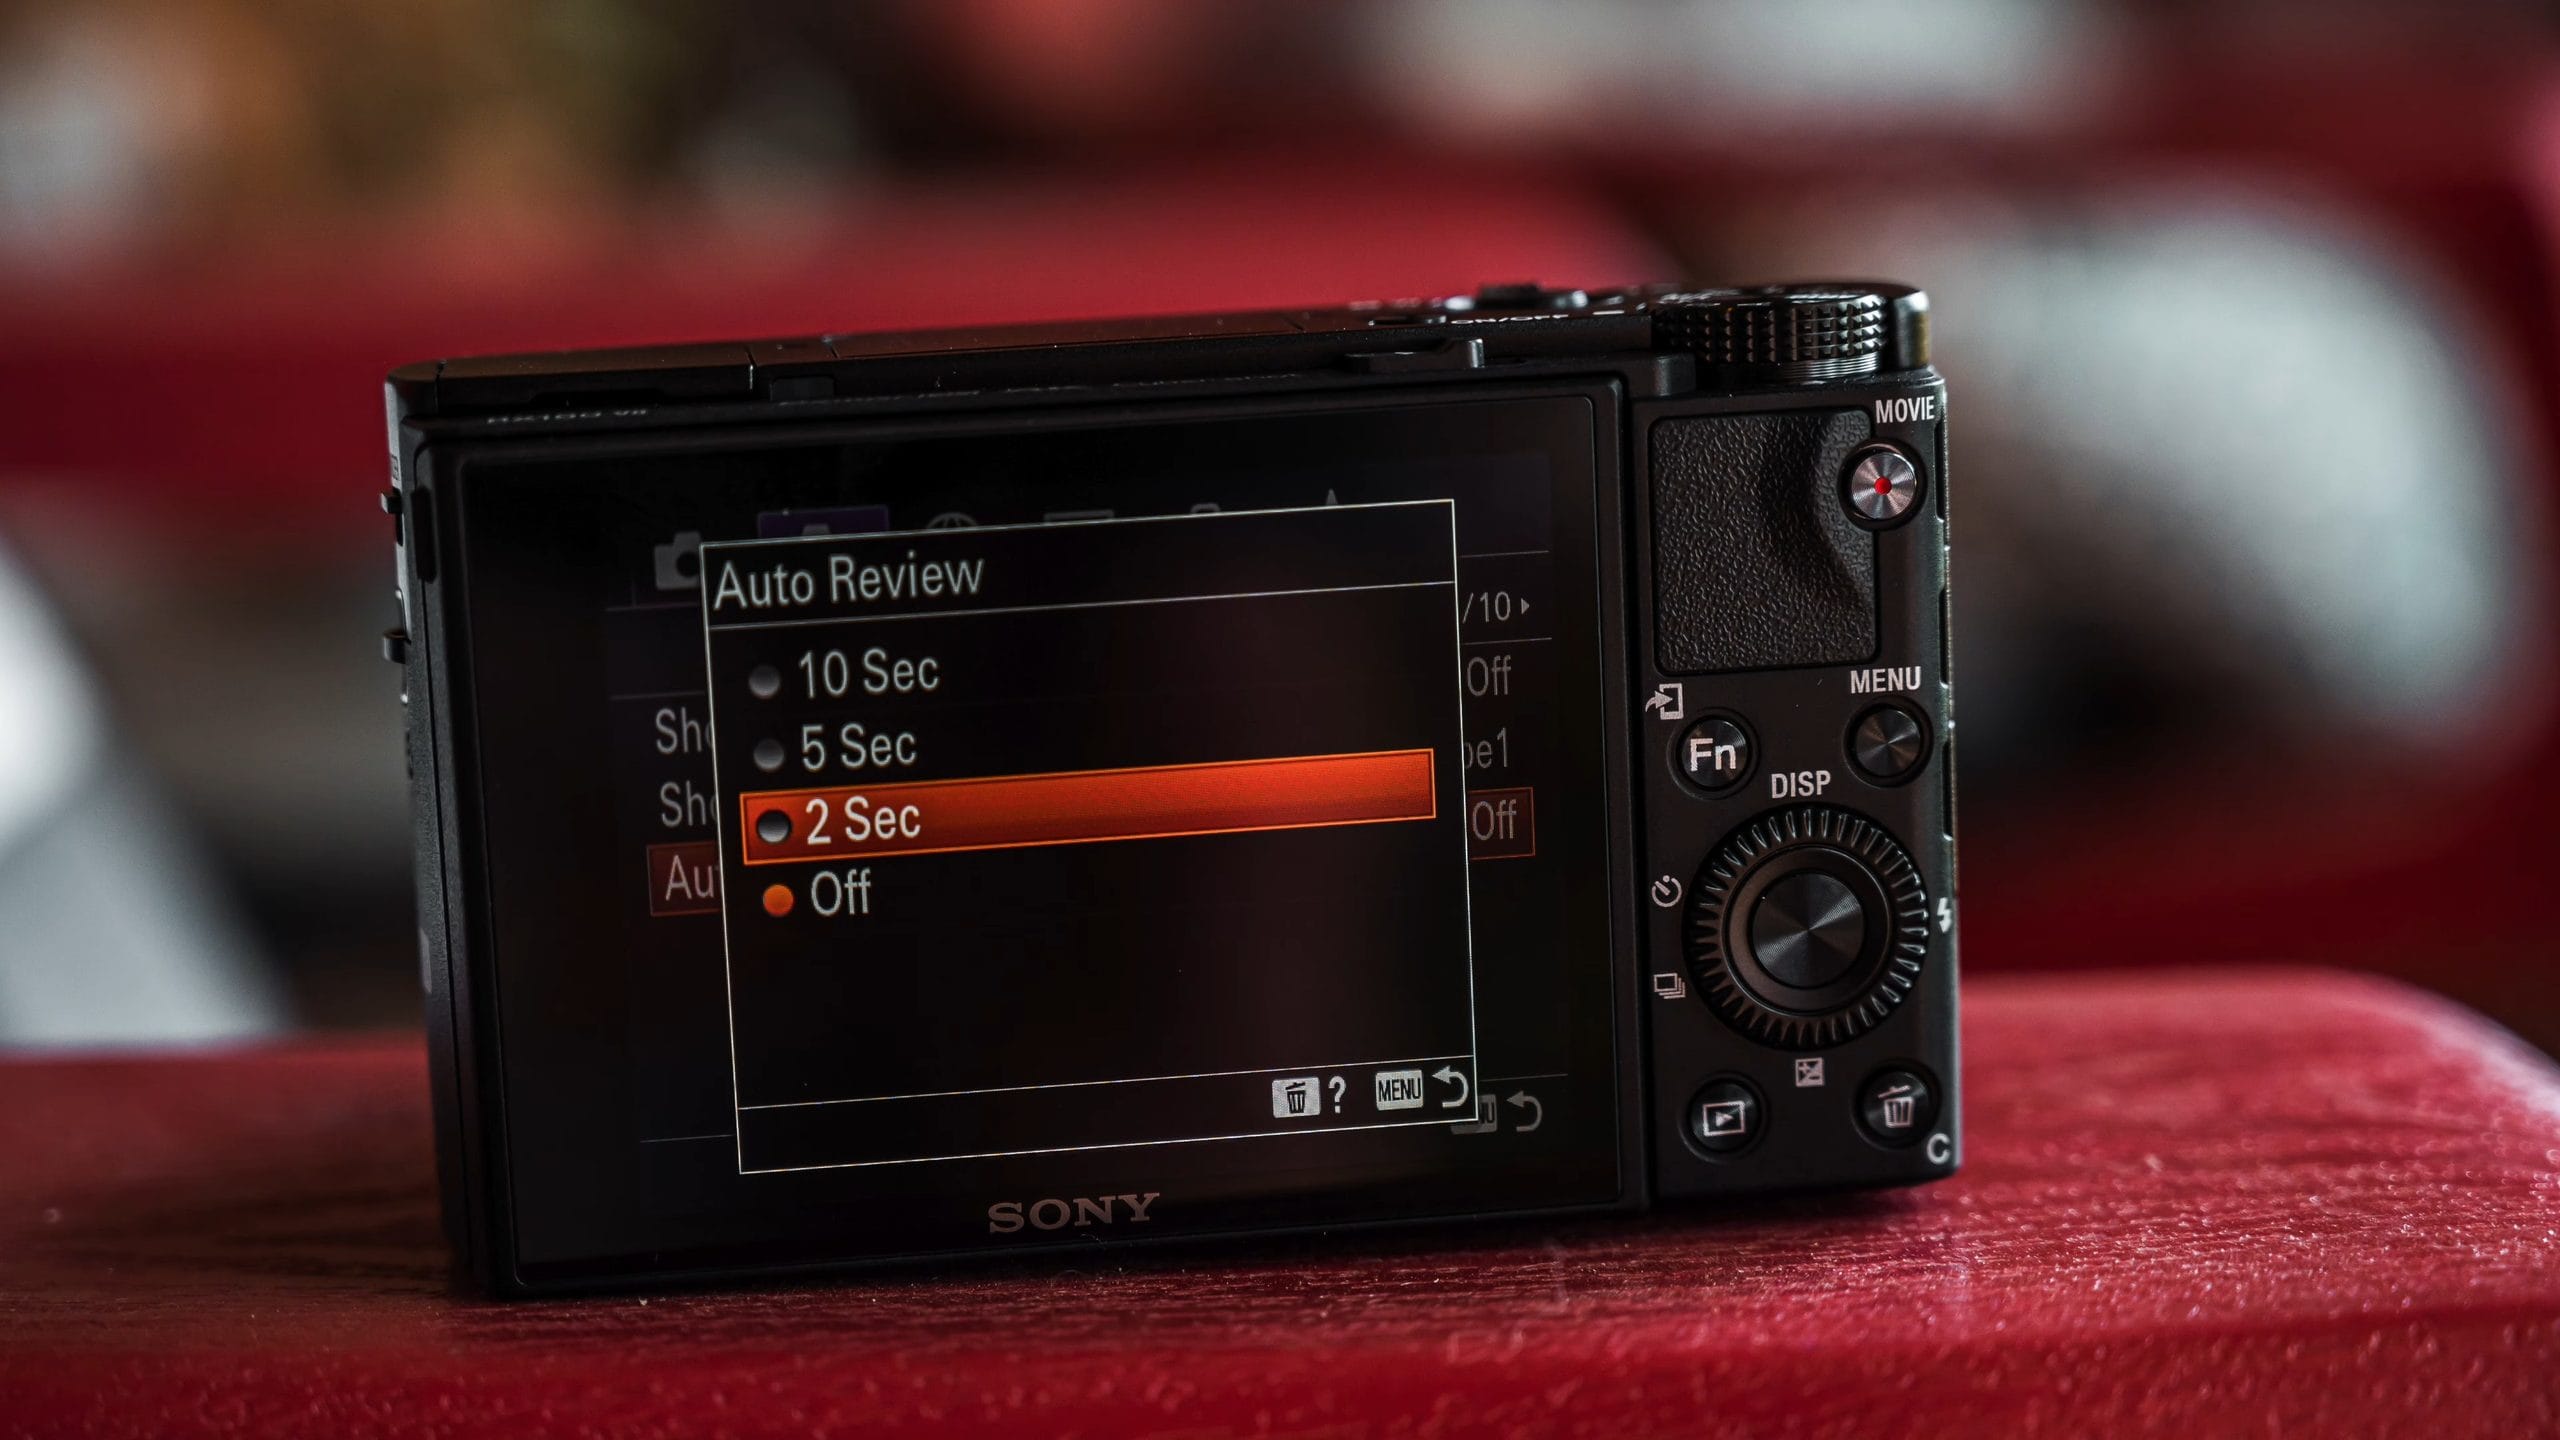
9. Set Auto Review to 2 Seconds
The next setting I change is turning Auto Review on and setting it to 2 Sec. When I take a photo, I want to see it right after, whether that’s through the EVF or on the back display. By default, the camera just gets ready to shoot another photo, which is fine, and this camera is meant to take photos really quickly.
But all I have to do to get back to shooting is press the shutter button down a little bit again. And if I’m shooting continuously by holding the shutter button down, it doesn’t try to show me a review, because it knows I’m shooting continuously. When I’m done and I take my photo, I want to see it for about two seconds without having to hit the playback button. You’ll find it in MENU > Camera Settings2 > Auto Review.
10. Use the Screen as a Touch Pad with the EVF
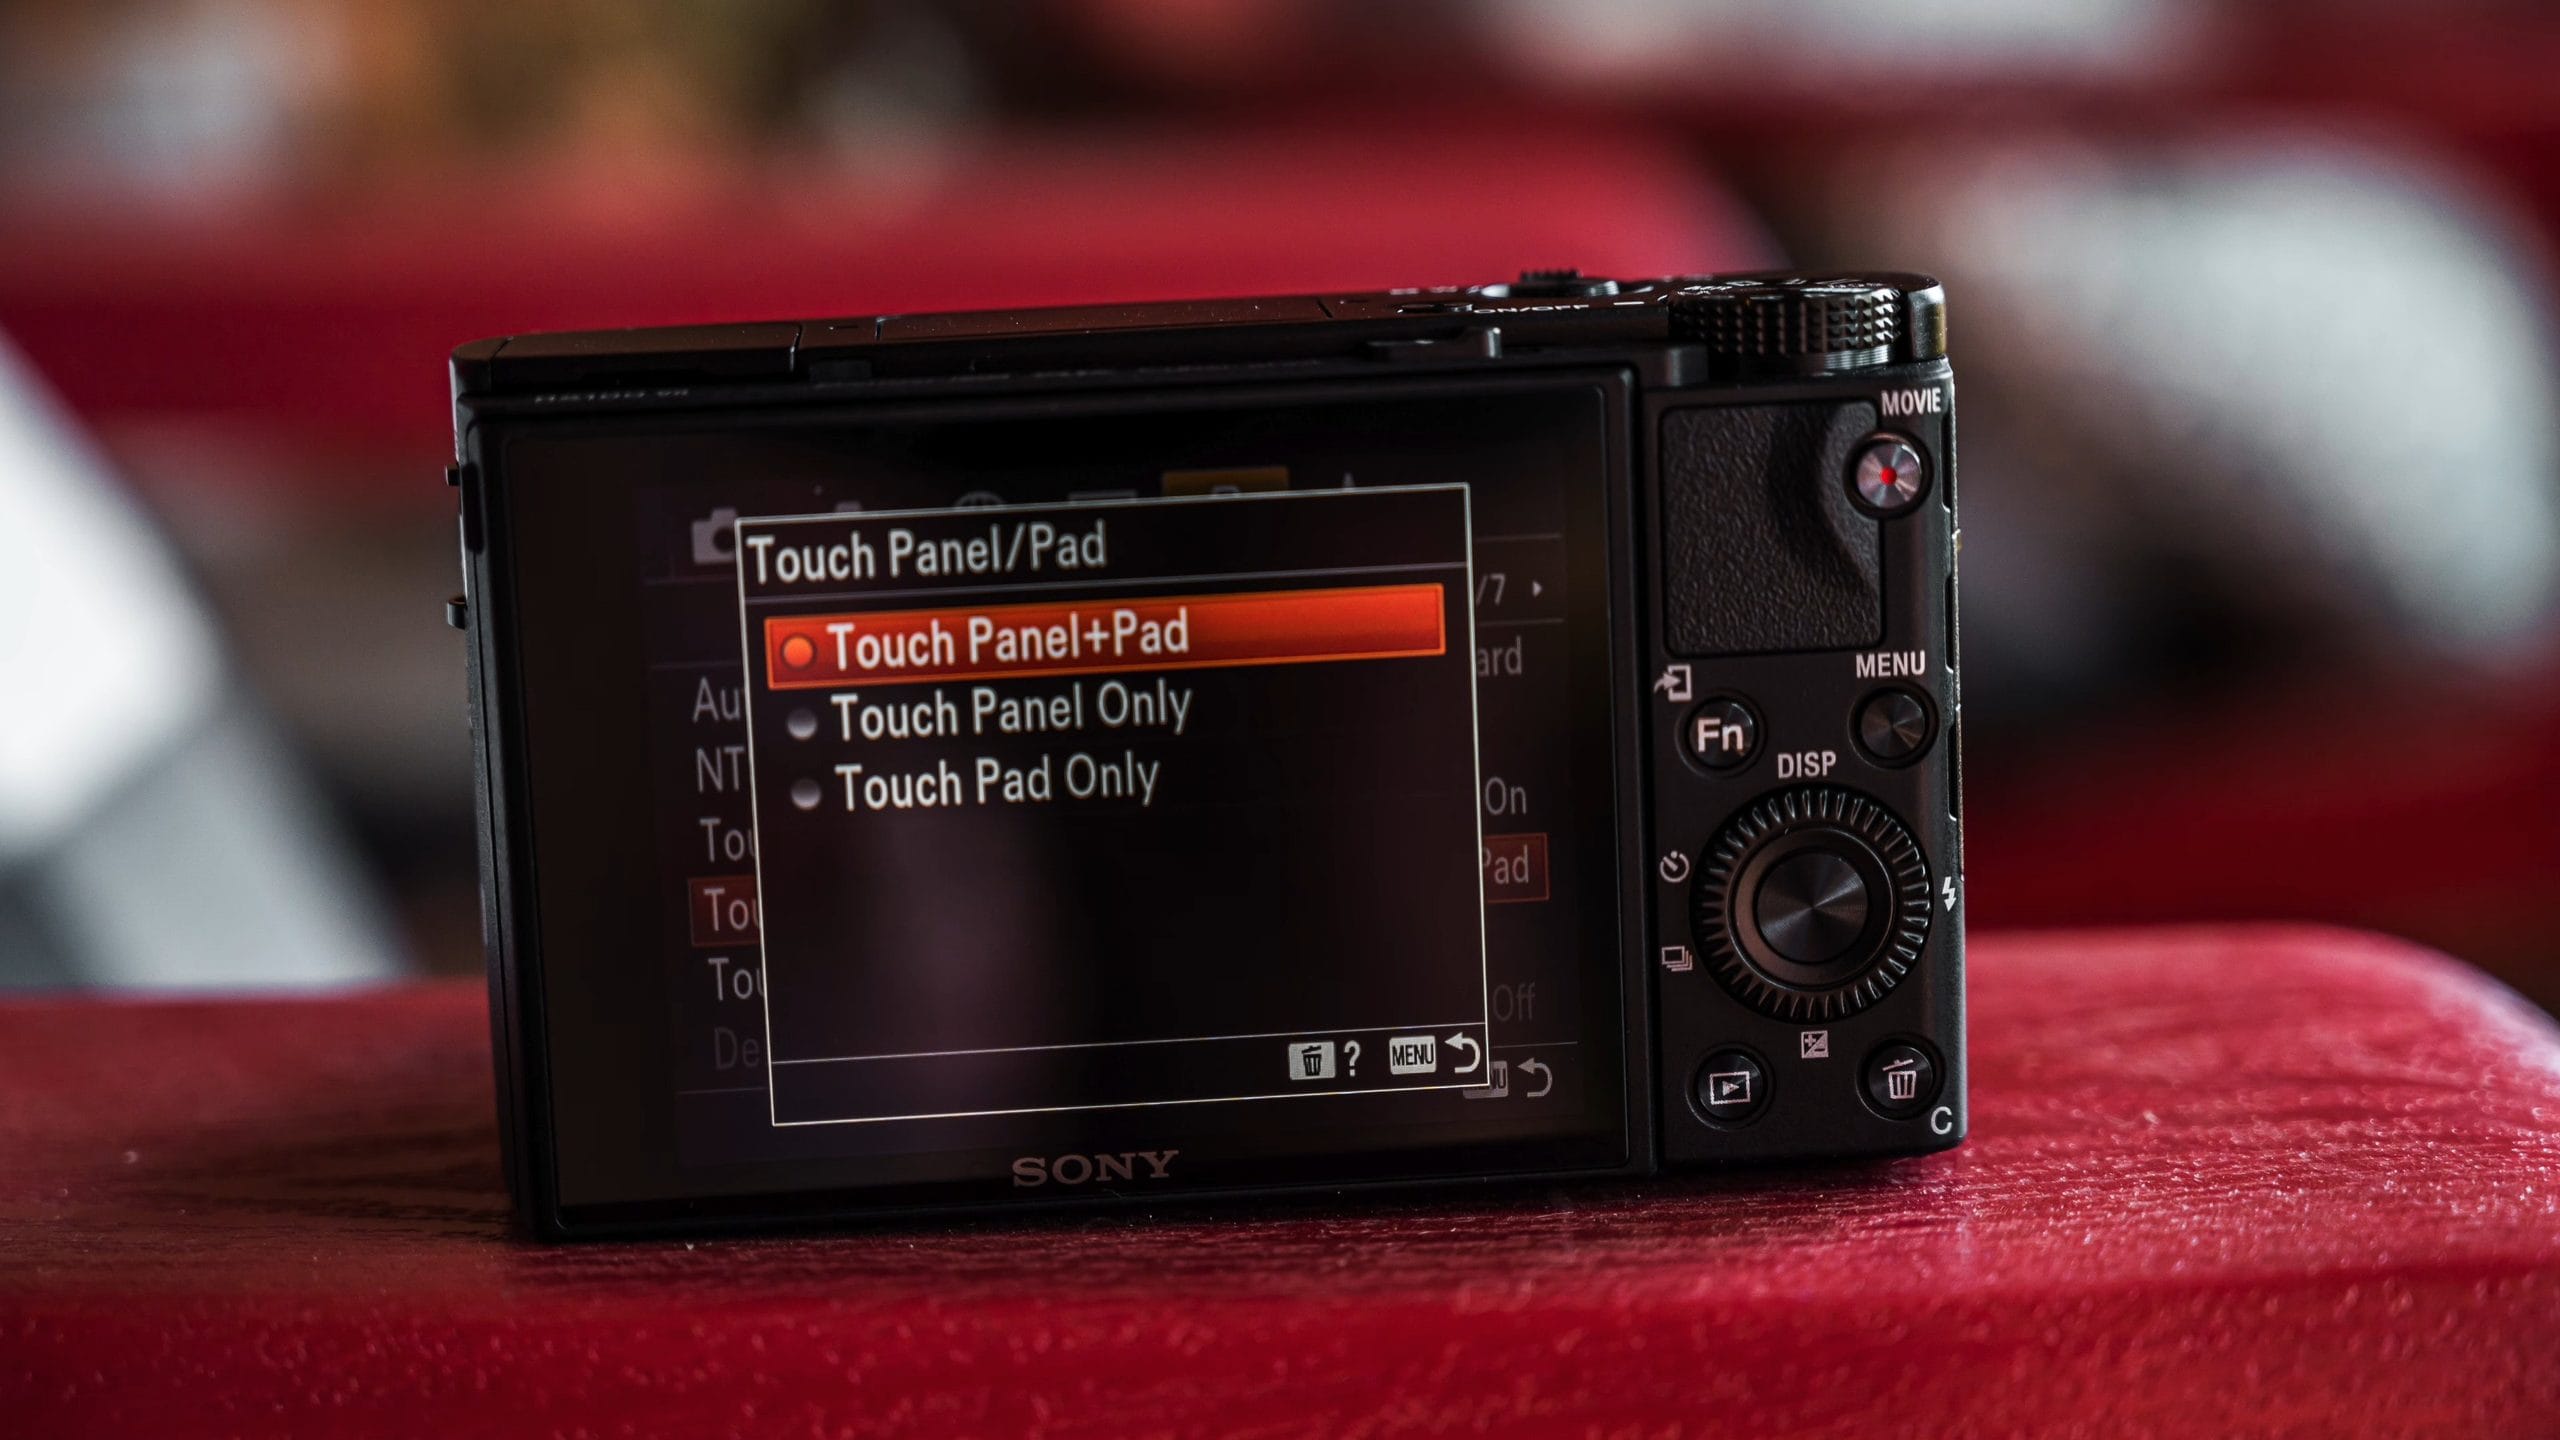
When you’re using the pop-up EVF, it’s really nice to be able to move the focus point around with your thumb on the back display. When you’re looking through the EVF, the screen on the back turns off, but you can put your thumb on it and drag the focus point around, the same way you’d use a trackpad to move the cursor on your computer. This saves a ton of time and makes it much easier, but you have to set it up first.
- Go to the Setup menu and find Touch Panel/Pad. By default it’s set to Touch Panel Only.
- Change it to Touch Panel+Pad. That turns on the Touch Pad Settings right underneath it.
- I leave the vertical orientation setting On and Touch Position Mode on Relative Position.
- I leave the operation area set to the right half of the screen.
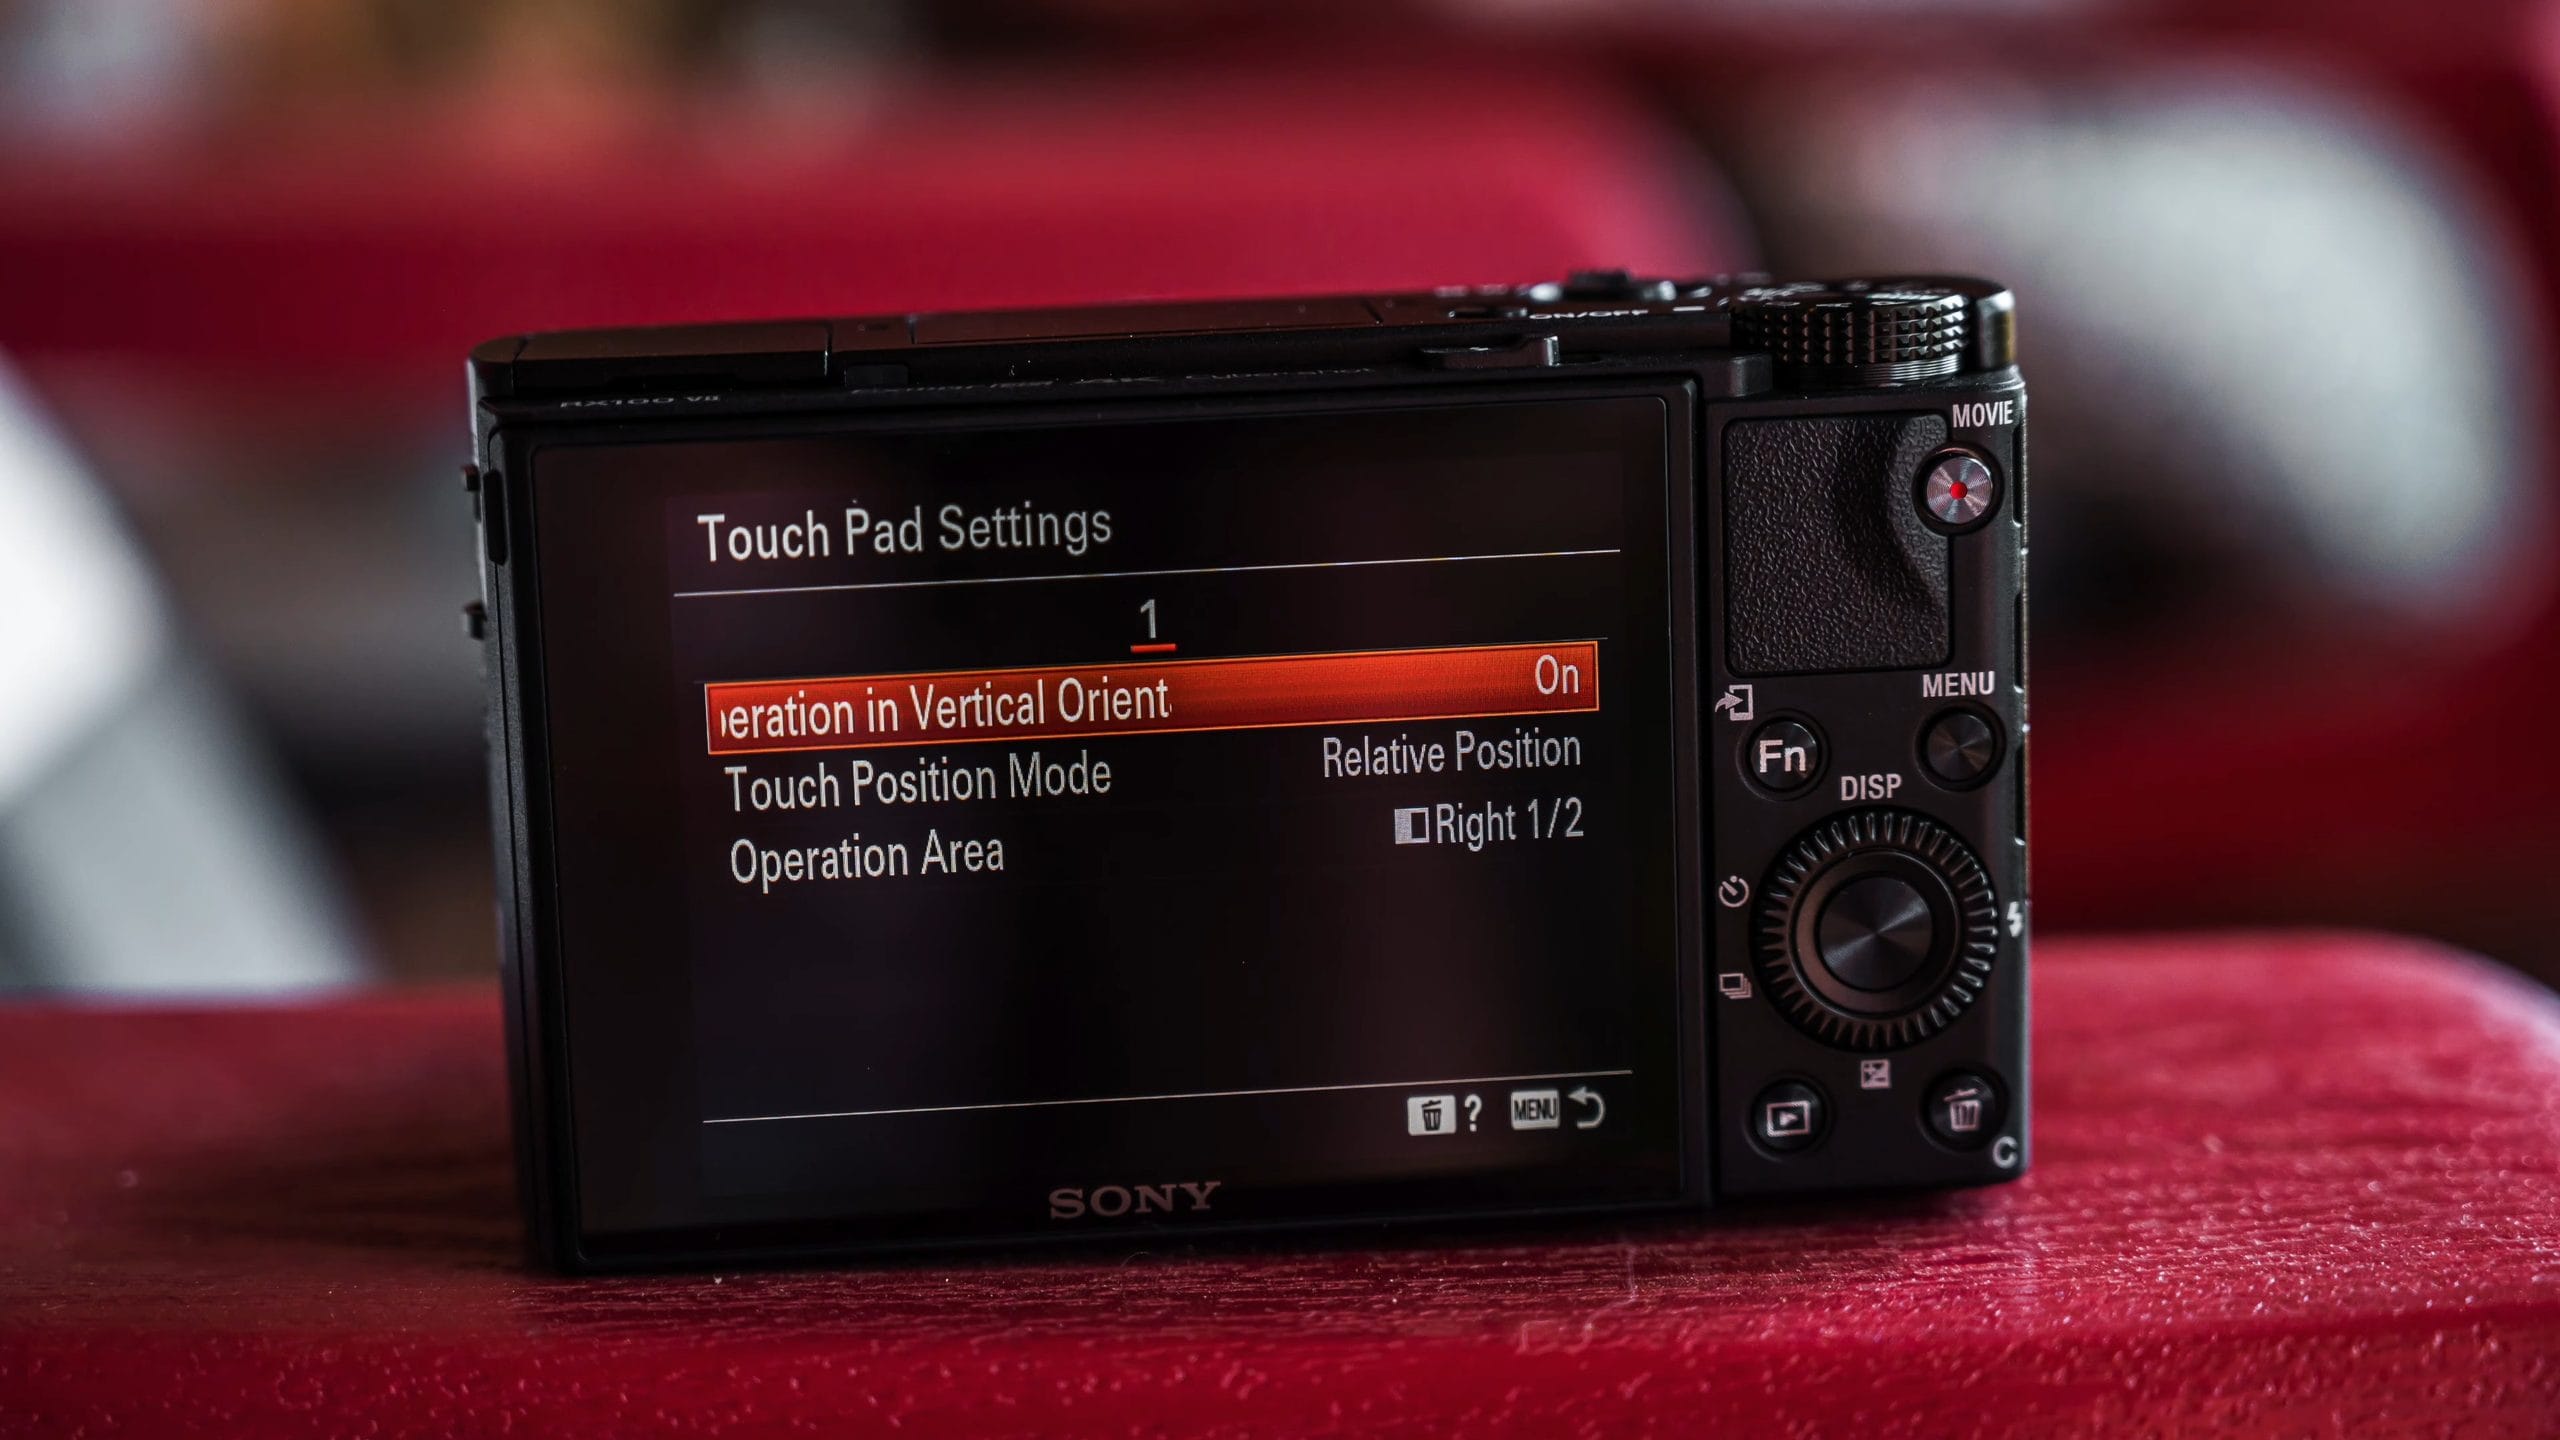
I usually hold this camera with my hand kind of cupped underneath it and use my right thumb to move the focus point. If you hold the camera differently, you might want to use your left thumb, and you can change the operation area to the left half of the screen. The reason it’s split up like that is that when you’re using the EVF, part of your face is covering the screen. For me, I’d run into my nose if I tried to go past the right half. There are also options for the whole screen and the upper and lower portions, because depending on how you hold the camera and which eye you use, you might set it up differently. I think the right half works best for me.
11. Add Your Copyright Info
Next, set the copyright information in your camera to protect your images. We’re uploading and sharing our images in all different ways these days, and when you share an image, you want the copyright data, like your name and your copyright message, in the image.
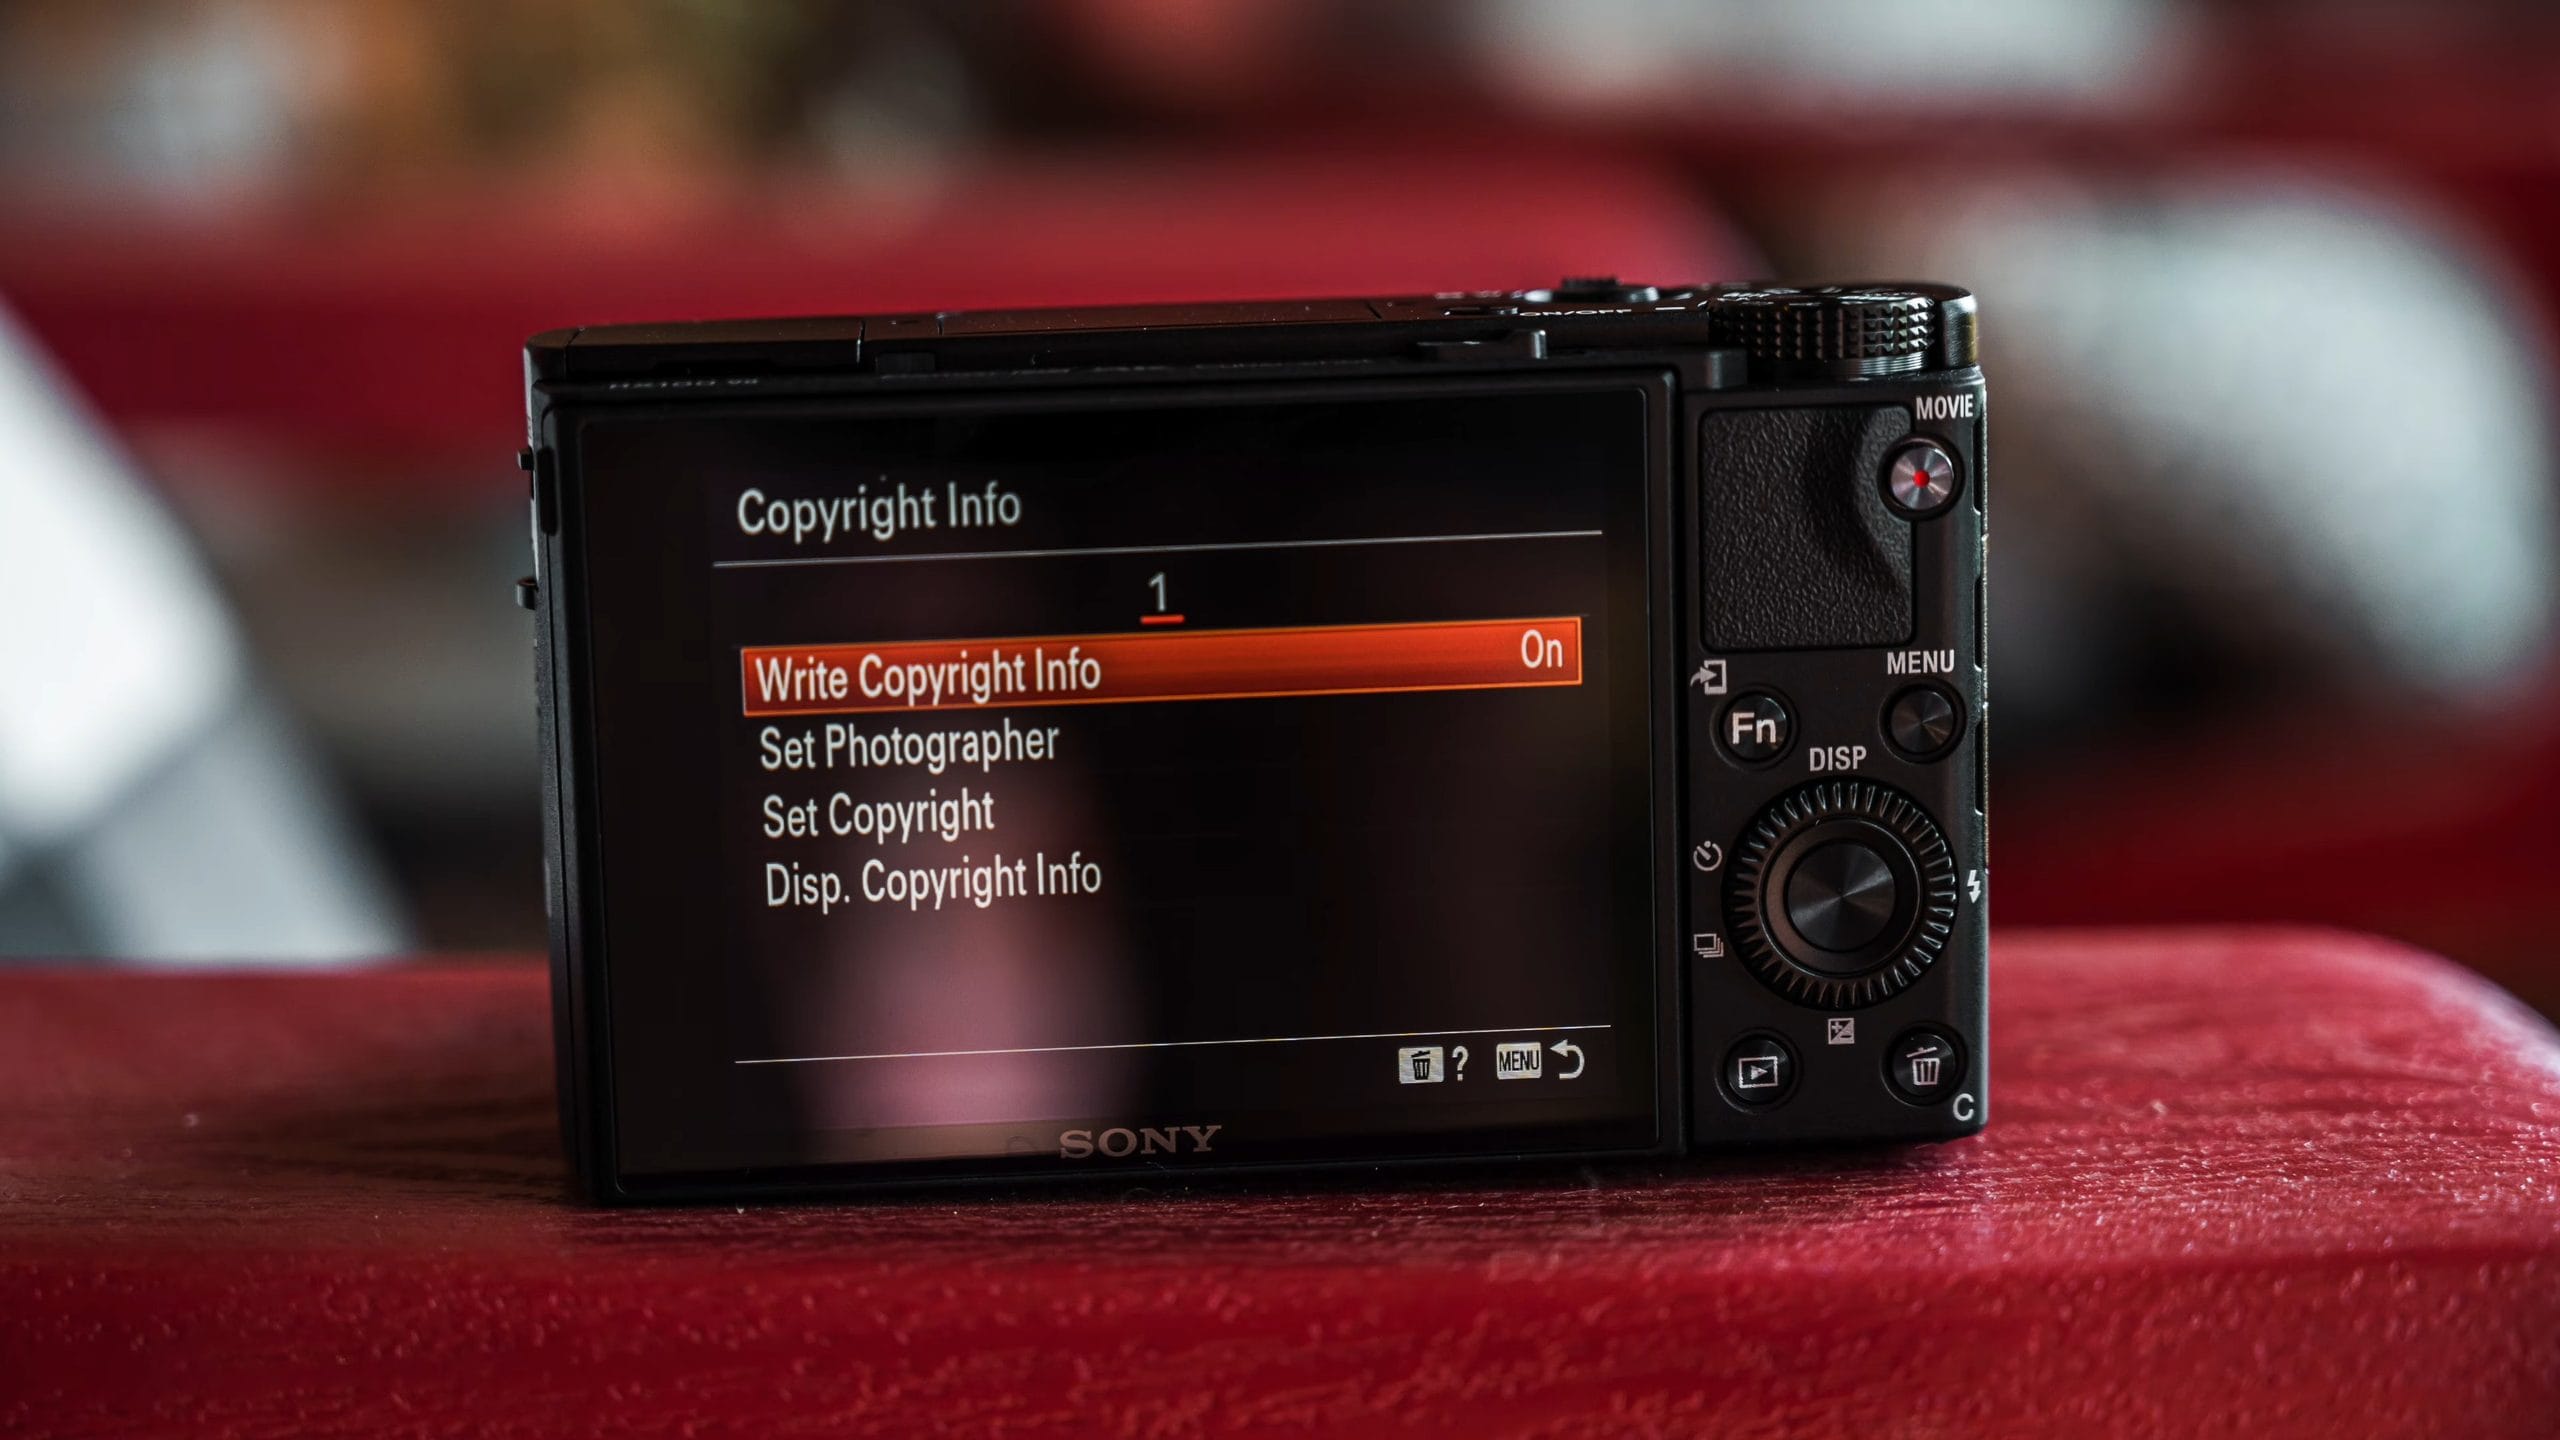
- Go to MENU > Setup > Copyright Info.
- Use Set Photographer to enter your name.
- Use Set Copyright to enter your copyright message. I use “All Rights Reserved.”
- Turn Write Copyright Info on.
If I share an image and somebody grabs it and thinks about using it, at least my copyright information is in the file. If I give somebody permission to use an image, that’s fine, but there have been many times I’ve found my images used somewhere else without my permission.
If you’re not a professional shooter, you might not think that’s a problem. But what if you took a picture of your children, shared it on social media, and then some blog used it to promote their product? That has happened to me, and I was very frustrated. All I had to do was request that they take the image down because of the copyright written to the image. Speaking that language and saying the word “copyright” was enough to get them to take it down. There’s more that goes into protecting your images, but in most cases that’s going to be enough.
12. Change the File Name Prefix
The last thing I change is the prefix on the file name. When I send images to my smartphone, I don’t have the opportunity to rename them as they transfer, so I end up with all these images that start with DSC, and I don’t always remember which camera they came from.
So I change the file name prefix from DSC to something specific to this camera. That way I know which camera an image came from without digging through the EXIF data, and it helps me sort my images too. That’s really important to me because I’m shooting with a lot of different cameras all the time. If you import your images and rename them anyway, by all means just leave it alone.
You’ll find it in MENU > Setup > File/Folder Settings > Set File Name. You get three characters.
Gear I Use With the RX100 VII
Some of these are affiliate links, which means I may earn a commission if you make a purchase, at no extra cost to you.
- Sony RX100 VII
- The SD cards I use
- The case I’ve used for years across different versions of the RX100
- SmallRig cage for the RX100 VII
Still shooting in Auto? If you want to learn more about shooting in manual mode, check out my free Ditch Auto course.
Was this helpful?
Frequently Asked Questions
Should I shoot RAW or JPEG on the Sony RX100 VII?
What focus area should I use on the RX100 VII?
Can the Sony RX100 VII shoot 120fps in 4K?
How do I put ISO on the control wheel of the RX100 VII?
How do I turn off the focus beep on the RX100 VII?
How do I use the RX100 VII screen as a touch pad with the EVF?
How do I add copyright info to photos on the RX100 VII?
Can I change the DSC file name on the Sony RX100 VII?
Related Guides